


Typography
Overview
Enfold makes it easy to have a consistent typography across the site. By default enfold comes loaded with many websafe and google fonts, for some reason if you need to use a custom font that suits your design or to comply with GDPR. With the release of Enfold 4.4 users can now upload any custom fonts or google fonts from Enfold theme options 😉
Common fonts like body, p, strong, headings, menu, buttons and titles can be changed from Enfold > Advanced styling.

General font options
A quick look at font options to change font family, size and color for common elements such as body, paragraph, menu items, titles, headings, etc. Font styles can be separately applied to different sections such as the logo area, content area, footer, primary and secondary sections.
Color of the elements in the below groups can be changed from Enfold > General Styling > Select a section like a logo area, footer, etc.
- Primary group: Consist of elements such as active menu item, menu hover, strong tag, button color, content links, footer links, drop caps.
- Secondary group: will affect blockquotes, form placeholder text, widgets, widget titles, pagination, playlist time and meta content of elements like the team members, blog post etc.
- Highlight group: is made up of link hover color in the content area, links in meta content, footer, button color on hover, etc.
Body Font
Default font family, size and color for content sections like body, paragraph, etc can be changed from
Body font family:
Enfold > General Styling > Fonts > Font for your body text
Body font size:
Enfold > General Styling > Fonts > Default content font size
Body font color:
Enfold > General Styling > Main Content > Main Content font color
To add your own custom style to the body text like may be a text shadow or other effects it can be done using custom CSS. The CSS selectors you can use are:
body {

  /* Your styles here */

  font-size: 14px;

}
Paragraph text
Paragraph font color: By default, paragraph text inherits the body font color set in the theme options. Unique color can be applied to the paragraph text from the text block element pop up options. Color set in the text block element options will override the default color applied to paragraph text by the theme.

Paragraph font size: Paragraph inherits the body font size by default but as you already know that a different color can be set individually. Font size of the paragraph can also be changed individually for each paragraph text and this will override the default font size set in the theme options.

Strong
Strong font color: Strong tag is a part of primary element group and it inherits the primary color set in the theme options under Enfold > General Styling > Main Content > primary color
Alternatively, the strong color can also be changed sitewide using the below custom CSS:
.main_color strong, .alternate_color strong { color: blue; }
Blockquotes
Blockquotes color: Blockquotes is grouped as a secondary element and it inherits the secondary color set in the theme options under:
Enfold > General Styling > Main Content > secondary color.
Other styles: Styles set in Advanced styling will override the secondary group style. Advanced styling gives more customization options like border, font size etc along with color it can be accessed from:
Enfold > Advanced styling > Blockquotes
Alternatively, custom CSS style can be applied to fully customize the blockquotes. The below element has a custom CSS class “blockquote-style-1” applied to it:
It is always the simple that produces the marvelous.
Code Snippet:
/*----------------------------------------
// Blockquotes
//--------------------------------------*/

#top .main_color blockquote.blockquote-style-1{
  font-family:Open Sans;
  font-style:italic;
  color: #FFF;
  padding:25px 15px 15px 30px;
  border-left:8px solid #537b35 ;
  background:#2dde98;
}
List
A text-based List can be created using the list icon in the text editor. A list item inherits the default color and size set for the body font. However, the font color and size can be changed in the text block option similar to the paragraph text.

Link text
A text link in a paragraph, widget area or blog posts is part of the primary element group. We can assign a different link color for each section (Logo area, Main content, Alternate content or Footer area) from the theme options.
Enfold > General Styling > Select the content area and update the Primary Color and Highlight Color ( Highlight color affect the hover color of the links).
Heading Fonts
- If the headings are created using the text editor the headings will inherit the body font color.

- If the headings are created using the “Special heading” element the color set in the theme options will be applied sitewide.
Enfold > General Styling > Main Content > Main Content Heading color

The special heading element has an option to select a different pre-styled heading and customize margins, paddings and color.
Main Menu
For a detailed overview of the menu items and styling options please visit the menu section.
Buttons
For more details and styling options available for buttons please visit the button section.
List of Available Google Fonts
Dropcaps
Drop caps can be inserted using the magic wand shortcode tool or you can directly use the shortcode in the text editor.
Hello I’m a simple drop cap. Letraset sheets containing Lorem passages, and more recently with desktop publishing software like Aldus PageMaker including versions of Lorem Ipsum.
I am a drop cap with background color. More recently with desktop publishing software like Aldus PageMaker including versions.
Code snippets:
Shortcode
[av_dropcap1]H[/av_dropcap1]ello I'm a simple drop cap. Letraset sheets containing Lorem passages, and more recently with desktop publishing software like Aldus PageMaker including versions of Lorem Ipsum.

[av_dropcap2 color="default" custom_bg="#444444"]I[/av_dropcap2] am a drop cap with background color. More recently with desktop publishing software like Aldus PageMaker including versions.
Dropcap Custom Style
Drop cap element can be custom styled using the CSS code. You can add text shadow backgrounds and border style to decorate it as per your needs. Let’s start by adding a custom CSS class name to the drop cap shortcode custom_class=’av-dropcap-style-1′ or just copy the below shortcode and the CSS snippet.
Whatever your budget and whatever the size of car you are looking for, we are sure we can help you find what’s right for you. We sell new and used cars from Pollos to Porchas. To fully appreciate the range of cars we have on offer please visit one of our showrooms.
Code snippets:
Shortcode
[av_dropcap1 custom_class='av-dropcap-style-1']H[/av_dropcap1]ello ipsum is placeholder text commonly used in the graphic, print, and publishing industries for previewing layouts and visual mockups.CSS
/*----------------------------------------
// CSS - Drop caps style -1
//--------------------------------------*/

 .av-dropcap-style-1.av_dropcap1 {
color:#ff4c4c;
font-size:5em;
line-height:80%;
padding-right: .05em;
font-family: Raleway, sans-serif;
font-weight: 800;
text-transform:uppercase;
text-shadow:.025em .030em 0 #fbb034;
}
Customization
How to upload custom fonts
Custom font uploader is one of the major additions to Enfold version 4.4. As the name say’s, Custom font uploader makes it very easy to upload the fonts from your computer to your website and use it in compliance with GDPR. Let us look at some key points related to using self-hosted fonts.
Supported Font Formats
The font formats supported by the Custom Font Manager are listed below:
- ttf
- eot
- woff
- woff2
- svg
Optimizing fonts
To use a font which is very heavy on loading or a font may exist in “otf” or other non-supported formats, we need to first convert the “otf” font to a supported format such as “woff” or “woff2” using a font kit generator.
- Upload the “otf” fonts and generate the font kit.
- Download the font kit and extract the “woff” and “woff2” files.
File structure
For the uploaded fonts to work correctly please follow the file/folder structure as mentioned below.
- Do Not Add subdirectories.
- Do Not Add CSS or HTML files.
- Do Not Add non-supported font formats.
- Do Not Add multiple font families in one folder.
- Do Not Add ttf, woff or other uncompressed fonts directly to the theme.
Note: To proceed further you should have the font files in the supported format as mentioned above.
Uploading one font at a time:
In a typical case, we have to upload:
- my-font-1.ttf
- my-font-2.ttf
- my-font-3.ttf
Compress each font as a separate zip file: Right click on my-font-1.ttf and select compress or zip option to generate a compressed file my-font-1.zip repeat this step for the rest of the fonts till you have.
- my-font-1.zip
- my-font-2.zip
- my-font-3.zip
Uploading multiple fonts: Each font and its variants should be in its own folder.
In the below example we have placed each font and its variants in separate folders:
- my-font-1 ( Folder )
- my-font-1-regular.ttf
- my-font-1-thin.ttf
- my-font-1-light.ttf
- my-font-1-bold.ttf
- my-font-2 ( Folder )
- my-font-2-regular.ttf
- my-font-2-light.ttf
- my-font-2-bold.ttf
- my-font-3 ( Folder )
- my-font-3-thin.ttf
- my-font-3-light.ttf
- my-font-3-bold.ttf
To upload the above fonts at once, select all the font folders (my-font-1, my-font-2, my-font-3) and compress it. Give the compressed file any name of your choice, for example, project-fonts.zip The zip file is now ready to upload.
NOTE: Do not add the font folders in one main folder as this will create sub-directories and it is not a supported format.
Naming conventions
You only have to follow the naming conventions used by Google: “_” or “-” are interpreted as space.
Managing font variants
There are a couple of ways to upload and manage font variants. In the first method, the variants will be auto-selected by the theme stylesheet. In the second method, we can manually assign the font variants to a specific element of the theme.
Method 1: Auto-assign variants
In this method, a folder containing font variants is compressed and uploaded. The font variants will be auto-assigned by the theme stylesheet. Let’s take Roboto font family as an example and below is the file structure in which it needs to be uploaded.
- Roboto.zip (Compressed folder containing font variants)
- Roboto-thin.ttf
- Roboto-light.ttf
- Roboto-medium.ttf
- Roboto-regular.ttf
- Roboto-bold.ttf
- Roboto-black.ttf
Upload the Roboto font family as a single zip file from Enfold > Import/Export > Custom font manager the font upload page will refresh and display the font family with its variants.

When Roboto font family is assigned as a default font from Enfold > General Styling > Fonts tab the font weight is auto-assigned to body and headings by the theme stylesheet.

Method 2: Manually assign font variants
This method is recommended if you do not have a lot of fonts, each font variant is compressed and uploaded separately so that we can manually assign the font variants to any element of the theme. Let’s take Roboto font family as an example and below is the file structure in which it needs to be uploaded.
- Roboto-thin.zip
- Roboto-light.zip
- Roboto-medium.zip
- Roboto-regular.zip
- Roboto-bold.zip
- Roboto-black.zip
Upload each of the Roboto family variants as a single zip file from Enfold > Import/Export > Custom font manager the font upload page will refresh every time and display the font variants as seen below.

Now we can assign each of the font variants of the Roboto family to any specific element of the theme from
Enfold > General Styling > Fonts
Enfold > Advanced Styling > Select any element

Uploading the fonts is pretty straightforward.
- Download and prepare your fonts (please see file structure for more info).
- Compress the folder/file in zip format and upload to Enfold > Import/Export > Custom Font Manager.
- After successfully adding new fonts in the correct format, the upload page will reload and display the font family.
- The uploaded font should show in the Custom uploaded fonts list where ever font family can be assigned like under Enfold > General Styling > Fonts

.
NOTE: Fonts can only be uploaded as compressed zip files for more information please check file structure section above.
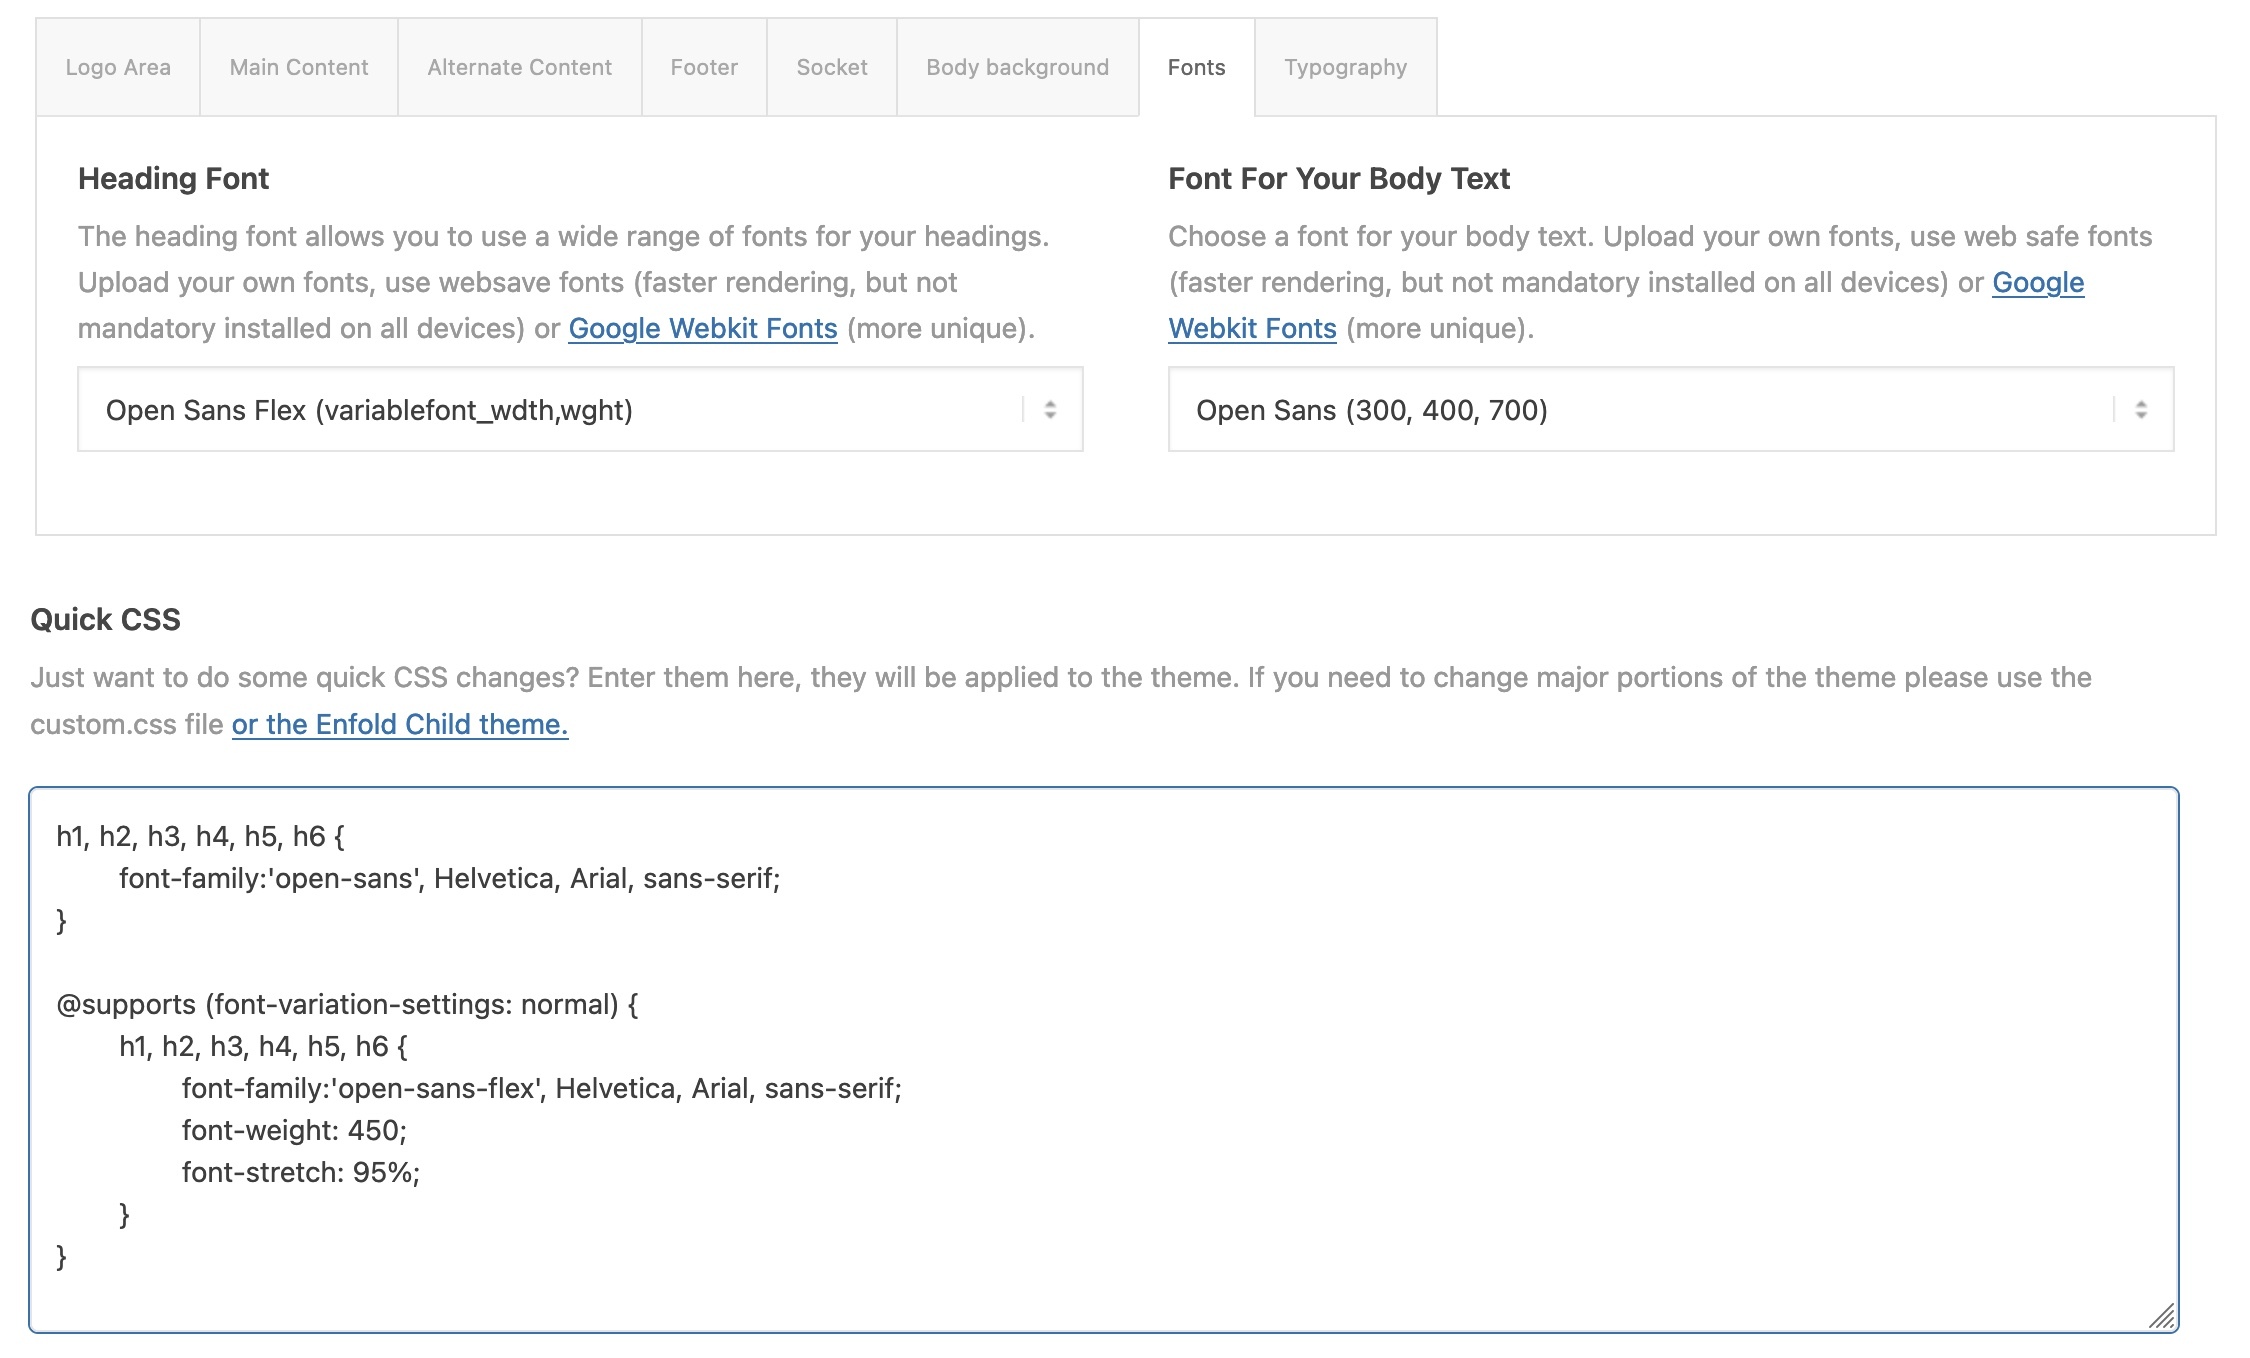
Using variable fonts
As of version 5.3, Enfold supports variable fonts. Here is how you can use them;
- Download variable font zip from Google (contains a static folder) – e.g. “Open Sans” – Open_Sans.zip
- Copy and rename zip file to “Open_Sans_Flex.zip”
- Delete the “static” folder inside the zip file. So this zip file can be used to upload the variable fonts via theme options.
- Filenames must contain VariableFont, e.g. OpenSans-VariableFont_wdth,wght.ttf, OpenSans-Italic-VariableFont_wdth,wght.ttf
- Create woff2 files (Using a website: https://cloudconvert.com/ttf-to-woff2 or using CLI for more advanced user: https://dev.to/benjaminblack/converting-ttf-fonts-to-woff2-and-woff-3f5b) and in the zip file for upload, add it in the same folder where you have the corresponding variable font .ttf file


- In Open_Sans.zip delete all top level files and bring subfolders in static to top level
- Delete not needed fonts and empty static folder
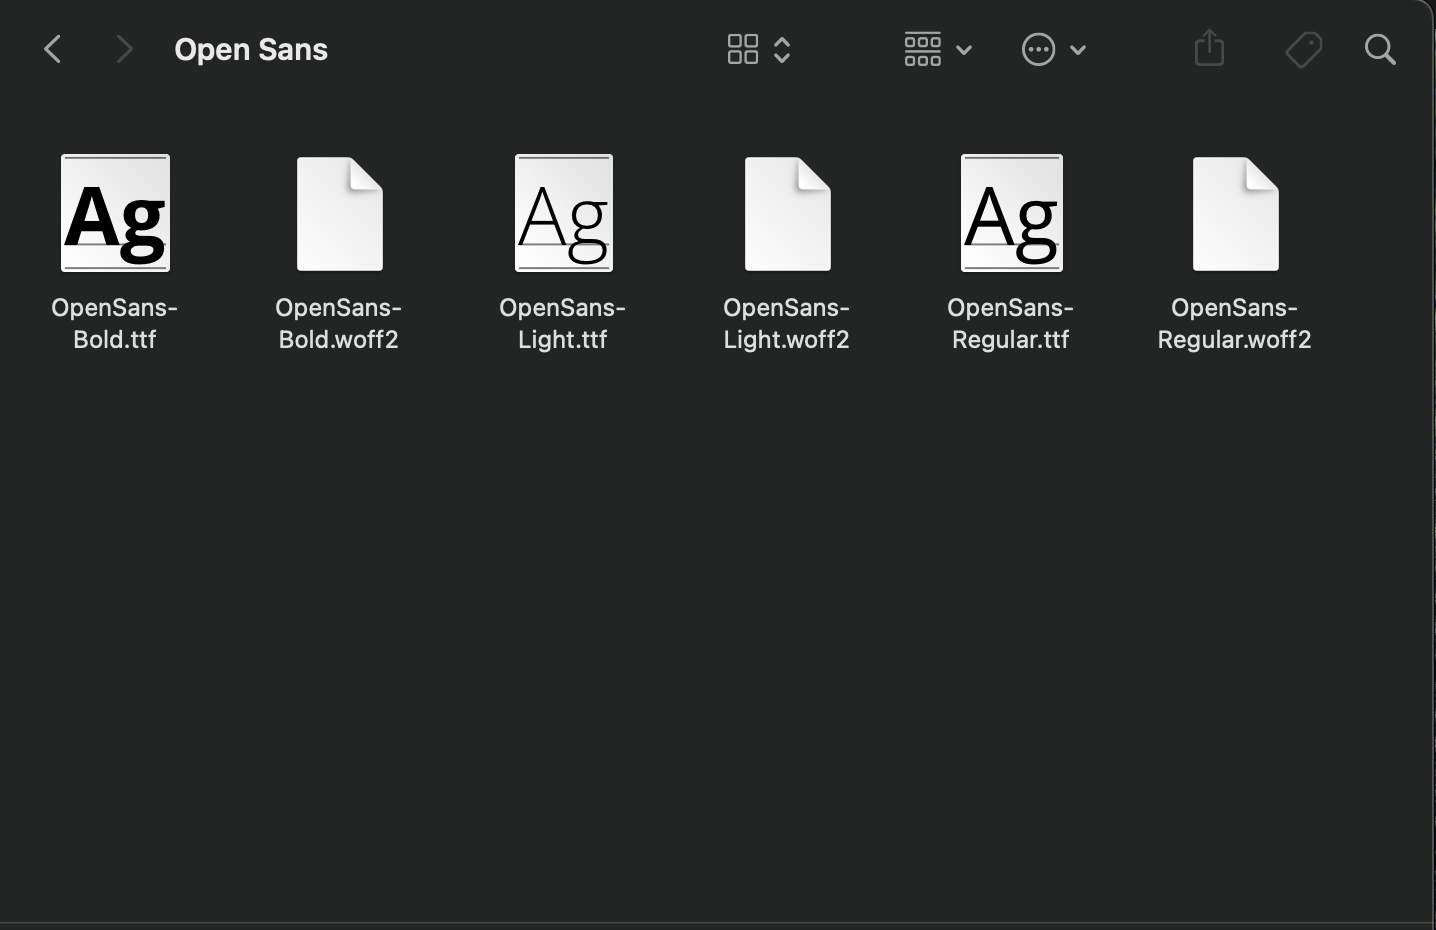
- Upload “Open_Sans_Flex.zip”
- Upload “Open_Sans.zip”

How to identify the fonts?
How many times has this happened to most of us? while browsing a website or checking out a print magazine/flyer the font looks great but we do not know which font is used? well, there are many tools available to identify the font. Sometimes these tools are not 100% accurate but quite reliable.
Web based
Browser tool
Popular web browsers such as chrome and firefox have many browser extensions one of them which has worked very well for me is WhatFont.

Where to find fonts for my projects?
There are many websites which offer both free and paid fonts you can choose for your projects, below is a list of some popular websites:
Google Fonts
Behance
Font Squirrel
Font Space
Font Library
daFont
Font pairing
How to download Google fonts
There are many web font services like Google Fonts, Typekit and several others. Web font services use a CDN to deliver the fonts. If a user who visits a website other than yours has already downloaded the same fonts which is used on your site then the CDN signals the browser not to download the same fonts again. This will result in your site loading much faster.
Google fonts are the most popular and more the site is popular chances are the font which you are going to use on your site is already on many users computer which makes your site load faster for all the users who use the same font.
Due to the recent GDPR act many users started to host their own fonts. Google fonts can also be downloaded and self-hosted ( No license is required ).
To download google fonts:
- Visit fonts.google.com and browse the fonts you like.
- Click the plus sign to add the font to select basket.

- A select basket appears at the bottom of the screen.

- Click on the select basket to expand it.
- Look for the download button on top right.

- Hover the mouse on the download button and click the download link to download the fonts.
Download all google fonts at once:
You can download all Google Fonts in a simple ZIP snapshot (over 300MB) from Google fonts archive.
Additional Resource:
For additional resources like eot, ttf, svg, woff and woff2 files and CSS snippets please visit Google Webfont Helper.
How to add google fonts using CSS
To add any google font using CSS to any Enfold theme element:
Open Google fonts website and choose your font families. Click on “Selected families” at the bottom and copy the font families.

For example:
font-family: 'Mukta Mahee', sans-serif;
font-family: 'Open Sans', sans-serif;
font-family: 'Roboto', sans-serif;
Now you can easily assign this to any element of the theme using CSS as shown below:
h2 {
   font-family: 'Mukta Mahee', sans-serif;
}
Note: If the font does not change please refresh the browser cache or try adding the word !important after the font family name.
Register Additional Google Fonts for Theme Options
To add additional google fonts to theme options please check “how to upload custom fonts” section.
Change the heading tags of the theme elements for SEO purpose
The heading tags used in the theme elements such as Icon Box, Timeline, and Content Slider can influence your SEO score. Depending on your SEO needs the heading tags can be updated by adding the below filter to your child theme functions.php file.
- Before adding the below code to your site please enable the developer options from Enfold > Layout Builder > Show element options for developers
- Add a custom class name to each of the theme element ( Icon Box, Timeline, and Content Slider ) for which you need to change the h tags and update the class name in the below code.
/**
 * Allows to change the default <h1> - <h3> tags used by Enfold
 *
 * @param array $args
 * @param string $context			where the filter is called from
 * @param array $extra_args			contains extra info depending on $context
 * @return array
 */
function my_avf_customize_heading_settings( array $args, $context, array $extra_args = array() )
{
	/**
	 * This is an example of the usage for "avia_sc_timeline"
	 */
	if( $context == 'avia_sc_timeline' )
	{
		$args['heading'] = 'h1';						//	change heading from h3 to h1
		$args['extra_class'] = 'my-timeline-class';		//	add an extra class for styling
	}

	/**
	 * This is an example of the usage for "avia_content_slider" and slider title
	 */
	if( 'avia_content_slider' == $context && is_array( $extra_args ) && in_array( 'slider_title', $extra_args ) )
	{
		$args['heading'] = 'h2';						//	change heading from h3 to h2
		$args['extra_class'] = 'my-extra-class';		//	add an extra class for styling
	}

	/**
	 * This is an example of the usage for "avia_content_slider" and slider title for the entries
	 */
	if( 'avia_content_slider' == $context && is_array( $extra_args ) && in_array( 'slider_entry', $extra_args ) )
	{
		$args['heading'] = 'h6';						//	change heading from h3 to h6
		$args['extra_class'] = 'my-extra-class';		//	add an extra class for styling
	}

	/**
	 * This is an example of the usage for "avia_sc_icon_box"
	 */
	if( $context == 'avia_sc_icon_box' )
	{
		$args['heading'] = 'h1';						//	change heading from h3 to h1
		$args['extra_class'] = 'my-icon-box-class';		//	add an extra class for styling
	}

	return $args;
}

add_filter( 'avf_customize_heading_settings', 'my_avf_customize_heading_settings', 10, 3 );
Performance and page speed
Self-hosted fonts can increase the loading time quite significantly, hence it’s recommended to only use custom fonts which are absolutely required. You can also convert the ttf font files to woff or woff2 which will reduce the file size and helps to load the page much faster.
To remove custom font’s that are not required please go to Enfold > Import/Export > Custom Font Manager and delete the unused fonts.
Please do consider checking out this nice article about optimizing the custom fonts on CSS Tricks.