


Contact Form
Overview
Contact forms are the easiest way to let your website visitors get in touch with you. The Enfold theme has a built-in contact form element and it can be used any number of times to add multiple forms to any post, page or widget with options to fully customize the form fields and style.
View some of the contact form examples.
Contact form setup
To set up a contact form you will need a working e-mail address. Drag and drop the contact form element on to your page or post and click on it to open the form options and enter your e-mail address in the e-mail address field.
Other options you can customize are:
- Form Title
- Add/Edit form elements like input fields or text area. Clicking on the form element will further let you customize it to choose the width, type etc.
- Labels
- E-mail Subject
- Autorespond Text
- Captcha
- Alignment
- Color Scheme
Code Snippets
Shortcode
[av_contact email='' title='Send us mail' button='Submit' on_send='' sent='Your message has been sent!' link='manually,http://' subject='' autorespond='' captcha='active' form_align='' color='' custom_class='' admin_preview_bg='' av_uid='av-hroj83']
[av_contact_field label='Name' type='text' options='' check='is_empty' width='element_half' multi_select='' av_contact_preselect='' av_uid='av-hkvmv7'][/av_contact_field]
[av_contact_field label='E-Mail' type='text' options='' check='is_email' width='element_half' multi_select='' av_contact_preselect='' av_uid='av-hhfwe3'][/av_contact_field]
[av_contact_field label='Subject' type='text' check='is_empty' options='' multi_select='' av_contact_preselect='' width='' av_uid='av-hac6df'][/av_contact_field]
[av_contact_field label='Message' type='textarea' check='is_empty' options='' multi_select='' av_contact_preselect='' width='' av_uid='av-h5d55n'][/av_contact_field]
[/av_contact]
Customization
NOTE: Contact Form and the Mailchimp Newsletter Form share a common class name. This will result in changes being applied to both the elements form fields, which is perfectly fine if you like the fields to look consistent.
If you intend to not apply the same styles to the newsletter element, we recommend enabling and adding the custom CSS class name to contact form element in the backend and use the custom class with the custom code provided below.
Contact form color
By default, the form field colors are inherited from the theme . You can also select Light or Dark transparent form style. To change the form field color to custom color please use the below CSS. Feel free to add your own CSS properties to make any additional changes 🙂
The below contact form element has a custom class name “av-contact-form-color” assigned.
Code snippet
Shortcode
[av_contact email='vinaynkashyap@gmail.com' title='Send us mail' button='Submit' on_send='' sent='Your message has been sent!' link='manually,http://' subject='' autorespond='' captcha='' form_align='' color='' custom_class='av-contact-form-color' admin_preview_bg='' av_uid='av-eqm6gj']
[av_contact_field label='Name' type='text' check='is_empty' options='' multi_select='' av_contact_preselect='' width='' av_uid='av-enbsvv'][/av_contact_field]
[av_contact_field label='E-Mail' type='text' check='is_email' options='' multi_select='' av_contact_preselect='' width='' av_uid='av-eiz7jf'][/av_contact_field]
[av_contact_field label='Subject' type='text' check='is_empty' options='' multi_select='' av_contact_preselect='' width='' av_uid='av-e91xnn'][/av_contact_field]
[av_contact_field label='Message' type='textarea' check='is_empty' options='' multi_select='' av_contact_preselect='' width='' av_uid='av-e69e23'][/av_contact_field]
[/av_contact]
CSS
/*----------------------------------------
----------------------------------------
----------------------------------------
// CSS -  Contact form color
----------------------------------------
----------------------------------------
//--------------------------------------*/

/* custom style form fields */
#top .av-contact-form-color .input-text,
#top .av-contact-form-color input[type='text'],
#top .av-contact-form-color input[type='input'],
#top .av-contact-form-color input[type='password'],
#top .av-contact-form-color input[type='email'],
#top .av-contact-form-color input[type='number'],
#top .av-contact-form-color input[type='url'],
#top .av-contact-form-color input[type='tel'],
#top .av-contact-form-color input[type='search'],
#top .av-contact-form-color textarea,
#top .av-contact-form-color select {
/* Text color */
color:#333;
/* Background color */
background-color: #fffae8 !important;
/* Border color*/
border-color: #b0a696 !important;
}
Styling contact form title
The contact form title text can be updated from the pop-up options and it’s style get’s inherited from the styles set up in the theme options.
In case you need to custom style the form title start by adding a custom CSS class name “av-contact-form-title” to the form element and use the below CSS snippet:
Code snippet
Shortcode
[av_contact email='email@gmail.com' title='Send us mail' button='Submit' on_send='' sent='Your message has been sent!' link='manually,http://' subject='' autorespond='' captcha='' form_align='' color='' custom_class='av-contact-form-title' admin_preview_bg='' av_uid='av-17rzk3']
[av_contact_field label='Name' type='text' check='is_empty' options='' multi_select='' av_contact_preselect='' width='' av_uid='av-by79vv'][/av_contact_field]
[av_contact_field label='E-Mail' type='text' check='is_email' options='' multi_select='' av_contact_preselect='' width='' av_uid='av-btjg7v'][/av_contact_field]
[av_contact_field label='Subject' type='text' check='is_empty' options='' multi_select='' av_contact_preselect='' width='' av_uid='av-bmnrjv'][/av_contact_field]
[av_contact_field label='Message' type='textarea' check='is_empty' options='' multi_select='' av_contact_preselect='' width='' av_uid='av-bgxfb7'][/av_contact_field]
[/av_contact]
CSS
/*----------------------------------------

// CSS -  Contact form title

//--------------------------------------*/
.av-contact-form-title fieldset h3 {

font-size: 24px;

text-transform: uppercase;

}
Add icons to contact form label
To add icons to contact form label. First, enable the custom CSS class name support and add a custom class “cf-label-icons” to the contact form and use the below CSS code.
Code snippet
We make use of the pseudo elements to target the form labels and add icons::
CSS
/*----------------------------------------

// CSS -  Contact form label icons

//--------------------------------------*/

#top .avia_ajax_form.cf-label-icons label{

	padding-left: 20px;

}

#top .avia_ajax_form.cf-label-icons label::before {

	position: absolute;

	left:0;

	font-family: 'entypo-fontello';

}

#top .avia_ajax_form.cf-label-icons fieldset p:nth-child(2) label:before{

	content:"e80a";

}

#top .avia_ajax_form.cf-label-icons fieldset p:nth-child(3) label:before{

	content:"e805";

}

#top .avia_ajax_form.cf-label-icons fieldset p:nth-child(4) label:before{

	content:"e826";

}

#top .avia_ajax_form.cf-label-icons fieldset p:nth-child(5) label:before{

	content:"e83b";

}

/* Input field do not support pseudo elements so we target the last p in the fieldset which is usually the submit button */

#top .avia_ajax_form.cf-label-icons fieldset p:last-child:before{

	content:"e844";

	color:#FFF;

	font-family: 'entypo-fontello';

	position: absolute;

	left: 20px;

	top: 50%;

	transform: translateY(-50%);

}
Styling contact form labels
Form field labels inherit the styles from the theme options. However, you can customize the style of the labels using CSS:
Code snippet
CSS
/*----------------------------------------

// CSS -  Contact form Lable

//--------------------------------------*/
.avia_ajax_form label {
color:#00a8e0;
}
/* Required field (Styling the asterisk ) */
.avia_ajax_form label .required {
color:red;
}
Styling Placeholder text
The code below will clear the placeholder text “onfocus” and also change the placeholder font style.
NOTE: This code will change the placeholder text sitewide.
Code snippet
CSS
/*----------------------------------------

// CSS - Placeholder text

//--------------------------------------*/
/* Place holder text color */
::-webkit-input-placeholder {
color: #bbb!important;
}
::-moz-placeholder {
color: #bbb!important;
}
::-moz-placeholder {
color: #bbb!important;
}
::-ms-input-placeholder {
color: #bbb!important;
}
/* Clear placeholder text on focus*/
[placeholder]:focus::-webkit-input-placeholder {
transition: opacity 0.15s 0.15s ease;
opacity: 0;
}
Styling the dropdown list
The below CSS selector can be used to modify the default style of the dropdown list.
Code snippet
CSS
/*----------------------------------------

// CSS - Dropdown list

//--------------------------------------*/
/* Drop down list */
#top .main_color select {
text-align-last: center;
text-align: center;
-ms-text-align-last: center;
-moz-text-align-last: center;
}
Styling submit button
Styling the form submit button:
Code snippet
CSS
*----------------------------------------

// CSS -  Contact form submit button

//--------------------------------------*/
#top .avia_ajax_form input[type='submit'] {
border: none;
background: #eb5424;
color: #f6f6f5;
}
#top .avia_ajax_form input[type='submit']:hover {
background: #000000;
}
Styling captcha text
Use the below text to style the captcha text
Code snippet
CSS
*----------------------------------------

// CSS -  Center align captcha text

//--------------------------------------*/
span.value_verifier_label {
left: 50%;
transform: translateX(-100%);
}
Styling validation error
The form validates all fields when the submit button is clicked. Sometimes if the user leaves a required field empty or a enters a wrong input, the form fields will have a red border. In case you like to highlight this in a different way you can use some custom CSS:
Code snippet
CSS
/*----------------------------------------

// CSS - Form validation error indicator

//--------------------------------------*/
#top .avia_ajax_form .error input[type='text'],
#top .avia_ajax_form .error .text_area {
background: red!important;
}
Styling conformation message
After the email is successfully sent the confirmation message can be styled using the below CSS:
Code snippet
CSS
/*----------------------------------------

// CSS - Form success message

//--------------------------------------*/
#top .avia-form-success {
background: gold;
color:#FFF;
}
Styling contact form 7 to look like Enfold form
If you are using a plugin like “Contact form 7” and would like to make it look similar to Enfold form to maintain design consistency. Please use the below CSS:
Code snippet
CSS
/*----------------------------------------

// CSS -  Styling contact form 7

//--------------------------------------*/
/* Textarea email and input fields */
#top .wpcf7-form input[type='text'],
#top .wpcf7-form input[type='email'],
#top .wpcf7-form .wpcf7-textarea {
/*border-color: #d0d2d3;*/
/*background: #dbebfa;*/
/*color: #00334e;*/
font-family: "HelveticaNeue", "Helvetica Neue", Helvetica, Arial, sans-serif;
font-size: 17px;
line-height: 1em;
padding: 13px!important;
border-radius: 2px;
}
/* Submit button */
#top .wpcf7-form .wpcf7-submit {
padding: 15px 30px;
border-radius: 2px;
}
How to set form field width
Each form field can be set to take a specific width of it’s parent container, allowing us to design custom inquiry forms with the Enfold theme.

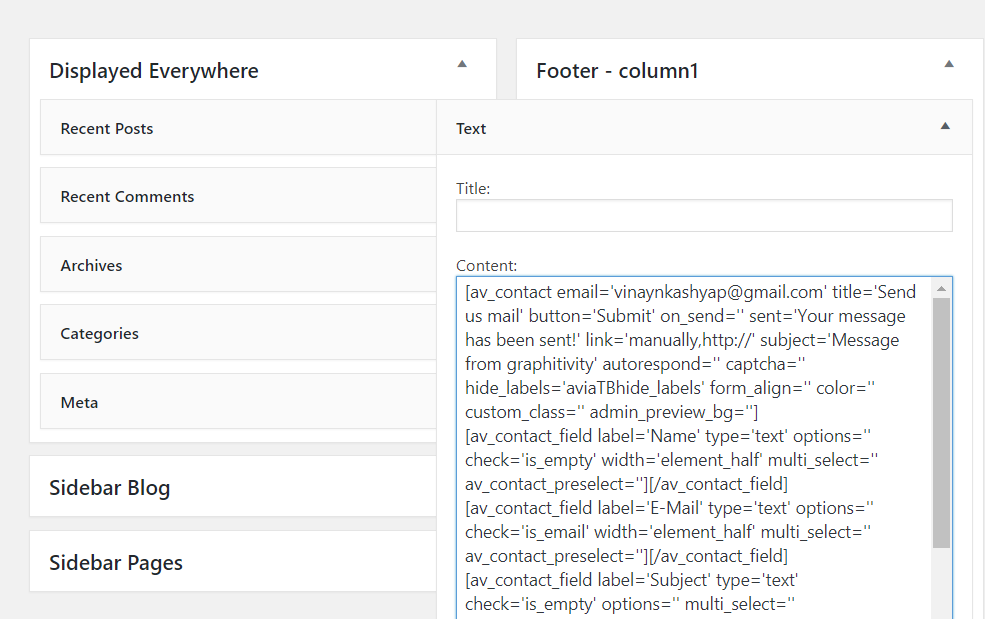
Using contact form in widget area
The form element can be placed in a sidebar, footer, as part of a slider, or anywhere else on the site with the help of shortcode.
- Enable the debug mode to view the page shortcode.
- Create a new form on an empty page ( it will be easy to copy the shortcode).
- To place the form in the sidebar or footer go to Dashboard > Appearance > Widgets.
- Drop a text area widget in footer or sidebar and paste the form shortcode where you need the form to appear.
How to trigger a pop-up form when a button is clicked
It is easy to create a pop-up form. For this purpose, a button element should be used please refer to Button > Button usage section or click here.
Add on click event to the contact form submit button
If you want to track the contact form submissions with google analytics you will need to add an “onclick” event to the submit button.
To do this you can use the “avf_contact_form_submit_button_attr” filter. The advantage is that you don’t need to hack the parent theme files, but if you place the code into your child theme functions.php file, it won’t be affected by the parent theme updates. Insert this code into the child theme functions.php file:
add_filter('avf_contact_form_submit_button_attr','avia_add_submit_attributes_to_cf', 10, 3);
function avia_add_submit_attributes_to_cf($att, $formID, $form_params){
  $att = "onclick="_gaq.push(['_trackPageview', '/VP/XXX/XXX']);"";
  return $att;
}
Note – you will need to replace onclick=”_gaq.push([‘_trackPageview’, ‘/VP/XXX/XXX’]);” with your tracking code – it’s just an example. The $formID and $form_params variables contain some information about the contact form (settings, element id, etc.). These variables are useful if you want to set different attributes for different contact forms.
CAPTCHA
What is CAPTCHA?
In today’s time, bots are incessantly used to post SPAM messages on your site which can annoy your site users and bring down the credibility of your site in no time. To reduce the bots effect companies like Google and others have come up with a CAPTCHA technology which is a free service offered by Google and other companies to help webmasters protect their site from spam and abuse. CAPTCHA is an acronym for “Completely Automated Public Turing test to tell Computers and Humans Apart”.
How CAPTCHA works?
CAPTCHA technology can prevent bots from automatically submitting SPAM messages or other unwanted content on your site. A lot goes on in the background to monitor different behaviors on your site such as a mouse click, active time on the page, page scroll, etc and differentiate a bot from the real users.
We have integrated the Google CAPTCHA technology in the Enfold theme and below is a brief overview of how things work.
Numeric Captcha
Enfold has a built-in numeric CAPTCHA system and it can be activated from the Contact form element options.
In case you disable Google reCAPTCHA in theme options or unable to activate the Google CAPTCHA and select V2 or V3 in the contact form(s) the built-in numeric CAPTCHA system will act as a fallback.
Google CAPTCHA v2
Google API v2 script is loaded only if the CAPTCHA v2 is activated in the theme options and contact form element. The returned token from Google API checkbox is verified with Google in backend immediately after receiving and your submit form gets a one time usable submit token (created by Enfold) which is verified when receiving the submit. If the token fails the submit is ignored and a failed message is returned.
Google CAPTCHA v3
Google needs to monitor user behavior to decide if the user is a human or a bot. Therefore we load the V3 API script on every page and send an initial verification request with action ‘page_load’. The only other request we send is when a user clicks the submit button of a contact form the first time to verify if he is a human (action ‘verify_submit’). Enfold does not send any other requests with actions.
NOTE: In case you select V2 in theme options and have selected V3 in the contact form(s) V2 will be used (and no V3 script will be loaded).
The returned token from Google API checkbox is verified with Google immediately after receiving in backend and the score is checked. If the score fails we provide a fallback to V2 verification – the checkbox is displayed and the user must verify to be a human. We proceed as described above with Version 2. Therefore it is absolutely a must that you create and verify API keys for V2 also as Google does not accept V3 keys for V2 verifications.
On a positive score, your submit form gets a one time usable submit token created by Enfold which is verified when receiving the submit. If the token fails the submit is ignored and a failed message is returned.
Here is a short video from Google that explains how Google CAPTCHA works.
Choosing the type of CAPTCHA
Every now and then a new version of CAPTCHA is released to stay ahead in the bots vs CAPTCHA race.
Enfold is fully integrated with the latest CAPTCHA technology to protect you from SPAM bots. You can activate any of the following CAPTCHA technology that suits you better.
Numeric Captcha
Numeric CAPTCHA system can be activated from the Contact form element options. Before submitting the form user has to answer a simple math question.
Google CAPTCHA v2
Google CAPTCHA v2 will display a checkbox and a text message “I’m not a robot”. Users have to click on the checkbox before submitting the form.
Google CAPTCHA v3
This version is designed by Google to be frictionless and non-interactive with the users. A CAPTCHA badge or a message is displayed at the bottom of the page as per the Google guidelines. CAPTCHA v3 works by monitoring the user behavior and assigns a score between 0 to 1. A score of 1.0 is very likely a good interaction, 0.0 is very likely a bot and the form will not be processed. Google recommends a threshold of 0.5 by default.
Google CAPTCHA v3 works without any friction with the website users by returning a score (1.0 is very likely a good interaction, 0.0 is very likely a bot) which you can check in the Google admin console.
To know more about the features of different version of CAPTCHA please check the CAPTCHA docs by Google.
NOTE: In case you select V2 in theme options and have selected V3 in the contact form(s) V2 will be used (and no V3 script will be loaded).
Activate Google CAPTCHA
Google CAPTCHA is now integrated to enfold contact form element but before using it we need to link the theme with the CAPTCHA service. To activate the CAPTCHA feature and use it in your Enfold theme please follow the below steps:
Create Google CAPTCHA keys
- Ok, let’s start by visiting the Google CAPTCHA home.
- Login with your Gmail credentials if you haven’t.
- Now you should see “Register a new site” options if not click here.
- In the “Label” section please enter a name that is easy to identify your site name.
- Select a “reCAPTCHA type” you like to use.
- Under the CAPTCHA v2 please select the option “I’m not a robot” Checkbox.
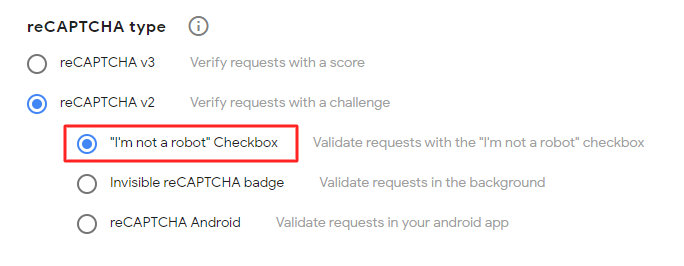
- Please note if select v3 you need to repeat the steps and register for both v2 and v3. Enfold will use CAPTCHA v2 as a fallback if v3 fails.
- Add your domain name and hit the enter to save.
- Accept the captcha terms and submit your options.
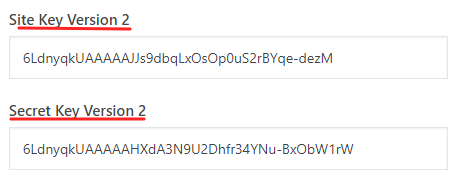
- In the next screen copy the Site key and Secret key for your registered domain.
Integrate CAPTCHA on your Enfold site
- Go to Enfold theme options > Google Services > Google ReCAPTCHA
- Select the CAPTCHA version you registered the domain name for.
- Enter the Site Key and Secret Key in the theme options and click on the blue button that says’s ” Check reCAPTCHA API keys Vx” to verify your Key works.
If all goes well you should see a success message. On the last step, click the “Save all changes” to save your theme options.
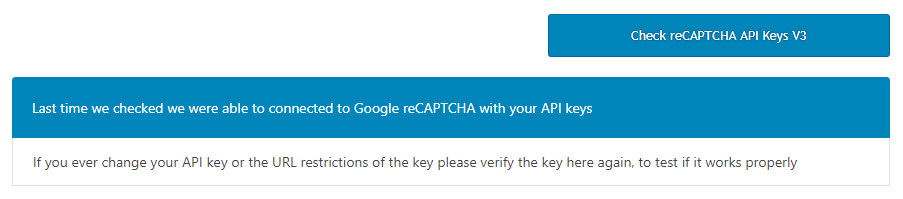
If the API key you entered is for a wrong version or is incorrect an error message is displayed on your screen. Make sure you copy the key correctly and match the CAPTCHA version if not delete the API key and register a new one and repeat the steps.
To set up the Google CAPTCHA v3 you need to register for both v2 and v3. Enfold will use CAPTCHA v2 as a fallback if v3 fails.
Create a form with CAPTCHA
Drop a contact form element on to your page.
Click on the contact form element to open the element options.
Scroll down until you see “Contact Form Captcha” and select one of the CAPTCHA options.
Display default Google CAPTCHA badge
By default, Enfold would display “This site is protected by reCAPTCHA and the Google Privacy Policy and Terms of Service apply.” text under your contact form.
If you would like to display a Google reCAPTCHA badge instead, you can add following code to Functions.php file of your child theme
add_theme_support( "avia_recaptcha_show_legal_information" );If you are not using a child theme you need to add the above function after this line in the theme functions.php:
if(isset($avia_config['use_child_theme_functions_only'])) return;After adding the code in Functions.php file, you can go to Enfold theme options > Google Services > Google Legal Information and choose between string or badge.
Disable CAPTCHA
To disable the Google CAPTCHA go to Theme Options > Google Services > Google ReCAPTCHA > Disable reCAPTCHA from the dropdown list.
Once the Google reCAPTCHA is disabled from the theme options no related scripts are loaded at all but you can still use the built-in numeric CAPTCHA.
Error handling
In case we encounter severe problems like:
- No internet connection / lost connection
- Invalid tokens
- Script loading errors
The submit button is automatically removed from the HTML code to avoid manipulations and give the user feedback to reload the page.
For administrators (‘manage_options” capability) we provide a more detailed error report. This can be changed with filter avf_reCAPTCHA_show_extended_error_messages.
Troubleshoot
My contact form is not sending emails
If you are not receiving e-mails from the contact form, here are some troubleshooting tips that you can try before asking in the support forums.
1. Typos and SPAM
Double check that the e-mail address you’re using does not have any typos. Also be sure to check your spam folder in your e-mail client. If possible, try with another email address which is not linked to a private domain. For example Gmail or Yahoo.
2. Check if WordPress is able to send e-mails
Go to the login screen of your WordPress installation and attempt to recover your user password, if you do get the e-mail then it may be that your server is only allowing e-mails sent from the default WP address (should be like “wordpress@yoursite.com”). In this case, you can set the Enfold contact form to send messages from that address, just add the following snippet to your theme/child theme functions.php file:
function change_cf_from() {
    return "wordpress@yoursite.com";
}
add_filter('avf_form_from', 'change_cf_from', 10);
3. Deactivate Plugins
If you see the contact form “Send” button is not responding then it could be that a plugin is causing a JavaScript conflict on the page. Deactivate all plugins and try again.
4. Third-party plugin form testing
Install the Contact Form 7 plugin, create a Form and do some tests. If no e-mails are received then it’s most likely a problem with your hosting provider. You will want to contact them and let them know you are having trouble with e-mail sending to see if there are any problems.
5. Using SMTP
If your hosting provider requires you to use SMTP then you can setup the WP SMTP plugin to have WordPress use SMTP instead of PHP mail. You will need to grab the SMTP server information from your hosting provider.
Mailto links not working
By default, some browsers do not handle the mailto links so nothing happens when you click on the email links in your browser. Do not worry it is a one-time setup. Let’s make sure your browser is set up correctly to handle the mailto links please follow the steps below:
1. If you are using chrome go to Chrome Settings > Content Settings > Manage Handlers
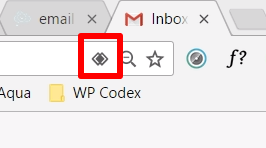
2. If Manage Handler setting is empty click on the double diamond icon that appears when you first log in to Gmail and select “Allow” mail.google.com to open email links and repeat the first step.
This should open the email links in the browser. If you still have any issue check the mailto link is set up as mentioned here https://css-tricks.com/snippets/html/mailto-links/
We recommend using the contact form because some browsers depend on the user settings.
Contact form going to SPAM
There is nothing on our side that can control which email gets flagged as spam. That is up to your mail service and your domain reputation to that spam filter, but you can give SMTP plugin a try.
Emails arive late
There is not much we can help you with, as it is the mail server that handles outgoing emails. Please contact your host to resolve third party issues.
Developer Info
Filters
Allows bulk modifications to incoming mail
avf_contact_form_incoming_mail

Allows bulk modifications to autoresponder mail
avf_contact_form_autoresponder_mail

Allows to customize header string
avf_skip_mail_header_keys
Resource
Contributed video: