Image With Hotspots
Overview
The Image with Hotspots allows you to place either a fullwidth or content size image on the screen that has various hotspots (any number possible) which will be shown once the image scrolls into the browser viewport.
There are – as always – several color options, as well as options for each individual hotspot. For example how and when the text overlay should be shown.

Mouse
Keyboard
Monitor
View examples of the image with hotspots.
Creating images with hotspot
The Images with Hotspots element is located in the Media Elements tab. You can see an example of it on the demo site here: http://www.kriesi.at/themes/enfold/shortcodes/images-with-hotspots/

Drag and drop the element into your layout, click on the indicated button and in the pop up that appears you can begin by adding the image and then each hotspot.
Adding Hotspots
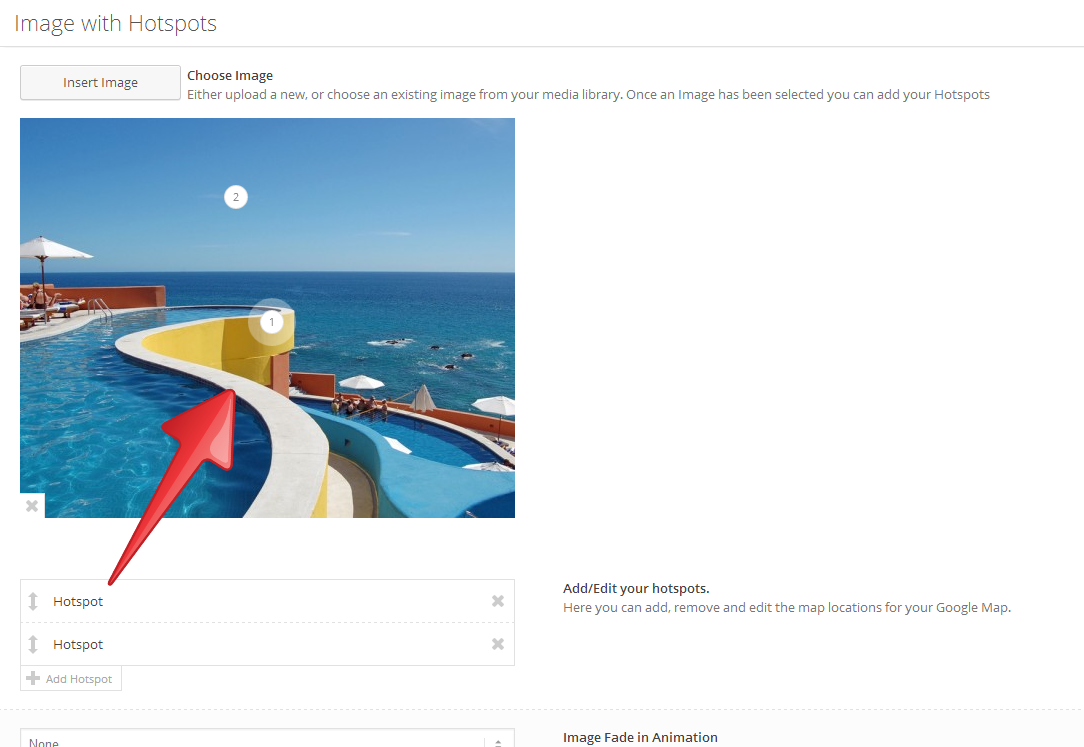
Once you’ve selected the image, each time you click on the ‘+ Add Hotspot’ button a new hotspot will appear on the image. Using your mouse you can drag and drop the hotspot wherever you want on to the image.

Editing Hotspot tooltips
Clicking on a hotspot in the list of hotspots (or clicking on a hotspot already on the image) will open another popup where you can select the tooltip position, tooltip width and add the content of the data that will appear. Make sure to scroll down in that window for Tooltip Style and the Hotspot Color options.
When you are finished make sure to Save and publish the page to see your new image with Hotspots!
Code Snippet
Shortcode
[av_image_hotspot src='placeholder-full.jpg' animation='no-animation' hotspot_layout='numbered' hotspot_tooltip_display='' hotspot_mobile='true' av-desktop-hide='' av-medium-hide='' av-small-hide='' av-mini-hide='' av_uid='av-1rw5tk'][/av_image_hotspot]
Customization
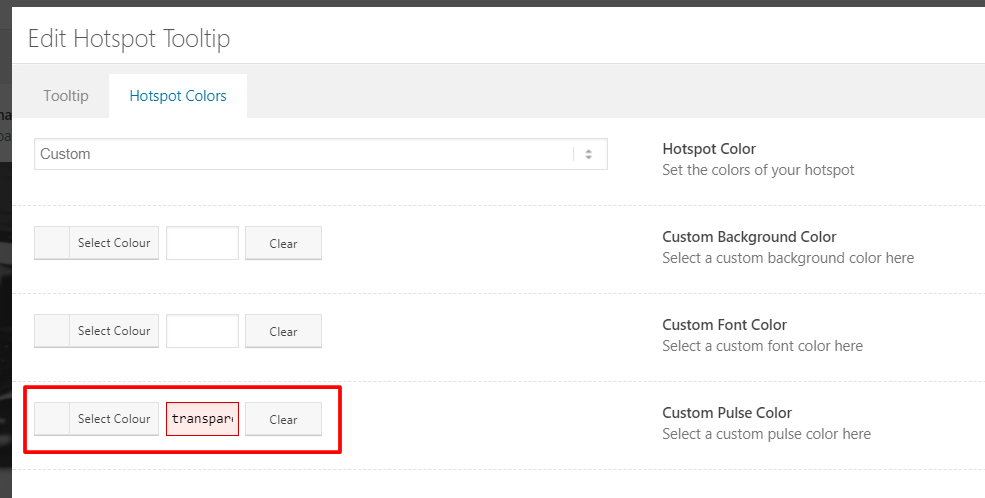
Remove pulse animation
To remove the pulse effect simply enter the word “transparent” in the color area for pulse. In case if you wish to make transparent hotspots, the same will work for hotspot color 🙂

Resource
Contributed video:


