


Translation
How to translate strings to your own language
As of May 2020, Enfold already has translations for following languages included:
- Arabic
- Catalan
- Chinese (Simplified)
- Chinese (Taiwan)
- Czech
- Danish
- Dutch
- French
- German
- German (Switzerland)
- German (Formal)
- Greek
- Hebrew
- Hungarian
- Italian
- Japanese
- Korean
- Norwegian
- Persian
- Polish
- Portuguese (Brazil)
- Romanian
- Russian
- Slovak
- Spanish
- Swedish
- Turkish
Translations are contributed by fellow Enfold users and some of them are not 100% complete. That is because we add new strings with almost each update and users who contributed translations only needed to translate the strings on front-end. If you would like to contribute translations, you can download latest versions of language files here and then post them in this thread. If you have a GitHub account or do not mind creating one, you can make pull requests. Instructions can be found here.
Thanks a lot to all contributors! We and whole Enfold community appreciate your effort 🙂
If you would like to translate untranslated strings or update existing strings, you can use Loco Translate plugin or Poedit software.
Loco Translate
With Loco Translate, you can edit strings from WordPress dashboard.
After installing the plugin, please go to Loco Translate -> Themes -> Enfold -> Advanced configuration tab and insert “lang/enfold.pot” in “Template file” field.
Then, please go to Loco Translate -> Settings -> Site Options -> Extracting strings and insert “99999K” in “Skip PHP files larger than:” field.
It is important to sync files before updating to make sure all available strings are ready for translation. To sync files in Loco Translate, please go to Loco Translate -> Themes -> Enfold -> Overview tab -> Edit Template tab, click Sync button and Save. Then go to Loco Translate -> Themes -> Enfold -> Overview tab, choose your language, click Sync button and Save.
After syncing files, you are ready to update language files 🙂
Poedit
You can find language files inside /wp-content/themes/enfold/lang/ folder and edit .po files using Poedit.
Before translating your strings, please make sure to click “Update” button and save.
After updating the strings, you can replace new file with the old one located in /wp-content/themes/enfold/lang/ folder.
How to translate sites built with Enfold using WPML
Both Enfold and the Avia Layout Builder are compatible with WPML, letting you build a multilingual website in just a few minutes.
Getting started with WPML
To translate Enfold with WPML, you first need to buy a WPML plan. Once purchased, you can then install WPML on your site and begin the setup wizard. During this process, you can choose which languages to add, how URLs should look, and provide context about your website.
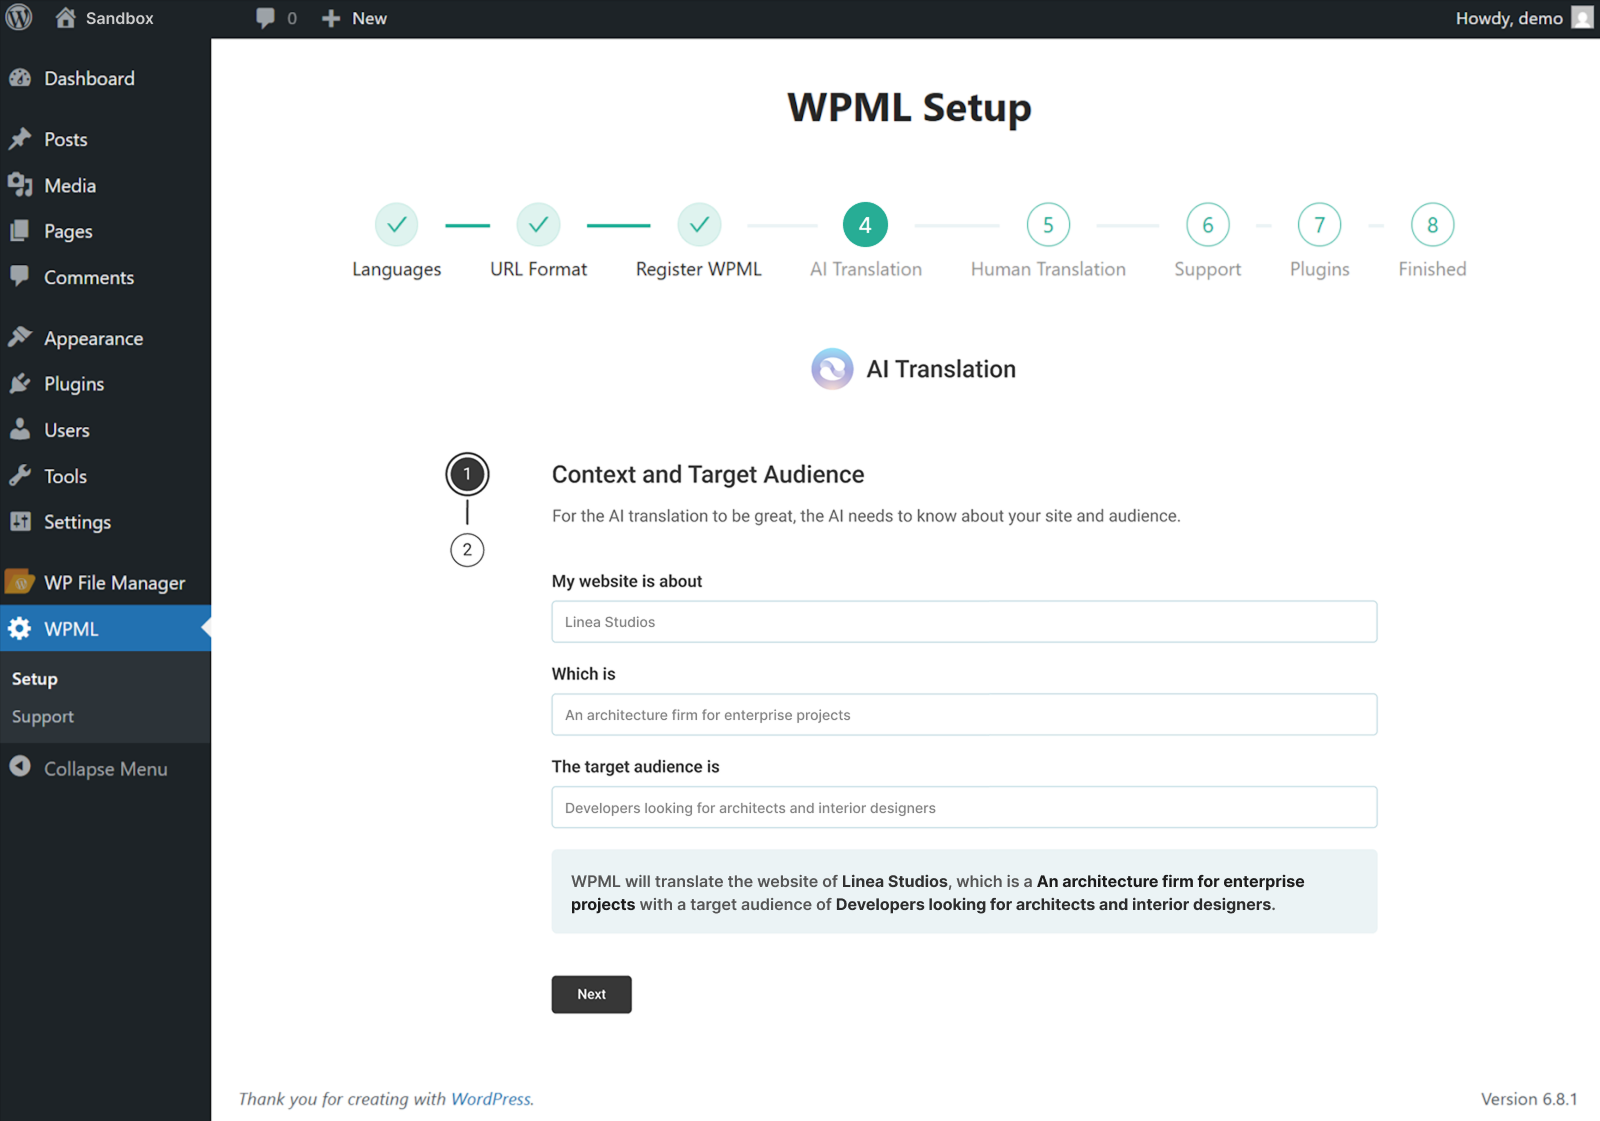
Providing context about your website
Using the context that you provide, WPML’s most accurate AI translator – Private Translation Cloud (PTC) will create translations that perfectly fit your target audience and industry.
PTC is like your own team of expert translators with a deep understanding of your content and niche. It’s WPML’s proprietary AI technology, and even includes a translation quality guarantee: If you’re not satisfied with PTC’s translations, you’ll get a full refund.
How to translate with WPML
To translate any content on your website, go to WPML → Translation Dashboard. This will open a dashboard with all your website content organized into sections, such as standard WordPress elements (pages, e.g.) and Enfold elements (Custom Element Templates, e.g.).
To automatically translate your content with PTC, simply select all the items you want to translate.

Selecting content in Translation Dashboard
Next, choose Translate automatically as your translation method, and click Translate. If you look under the table, WPML also shows you how much translating your content costs.
Choosing Translate automatically in Step 2
Once WPML is finished, translations will appear on your website when switching languages.

Translated page on a website
If at any moment you want to edit your AI translations, you can always make changes using the Advanced Translation Editor.
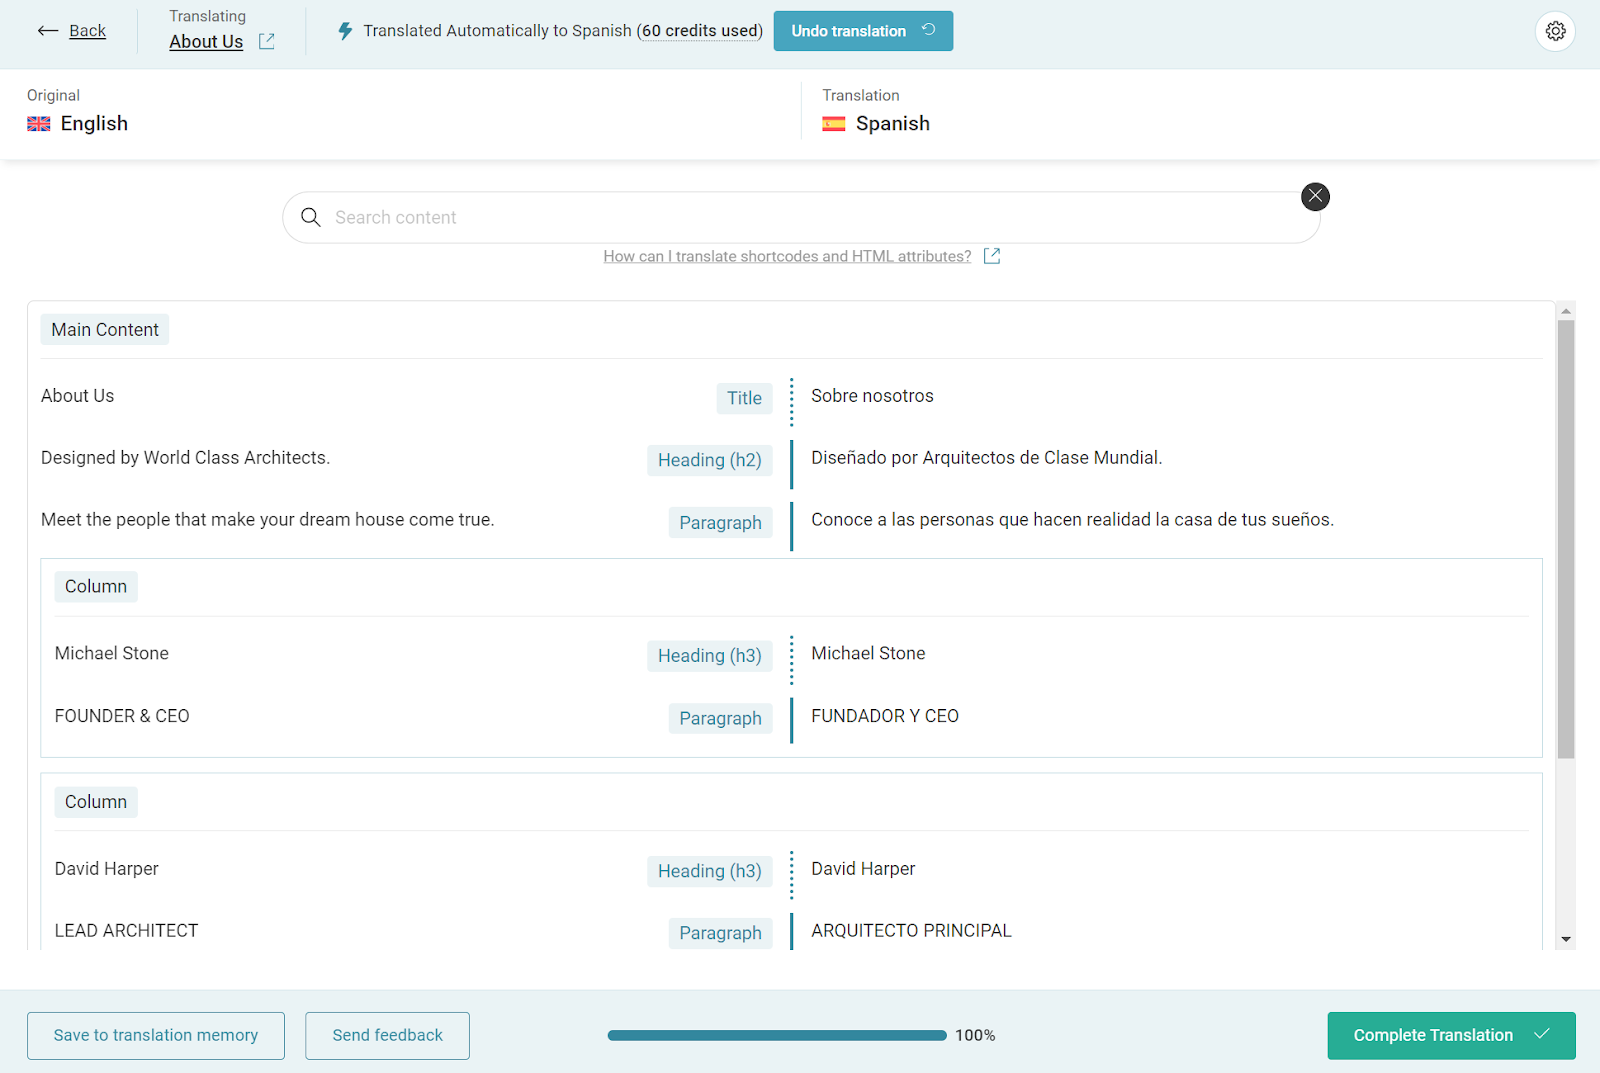
Adding translations in the Advanced Translation Editor
Just visit the translated page you want to edit on the front-end, and click Edit translation in the top admin bar. This will open the editor, where you can make any changes necessary.
Setting theme options per language
With WPML, you can set different Theme Options in each language. This lets you create unique designs and functionality per language, such as different color schemes, theme layouts, and more.
To set theme options for a specific language, open the language switcher in the admin bar and choose the language you want to edit settings for.

Selecting language in admin switcher
Next, go to Enfold → Theme Options and select the tab you want to configure settings in. Make your changes and save; your new settings will now take effect on the language you selected.
If you want to sync the same settings across all languages, go to the Theme Options tab and scroll down to WPML Options Management. Toggle the switcher at the bottom and save changes.
More information about translating your site with WPML
Check out WPML’s documentation for more in-depth instructions about translating sites built with Enfold and the Avia Layout Builder.
Child Theme Translations
In case you want to modify something in an Enfold translation you can do it by directly editing the translation file. However, if you update the theme these modifications will be lost. To avoid this, it is recommended to use a child theme approach, here’s how to do it.
Step 1
Create a /lang/ folder in your child theme directory and copy (from the parent theme) the translation files to be modified:

Step 2
Add the following to your child theme functions.php file:
function overwrite_language_file_child_theme() {
    $lang = get_stylesheet_directory().'/lang';
    return $lang;
}
add_filter('ava_theme_textdomain_path', 'overwrite_language_file_child_theme');
Now the translations found in your child theme /lang/ folder will be loaded instead.
Translating the portfolio slug with WPML
Since Enfold 2.4.4 we use the _x() function to translate the portfolio post type slugs. It’s the default (and recommended) solution to translate post type slugs with WPML. Please note that you must install the String Translation extension first – otherwise you can’t translate the slug(s).
After you installed both plugins and Enfold go to the WordPress Dashboard (admin screen) and select “WPML” > “Translation options” from the sidebar menu. A new option page will load – search for the “Translate custom posts slugs (via WPML String Translation).” checkbox and tick it (=activate this setting). Then click the blue “Save” button.
Afterwards search for the “Custom post types” option field on the same option page. It will look like:

Note that you need to tick the checkbox below “Portfolio Items” – otherwise you won’t see the slug translation options for the post type. WPML enables you to translate the slug for each registered language except the standard language. Enter your custom text/translation into the text field(s) and then save the settings.
Eventually select “Settings” > “Permalinks” from the sidebar menu. You’ll notice a “Portfolio Entry Settings” section near the bottom of the permalink option page which enables you to change the slug for the standard language. By default the “Portfolio Items Base” option is set to “portfolio-item” and the “Portfolio Categories Base” is set to “portfolio_entries”. You can replace the default values with some custom text – however you must not use special characters or spaces.
Last but not least save the permalink settings by clicking the “Save Changes” button. Please save the permalink settings even if you didn’t change the default slug rules because the saving process forces WordPress to clear/flush the slug rewrites rules.