I installed enfold what next?
Overview
Let the fun begin. After installing the enfold theme the next step is to make it look unique and match your branding style by changing the default settings.
Before we start
While setting up a fresh WordPress site with no content or updating an existing site, it’s a good idea to let your website visitors know what is happening by quickly setting up a maintenance mode or a coming soon page than displaying an incomplete or a broken website.
Maintenance Mode
Maintenance mode helps you display an under construction or a coming soon message to your website visitors. To set up a maintenance page please follow the below steps.
WordPress has many plugins available for this purpose each with different features, give WP Maintenance Mode plug-in a try or browse the WordPress plug-ins directory for more maintenance mode plugins.
Coming Soon Page
- Use a pre-built coming soon page or the maintenance mode page that comes with enfold 2017 demo or create your own coming soon page and if required, add the subscription or notification form.
- Set it up as your front page from Enfold > Theme Options > Frontpage Settings.
Plugin Requirement
Some demos require additional plugins to be installed so you can utilize all the features. If you notice the list of demo sites each demo has its own description and recommendation of plugins as shown in the below screenshot.

To install the recommended plugin go to WordPress Dashboard > Plugins > Add New and search for the plugin and click on install. After the plugin is installed it is required to be activated by clicking on the activate plugin option.
Import Demos
Enfold comes packed with beautiful demo sites which can be installed and easily customized to match your branding or make it your own unique site. Click here to view all of Enfold demos.
One Click Install Demo: Importing a demo site and adding/replacing the content is a great way to get started. To import the demo with a single click simply go to Enfold > Import Demo and import the demo that suits your business.

Please note that importing demo sites will reset the theme options. If you have made changes to the theme options and would like to import the demo pages without losing the settings in theme options you can try importing the demos manually.
Backup and restore theme settings
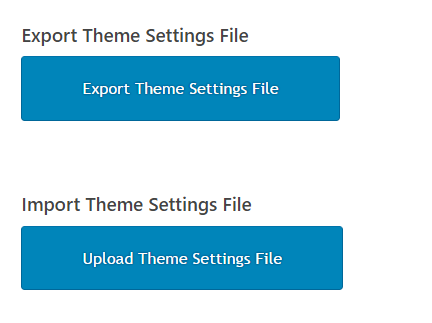
Theme Settings: You may have spent some time customising and styling the theme elements like header style, colors, content style, fonts and many other options. Enfold theme options can be exported or imported very easily from the Import/Export tab.
Export/Backup Settings: Go to Enfold > Import/Export tab.
Note: After importing the theme settings file, to see the changes, please make a small change in the theme options by changing the font size or color and save the settings.

Quick Setup
Let us take a quick look at some options that will allow you to make some quick changes to set up your site fast. We will start with setting up the Logo, Color scheme, Typography and progress to other elements.
Logo Setup
The first step to personalize the theme is to upload your own logo. There are two different options to upload the logos default logo and the transparent header logo.
Preparing your Image
We recommend using a .png image with a maximum size of 340px wide by 156px tall. Logo can be uploaded from Enfold > Theme Options > Logo

- Transparent header logo: When the page is scrolled the color and size of the logo area may change (depending on the theme setting) and a different logo can be displayed when the page is scrolled from Enfold > Header > Transparency Options > Transparency Logo.

Favicon setup
If you aren’t familiar with Favicons, they are the little images that show in the browser tabs or bookmarks for a site. They take a bit more care when creating the image file since they are so small, but there are some great resources on the web to make that easier.
Setting up Your File
A quick Google for “Creating your own Favicon” should help you find one of the many sites available these days which will help you in creating your file.
Upload the Favicon file
Once you have your new favicon created and read you can upload it to the Theme Options main tab and the theme will then add it to the site code so that browsers can recognize it.
![]()
Make sure to click on the Save all changes button at the top or bottom of the options page to save your new theme settings
Color scheme
The theme comes with predefined color schemes that can be used out of the box or modified if needed. Once you select one of the colors it changes all of the values in the tabbed options below as well as the live preview box.
The theme colors are separated in different theme sections: General, Header, Main Content, Alternate Content, Footer and Socket. You can apply link colors, font colors, backgrounds etc to each section. As soon as you change the value of some of the input fields the small preview window will update and show you how your new style looks like.
Color scheme are a set of a predefined color scheme which can be accessed from Enfold > General Styling > Select a predefined color scheme. To get started with custom styling your Enfold theme choose a color scheme that is close to your design and edit the options in General Styling below the selected color profile.

*Note: When you click on Save all Changes the options for your styling are not saved to the pre-defined color schemes. Those will always load the same pre-defined options when clicked.
Advanced styling options
Advanced Styling Option can be accessed from WordPress Dashboard > Enfold > Advanced styling. Here you can select elements such as the menu, button, headings or any other element from the drop-down list. The default styles can be customized by adding new values to any of the element in the advanced styling option.

Typography
Typography options in Enfold theme can be accessed from Enfold > Advanced Styling. Select any element like body, paragraph, heading tags, menu or other tags available in the drop down list and edit the font family, font size, font weight and line height.

The text color for different sections of the site like header, footer, main content and other areas can be changed from Enfold > General Styling.

Background Styles
Body background options work great if a ‘boxed’ or ‘framed’ layout is selected from Enfold > General Layout > Layout

Background color or image for the site can be changed from Enfold > General Styling > Body Background

Background video can be set from the options available in the color section element. This looks great if you are using the color section element with the video background on a stretched layout.

Remove Borders around header, sidebar and other content
To remove the borders around menu, sidebar area please clear/delete the border color value found in Enfold > General Styling > Logo Area, Main Content, Alternate content and save changes.

Page preloader
Page Preloader is a nice way to indicate that the content of the page is loading. It is best to use them on web pages with heavy content that takes time to load. The preloader option can be easily enabled or disabled with a custom preloading logo or image from Enfold theme options > Page Preloading.

Menu setup
Pages, Posts, Products, Tags, Custom Links, Categories and much more can be added to the menu items. First, enable the required boxes from the ‘Screen options’ on the top right of the Appearance > Menu page to be able to add them to the menu.

Create or select the menu which you need to add/edit items.

Drag and drop the menu items from the list of pages and other options available on the left side to the menu items which can be seen on the right side.

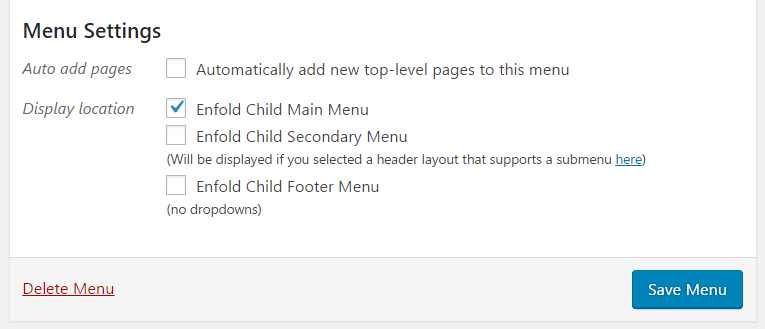
Finally, select the display located at the bottom of the screen before saving the menu.

WordPress Codex has a section dedicated to Menu setup and has detailed information please check WordPress Codex Menu Setup tutorial.
Header style
The Enfold theme brings you beautiful and eye-catching header styles. All the header layouts come with a logo, menu and widget spots, and ability to change the layout style, header behavior and other styling properties.
Header layout option can be accessed from Enfold > Theme Options > General layout > Logo and Main Menu

Header style and behavior can be changed from Enfold > Theme Options > Header

Social profile setup
Social profiles for most of the popular networks can be set from Enfold > Social Profiles by selecting the social network name and adding the link to your social profile.

Social icons can be activated for blog, header, and footer from the blog, header and footer option in the theme settings.
Custom Footer
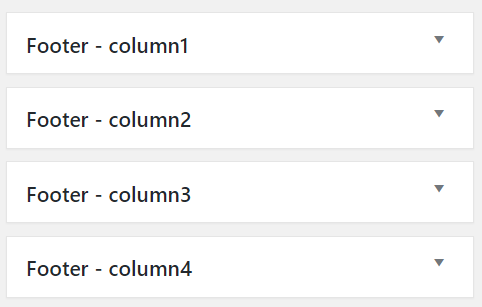
Enfold by default display widgets in the footer area. The widgets in the footer can be customized from Appearance > Widgets > Footer.

The theme has more footer settings in Enfold > Footer which allows you to:
Display or Hide the footer widgets and the socket area.
Add up to 5 footer columns.
Update the Copyright info.
Display Social icons in the socket area.
To remove the backlink add the below shortcode in the copyright field.
[nolink]
Html links or custom text can be added in the copyright field as shown below. If you would like to display a button here, a button shortcode can also be added in place of Html tag.

Sidebar/Widget setup
By default, the Sidebar options set in Enfold > Sidebar Settings are applied to all the pages however the default sidebar settings can be overwritten on any page using the sidebar settings provided in the page itself under Layout > Sidebar.
For example to hide the sidebar only on contact page open the contact page, on the right side under layout options > Sidebar Settings you can choose to hide the sidebar.

From the Enfold> Sidebar Settings you can choose to display the sidebar on the left or right side of Archive, Blog, Single Post, Pages, Smart Phone and update settings for Sidebar navigation and Sidebar Separator Styling.

Sidebar Widgets: Sidebar widgets like Recent Posts, Comments, Categories, Meta, Images, Custom text, Social profile and many more widgets can be added or deleted from Appearance > Widgets > Sidebar.

General Layout
As the term suggest the “Layout Dimension” option will allow you to adjust the width of the layout and fine tune the sidebar and the content width.
Layout Settings
The Layout options can be accessed from Enfold > General Layout.
In the Layout option, you can set the layout to be:
- Boxed
- Stretched
- Fixed Frame

Dimension Settings
The Dimension of the site content can be set from Enfold > General Settings > Dimension
The Dimension tab will allow you to set up
- Adaptive content width for easy viewing on a portable device.
- Content Width
- Sidebar and the content ratio
- Total width content and sidebar together can take of the “content width” described above.

Adjust Default Values of the Layout Settings
If you don’t want to set the Layout > Settings for each page or post manually, use the following filter in the functions.php file. The Layout and their designated keys are included in the comments below.
- Layout > Sidebar Setting
- Layout > Footer Settings
- Layout > Title Bar Settings
- Layout > Header visibility and transparency
add_action( 'after_setup_theme', 'ava_enfold_builder_layout_mod' );
function ava_enfold_builder_layout_mod(){
add_filter('avf_builder_elements', 'avf_enfold_builder_layout_settings_mod');
}

function avf_enfold_builder_layout_settings_mod($elements)
{
$counter = 0;
foreach($elements as $element)
{
// Layout > Sidebar Settings
if($element['id'] == 'layout') {
/**
*
* Available Options
* No Sidebar = fullsize
* Left Sidebar = sidebar_left
* Right Sidebar = sidebar_right
* MOD: Set the Layout > Sidebar Settings to "No Sidebar"
*
**/
$elements[$counter]['std'] = 'fullsize';
}

// Layout > Footer Settings
if($element['id'] == 'footer') {
/**
*
* Available Options
* Display only the socket (no footer widgets = nosocket
* Display only the footer widgets (no socket) = nofooterwidgets
* Don't display the socket & footer widgets = nofooterarea
* MOD: Set the Layout > Footer Settings to "Display only the footer widgets (no socket)"
*
**/
$elements[$counter]['std'] = 'nofooterwidgets';
}

// Layout > Title Bar Settings
if($element['id'] == 'header_title_bar') {
/**
*
* Available Options
* Display title and breadcrumbs = title_bar_breadcrumb
* Display only title = title_bar
* Display only breadcrumbs = breadcrumbs_only
* Hide both = hidden_title_bar
* MOD: Set the Layout > Title Bar Settings to "Hide both"
*
**/
$elements[$counter]['std'] = 'hidden_title_bar';
}

// Layout > Header visibility and transparency
if($element['id'] == 'header_transparency') {
/**
*
* Available Options
* No transparency =
* Transparent Header = 'header_transparent'
* Transparent Header with border = 'header_transparent header_with_border'
* Transparent & Glassy Header = 'header_transparent header_glassy '
* Header is invisible and appears once the users scrolls down = 'header_transparent header_scrolldown '
* Hide Header on this page = 'header_transparent header_hidden '
* MOD: Set the Layout > Header visibility and transparency settings to "Hide both"Header is invisible and appears once the users scrolls down"
*
**/
$elements[$counter]['std'] = 'header_transparent header_scrolldown ';
}

$counter++;
}
return $elements;
}
WordPress Security
Every day there are many websites that fall victim to hackers and other malicious scripts and virus attacks so it is better to be safe than sorry. We recommend installing the below mentioned or similar security plugins and secure your website. Do not give hackers an easy chance to destroy your hard work in seconds.


