Custom Element Templates
Overview and Settings
Basics
Using and working with a CET is similar to working with a normal ALB element, but there are a few things you need to know to understand the difference between the two so you can take full advantage of this powerful feature. To follow this tutorial please use the following settings on WP Dashboard -> Enfold theme options -> Custom Elements: Custom Elements Management: Editors and Admins Custom Elements Locked Options: Show locked options 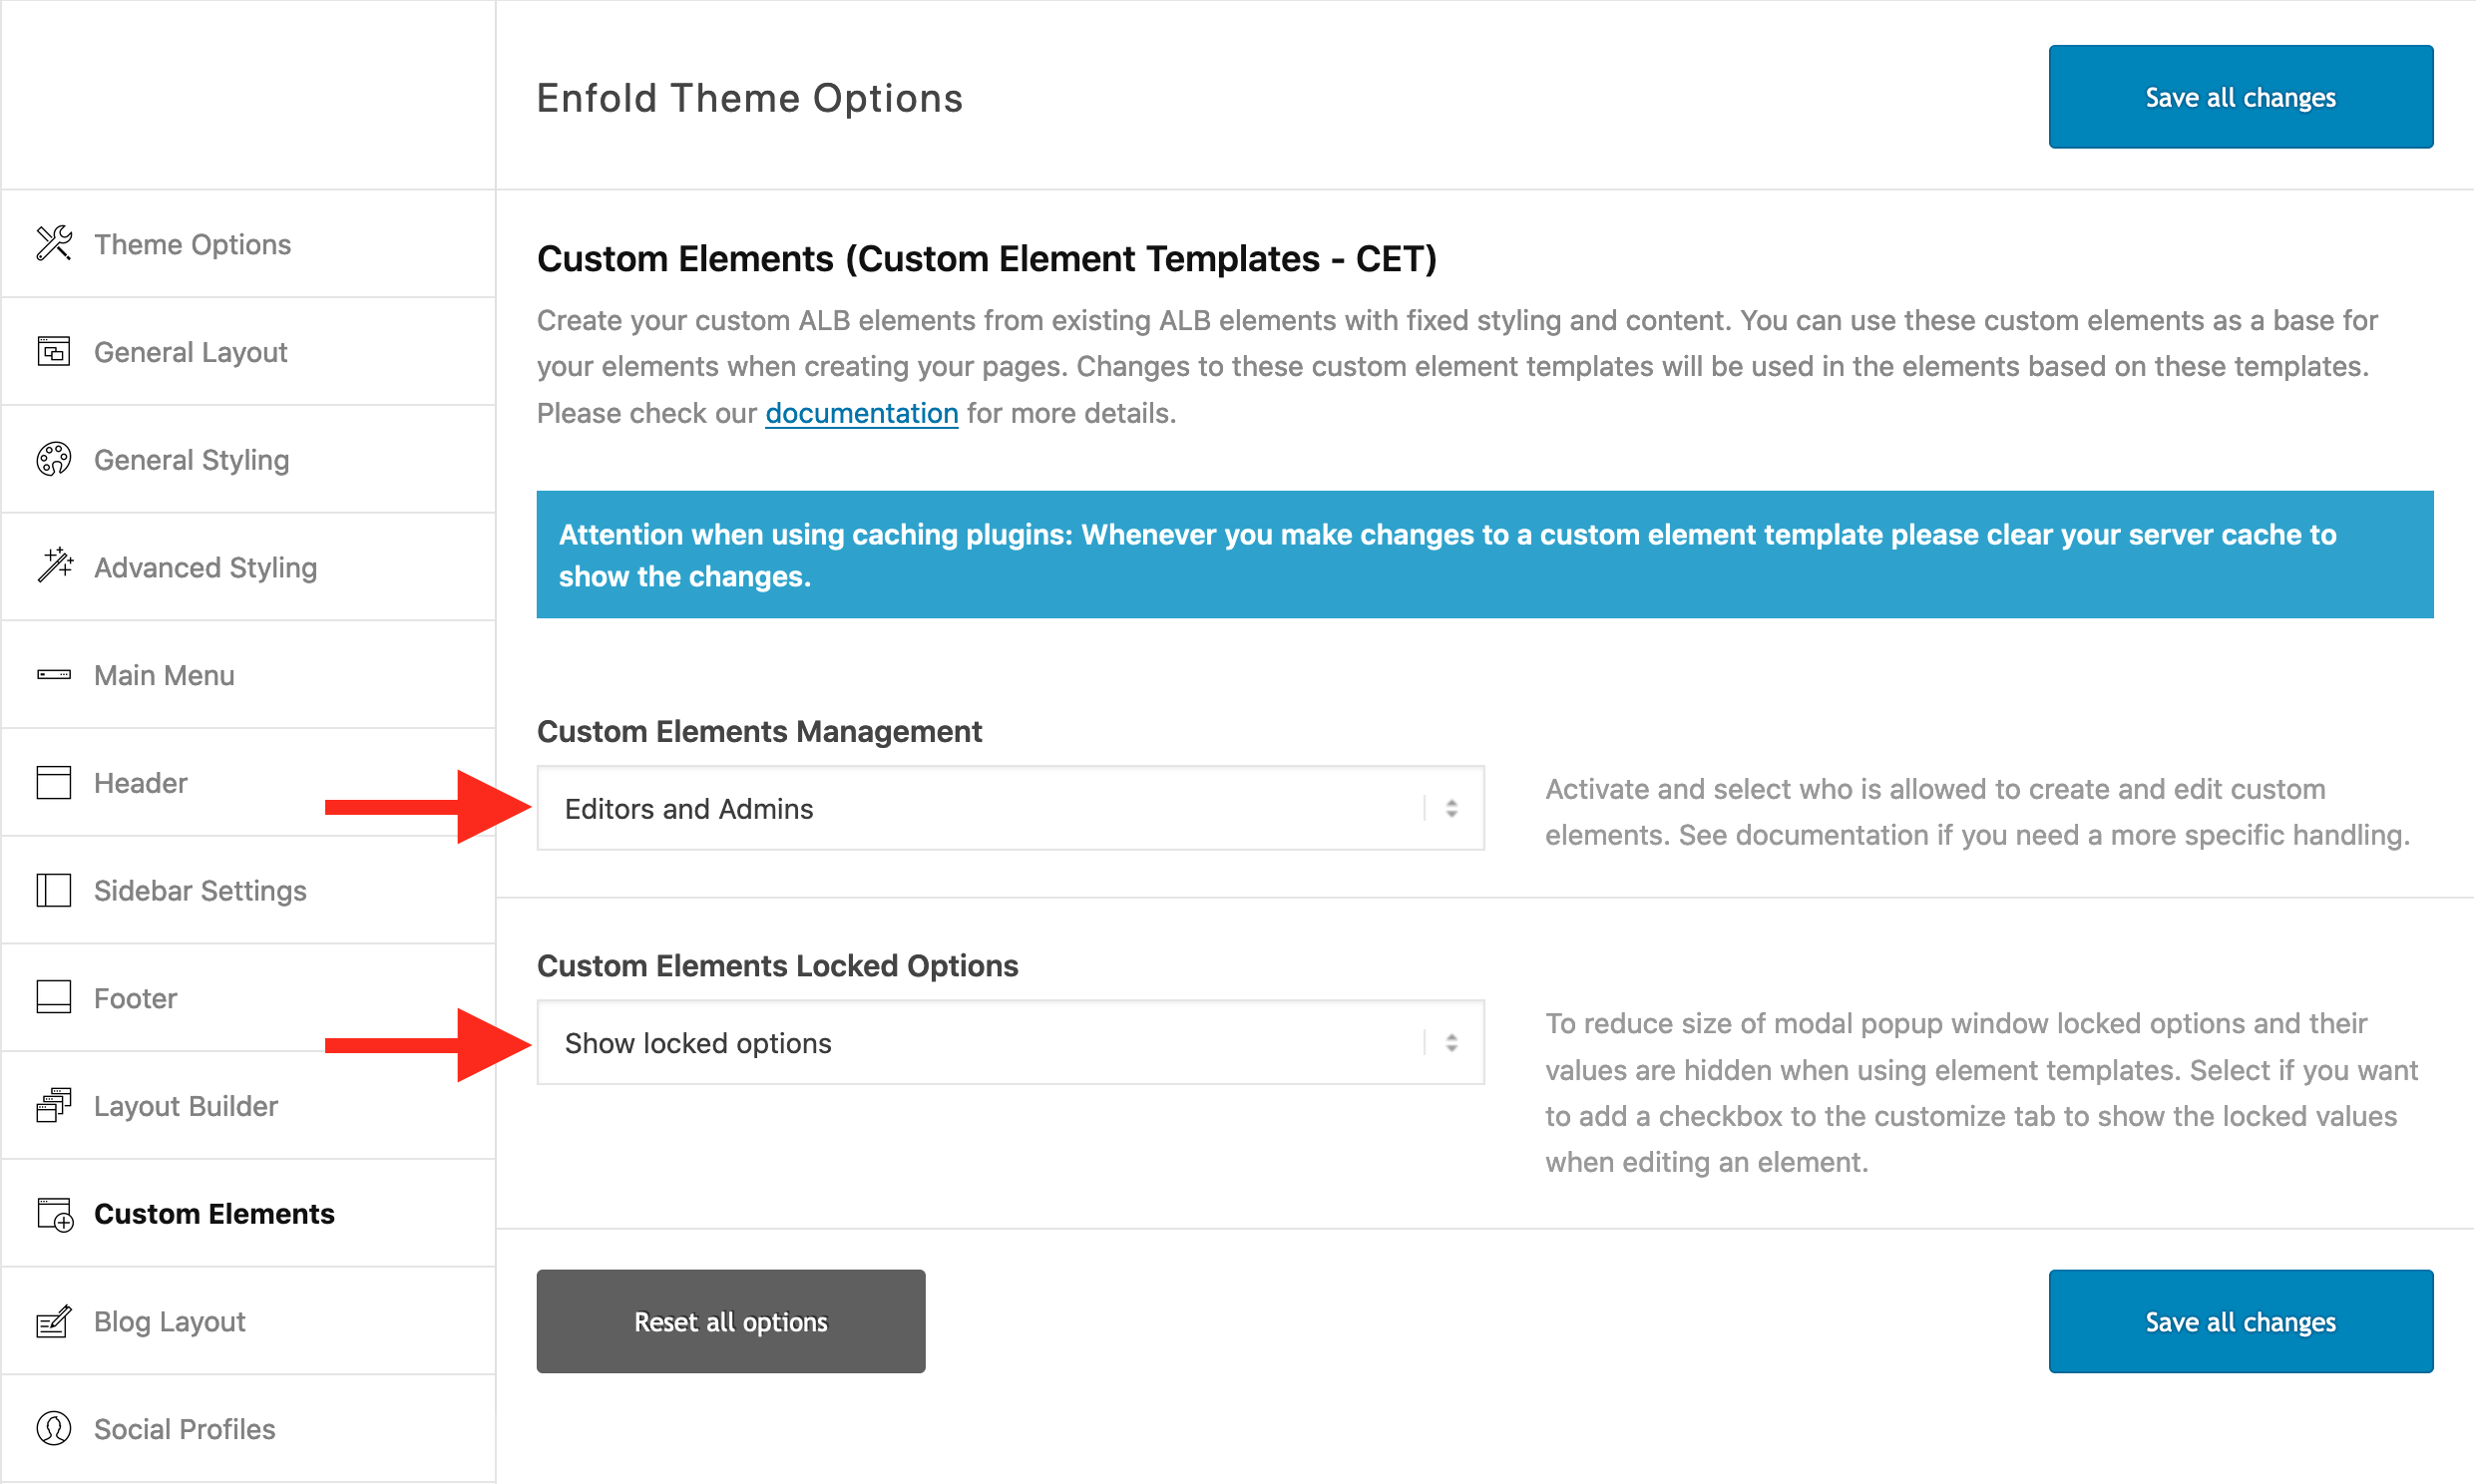 Let us start our example with a simple ALB button element. The Normal workflow would be:
- Create a new page
- Switch to Advanced Layout Builder
- Drag a button element on the page
- Open the modal popup of the button and make your settings
You might face the following problems if you need more buttons:
- For every button you use on your site you must set their settings separately, even if they share many of the same settings across your site.
- In the future if you decide to change your button layout or text settings you must do this for each button.
This is the point where a CET can help greatly. The standard ALB button has default settings that are predefined and preselected (we will focus on only a few to make it easier to follow):
- Button Label: Click Me
- Show Button Icon: Display icon to the left
- Button Size: Small
- Button Colors Selection: Basic options only
- Button Color: Theme Color
Let’s say, you want a specially designed button used several times on your site, it would help to have your settings already predefined. This is the first use of a CET:
-
- Click the Custom Elements Tab
- Click the “Add New Custom Element” button to create a new Custom Element

-
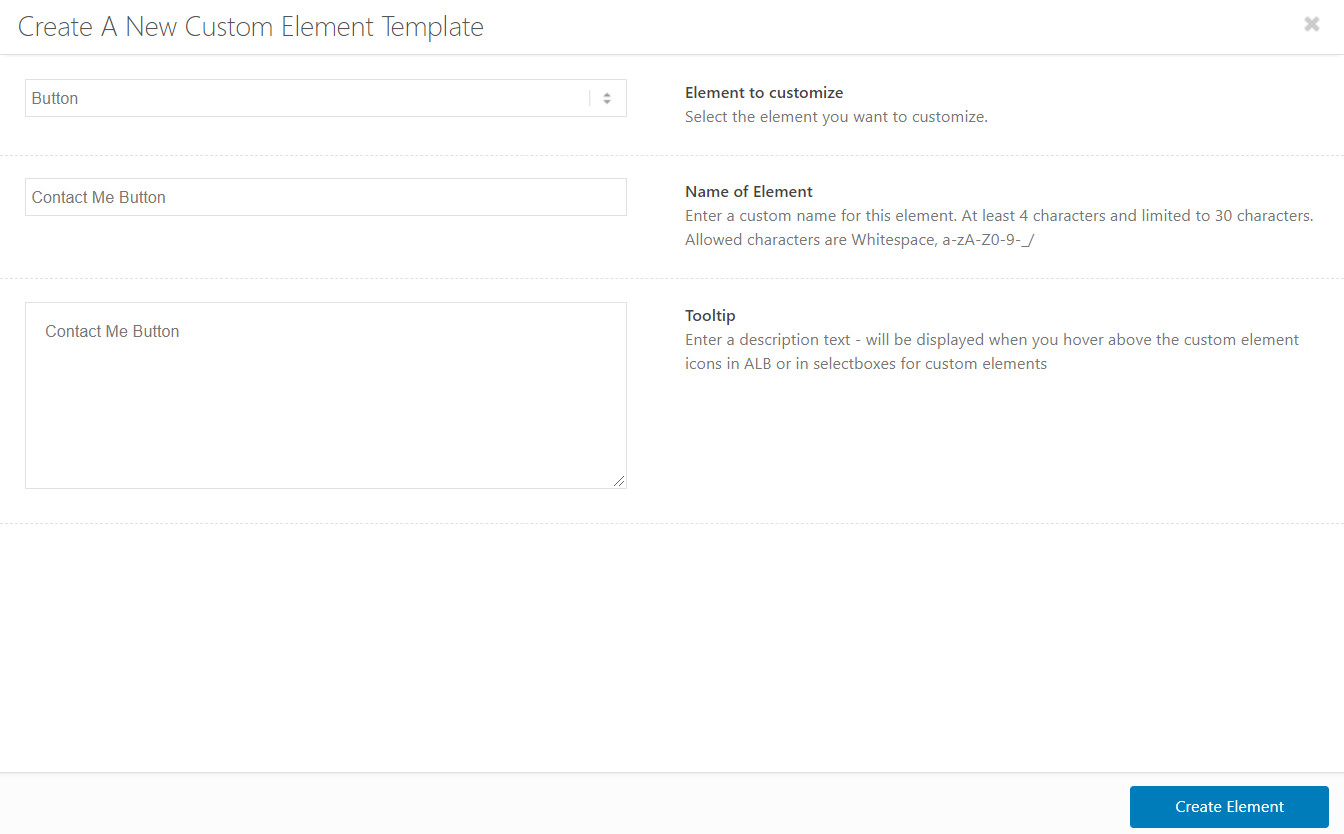
- A modal window opens:
- Select “Button”
- Give it a name, e.g. “Contact Me Button”
- Add an additional tooltip for this button
- Click button “Create Element”
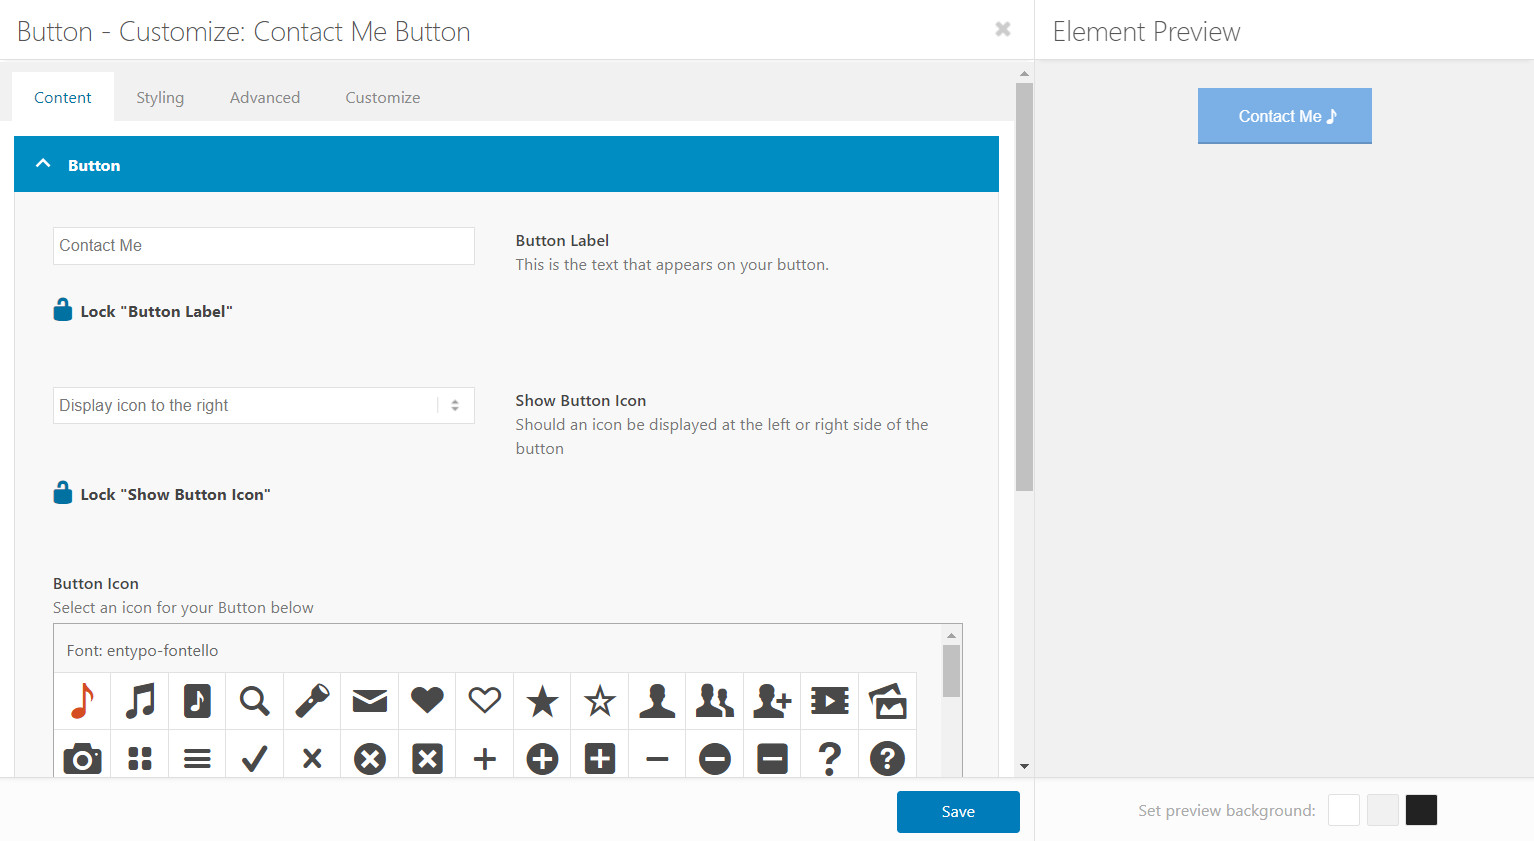
- The known button modal popup opens with the default settings preselected and a few more settings:
- Lock Symbol checkbox for most settings (ignore at this stage – we will explain later)
- “Customize Tab” (ignore at this stage – we will explain later)
- Change the settings:
- Button Label: Contact Me
- Show Button Icon: Display icon to the right
- Button Size: Large
- Button Colors Selection: Basic options only (leave it)
- Button Color: Blue
- A modal window opens:
-
- Click the “Save” button
- In the “Custom Elements” Tab you now see the button “Contact Me Button”

- Drag this button on the page. You will notice that his button element has a sky blue background color. This shows, that this button is based on a CET button
- Opening the modal popup is the same as a normal ALB button. The button has the above settings preselected. In background the default settings for this CET have been changed to your settings.
- You are free to change any of the settings of this button on this page and it will follow these settings. The power of a CET is that you are able to predefine the settings and speed up your workflow.

Important: A CET behaves like a normal ALB element but YOUR settings are predefined. For advanced users: the underlying shortcode attributes are modified for the element.
If in the future you want to change any of these settings:
- Click the “Edit Custom Elements” button
- Hover over the button “Contact Me Button” and click the pencil
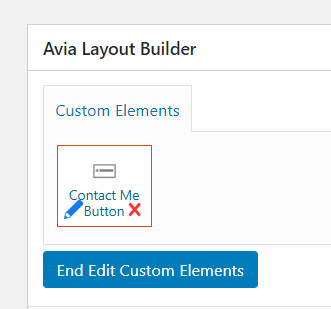
- The button modal popup with the additional settings field opens
- Make your changes and save
When you now drag the CET on a page you have the new settings.
Important: All other already existing buttons on your page(s) remain unchanged !!! Only newly added buttons have the new settings.
In the real world you would like to maintain a consistent layout for your buttons across your site without the need to edit each button separately. Lets say you must change the color for all your “Contact Me Button” buttons to red:
- Click the “Edit Custom Elements” button
- Hover over the button “Contact Me Button” and click the pencil
- The button modal popup with the additional settings field opens
- Change the color to Red
- Below you see a blue open padlock left of Lock “Button Color”
- Click it – it turns red and gets closed
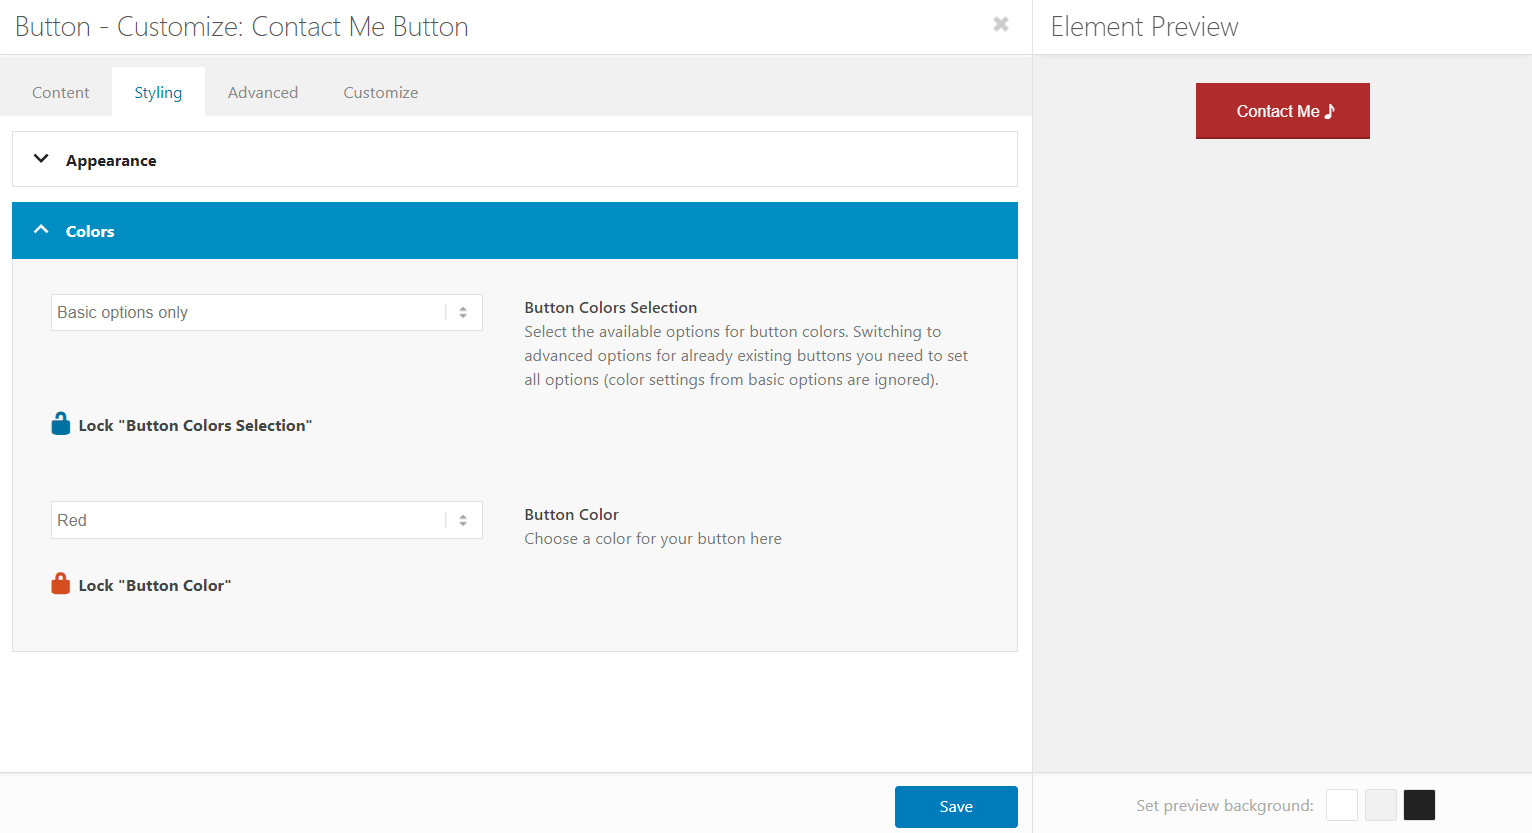
- Click Save to close the modal
- Click on the button element on the page to edit it
- Check the option Button Color:
- Selectbox no longer available, only the “locked” value Red
- Red padlock left of Button Color
- It is not possible to change this option in this element any longer as it has been locked in the CET this element is based on
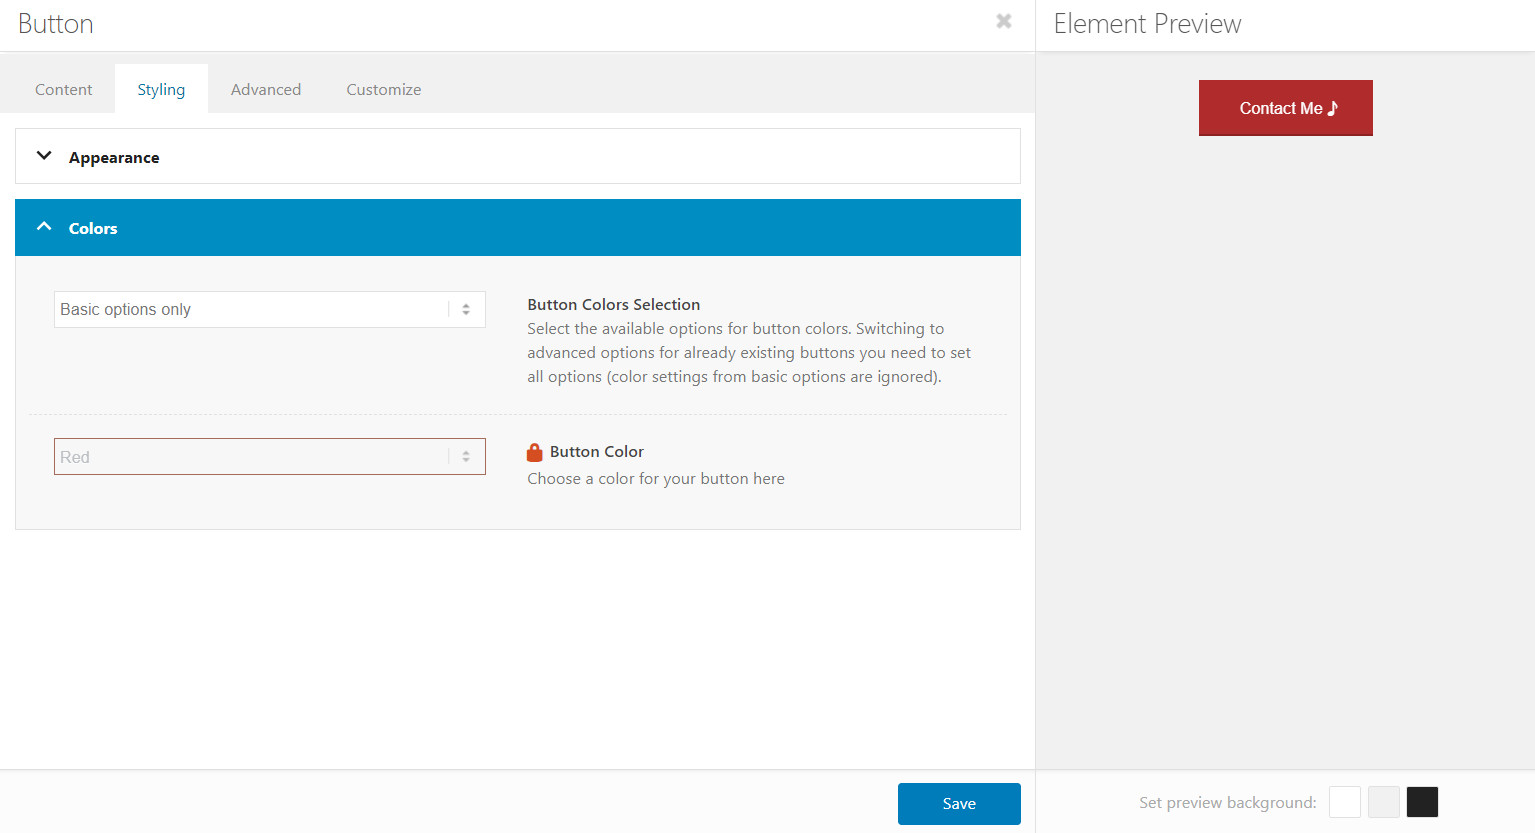 If you now reload the pages containing this element you will see that all the buttons have turned red (clear server cache if using a cache plugin and browser cache).
Important:
- Locked values in a CET override any previous value of already existing elements on pages
- Non locked values in a CET DO NOT change any previous value of already existing elements on pages
- Locking/Unlocking a value in a CET DOES NOT make any changes to already existing elements on a page, the locked value replaces the original value on the fly on page load. For advanced users: the underlying shortcode attributes on pages are not modified, when executing the shortcode handler a check for locked values returns and replaces the attribute values from the page shortcode.
Locking depending settings: Have a look at the button setting Button Colors Selection. Depending on the selection the option Button Color is visible or not. If you want to make sure that the button color Red is used and cannot be changed you also must lock Button Colors Selection. Keep this in mind and be careful, as you cannot be sure what settings are set in the elements on all of the pages across your whole site.
The Customize Tab
This tab in a modal popup contains the option “Select a Custom Element to lock values”. In our case open the modal popup of a button and you find in the dropdown:
- No Custom Element used – all options available
- Contact Me Button
- in case you have more CET buttons all buttons are listed

On a page open the modal from:
- an ALB button element: “No Custom Element used …” is selected, nothing is locked
- a CET button element: “Contact Me Button” is selected and locked values cannot be changed
It is possible to change the underlying Custom Element or switch to No Custom Element used, in either case the modal popup is reloaded to reflect the new situation for locked/unlocked values.
This means, if you have an existing page with an ALB button and want this button to have the locked values of a custom element you only need to select this custom element in the list. Another way is to select another custom element as a base for the page element and select the CET you wish.

Important: changing the underlying template DOES NOT make any changes to the existing settings of the element on a page. This allows you to change and check the styling of an element without loosing your previously made settings when switching between them. For advanced users: the underlying shortcode attributes are not changed.
Custom Elements Advanced Options
Enabling Advanced options extend the functionality of CETs and is recommended for advanced users only.
By default, Advanced options are hidden. To show them, please add following line to Functions.php file of your child theme
add_theme_support( 'show_advanced_custom_element_options' );Note: If you are not using a child theme, which is recommended, you should add the code right below following line in Enfold parent functions.php file
if( isset( $avia_config['use_child_theme_functions_only'] ) ) { return; }Enabling Advanced options, displays additional settings
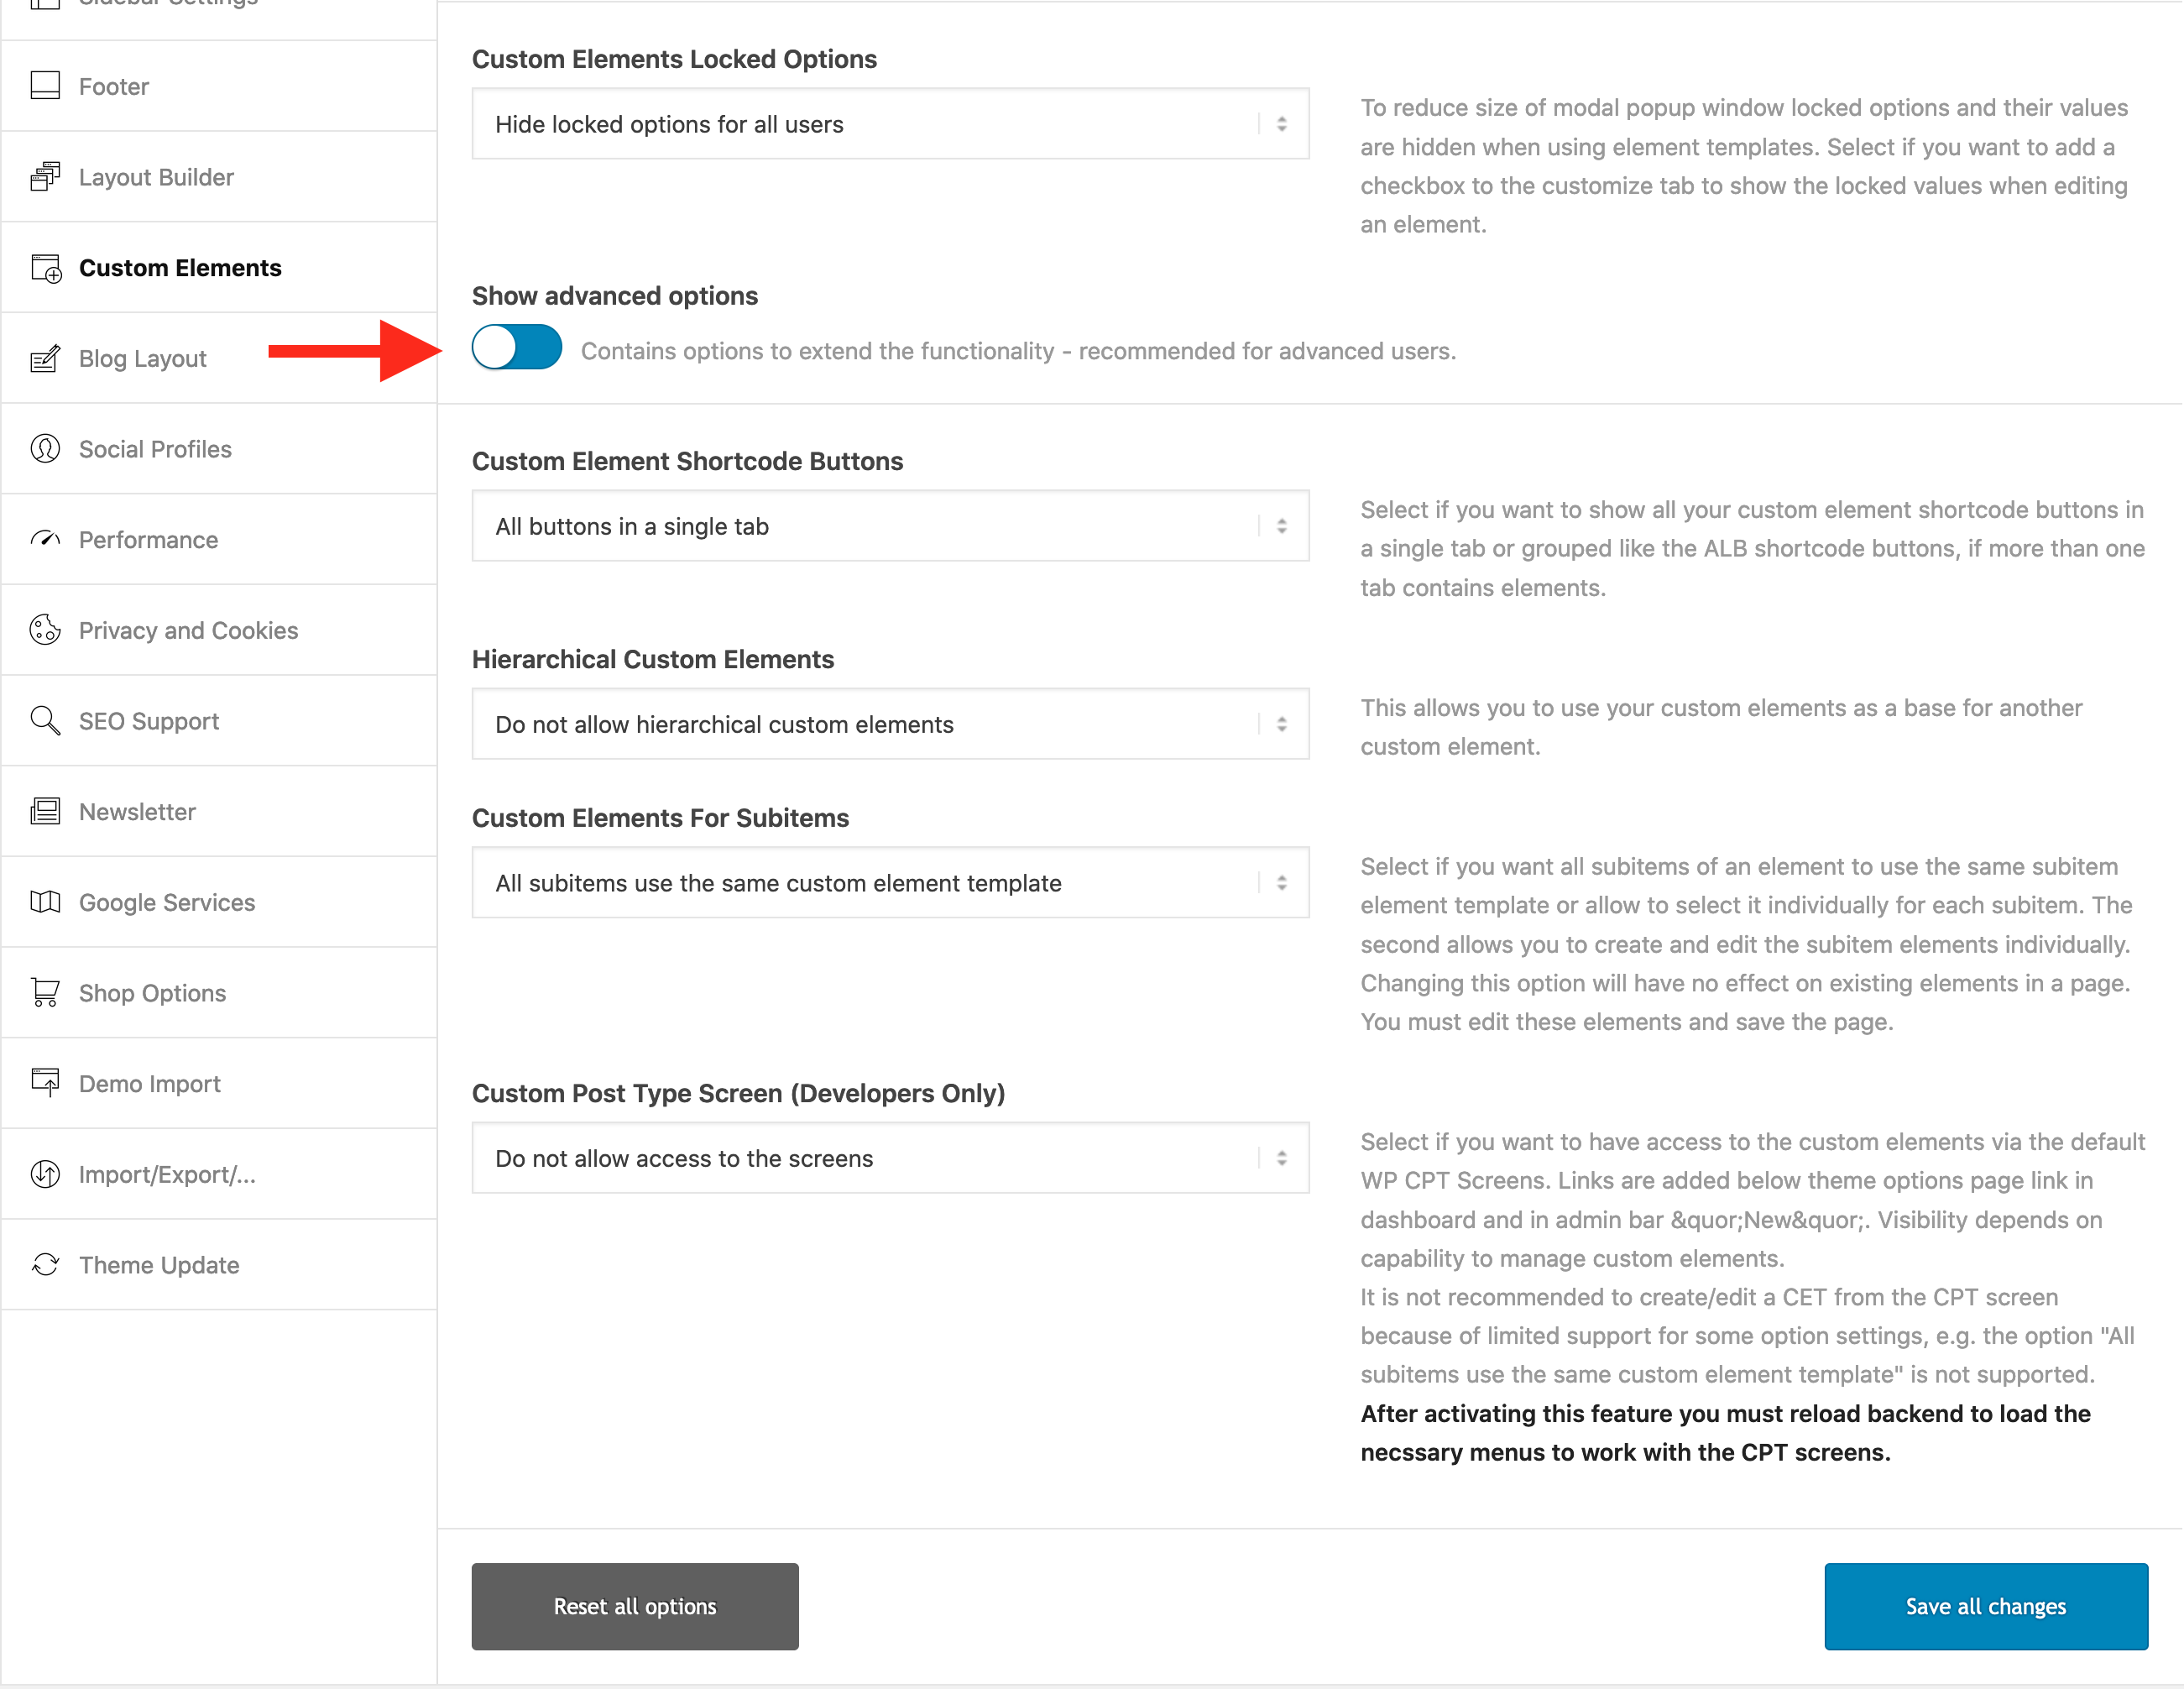
Custom Elements Advanced Option: Hierarchical Custom Elements
If this option is set to “Allow use of hierarchical custom elements” then a CET can be based on another CET. Then you can make your settings in the “Customize Tab” when editing a CET.
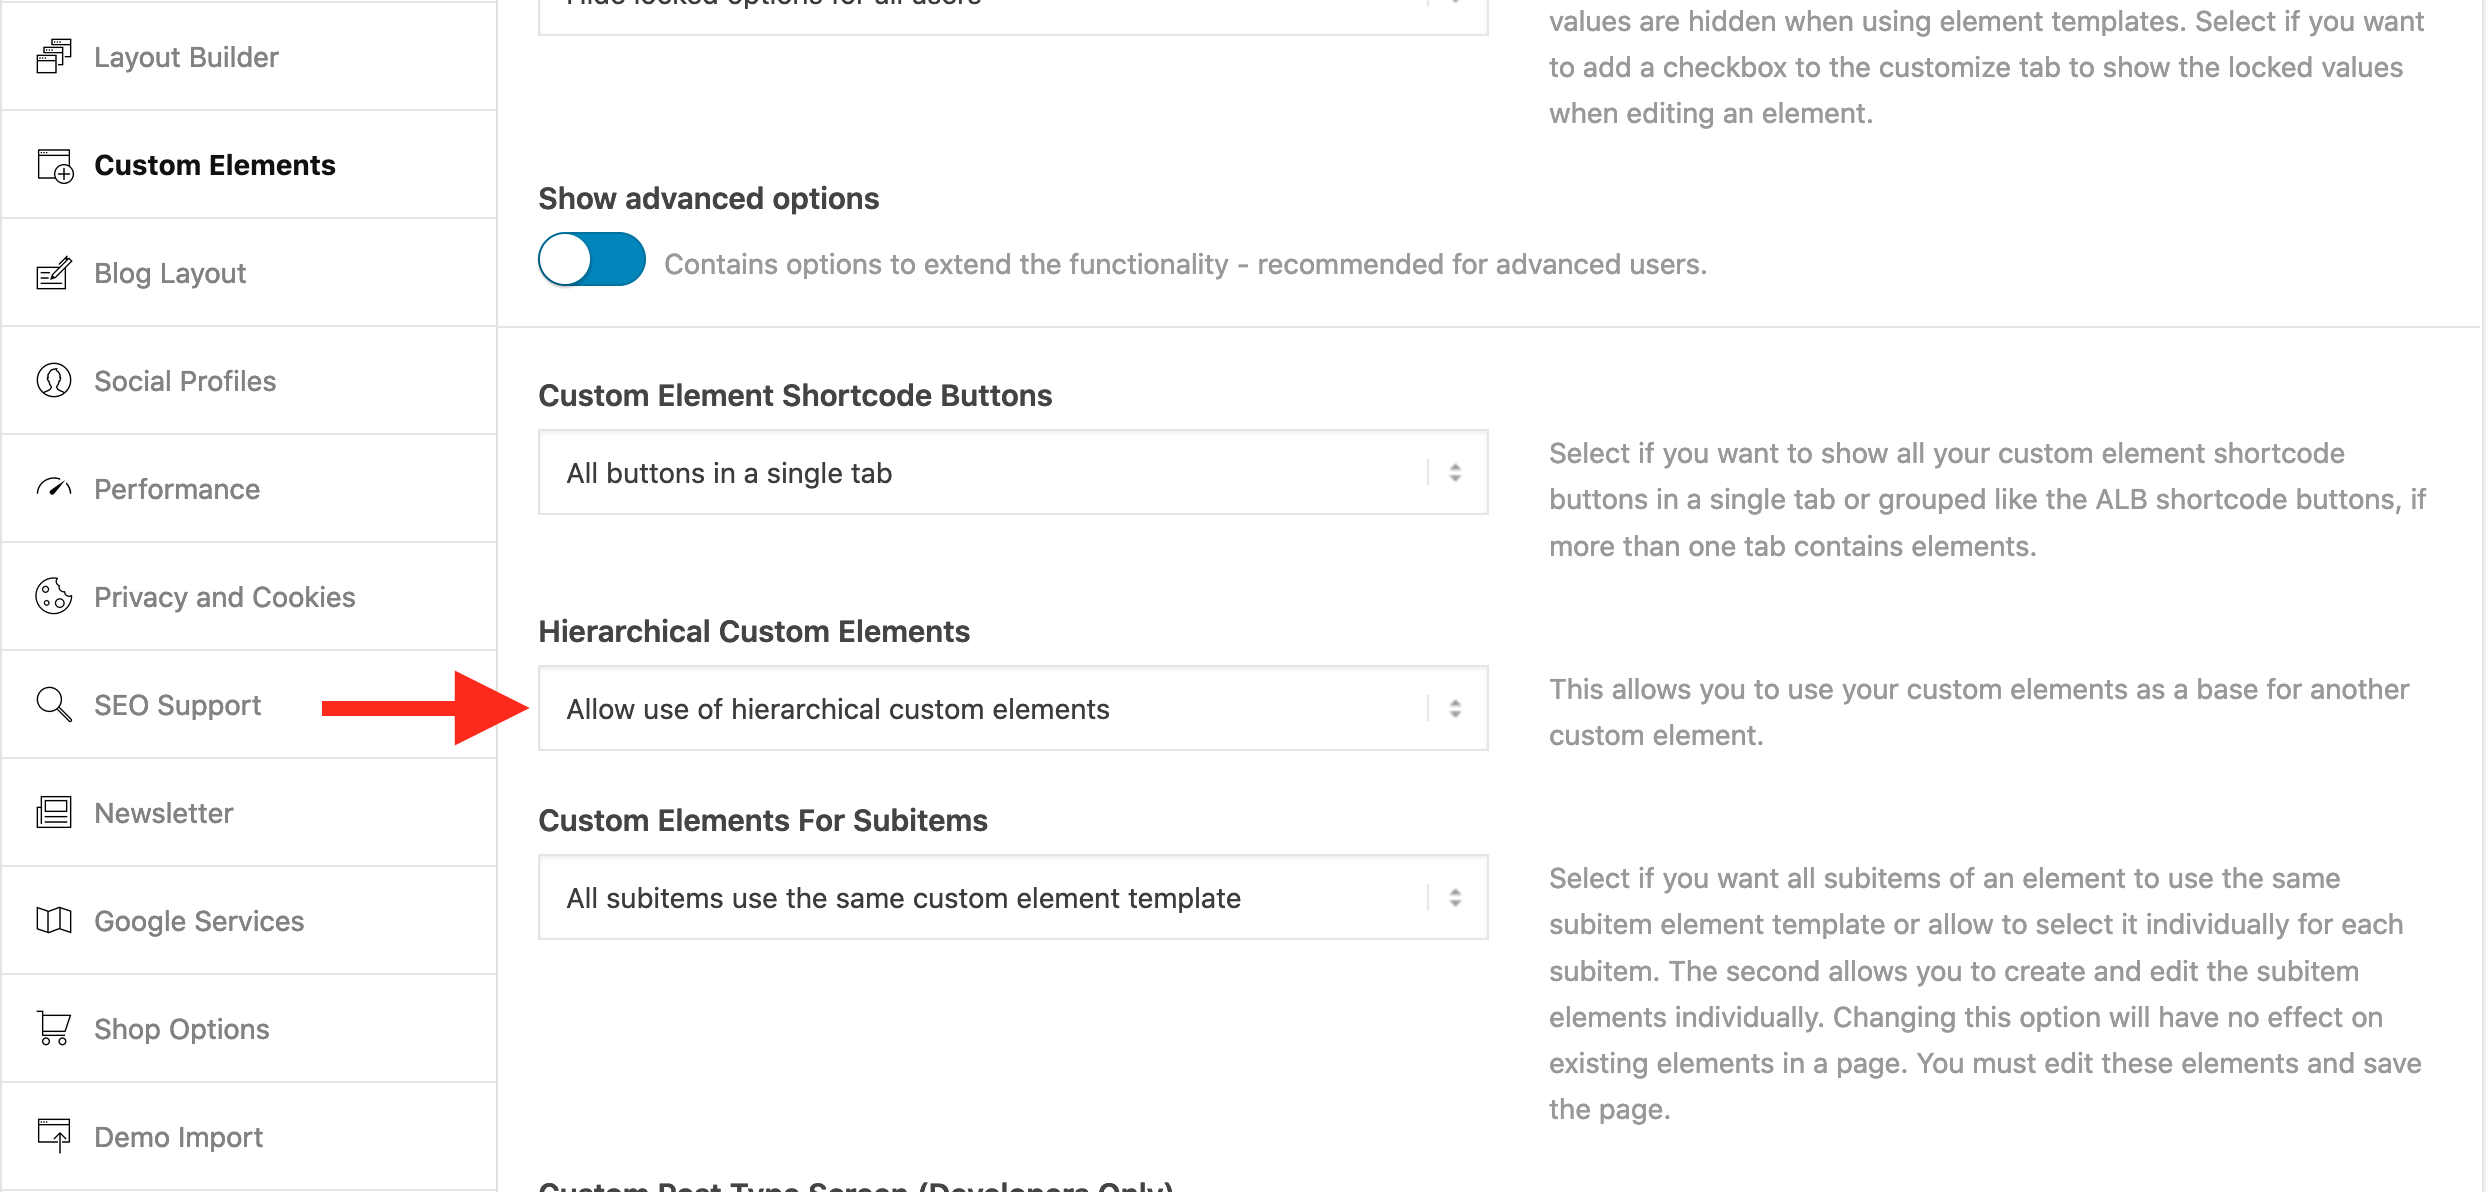
This allows you to group settings and narrow down the options that can be changed.
Basically the same behavior as described above, only one big difference:
Important – this behavior is different to the one when used on a page:
When changing to another CET as base the settings of this underlying CET are set as new defaults in this CET – but are not copied when the underlying settings are changed later. When switching back to “No Custom Element used” the existing settings are NOT changed.
Lets have a look at an example, with our button element:
Lets say you need a fixed color for all buttons:
Create a CET button “Fixed Color” with color: Red. and lock
Create another CET button “Small”:
-
- Select “Fixed Color” as Custom Element to lock values (= “Fixed Color” becomes parent)
- Color Red is locked, and it becomes the new default and cannot be changed

- Select Button Size “Small” and lock
When using the CET button “Small” on a page you find both color and size locked.

If you change the color to “Blue” in CET button “Fixed Color”, the CET button “Small” on the page changes to blue in frontend. The CET button “Small” did not change the color setting RED.
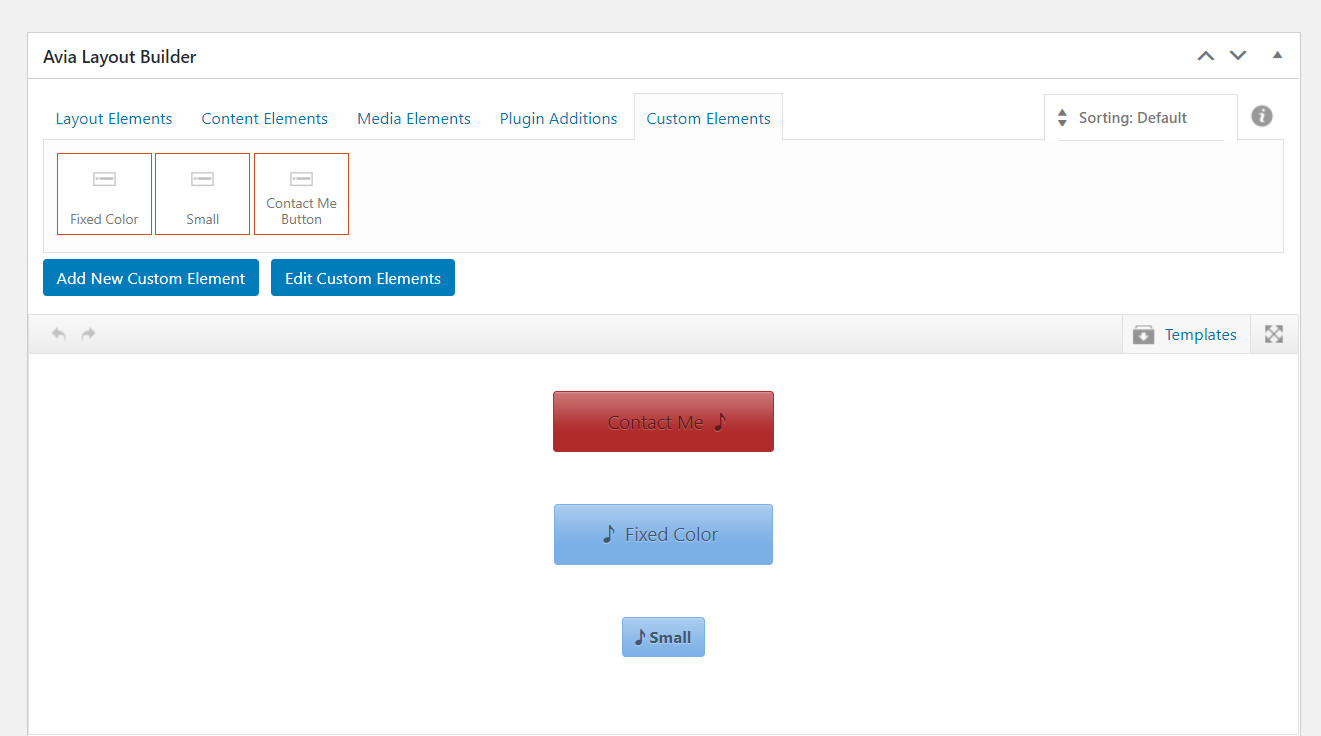
Important: In case you change the hierarchy of CET: Locked values are checked from first parent up
( “Fixed Color” -> “Small” -> …. )
Custom Elements Advanced Option: Custom Elements For sub-items
It is also possible to use CET for elements which open another modal for sub-items like Button Row which has buttons (as Button Row Items).
By default the setting is: ‘All sub-items use the same custom element template’.
With the default setting, when you create a CET for a Button Row and you define and lock your settings for the base element, and you can open one modal popup for a button and define and lock your settings for a button in the button row.
These settings and locked values are used as base for all buttons you later add to a button row when using this CET on a page.
This theme option setting is a shortcut only. In the backend a new CET for this subitem is created and managed. This allows you to select individual CET’s for each subitem.
When this theme option is selected, hierarchical CET’s are not possible for elements with sub-items.
“Individually select subitem custom element templates”
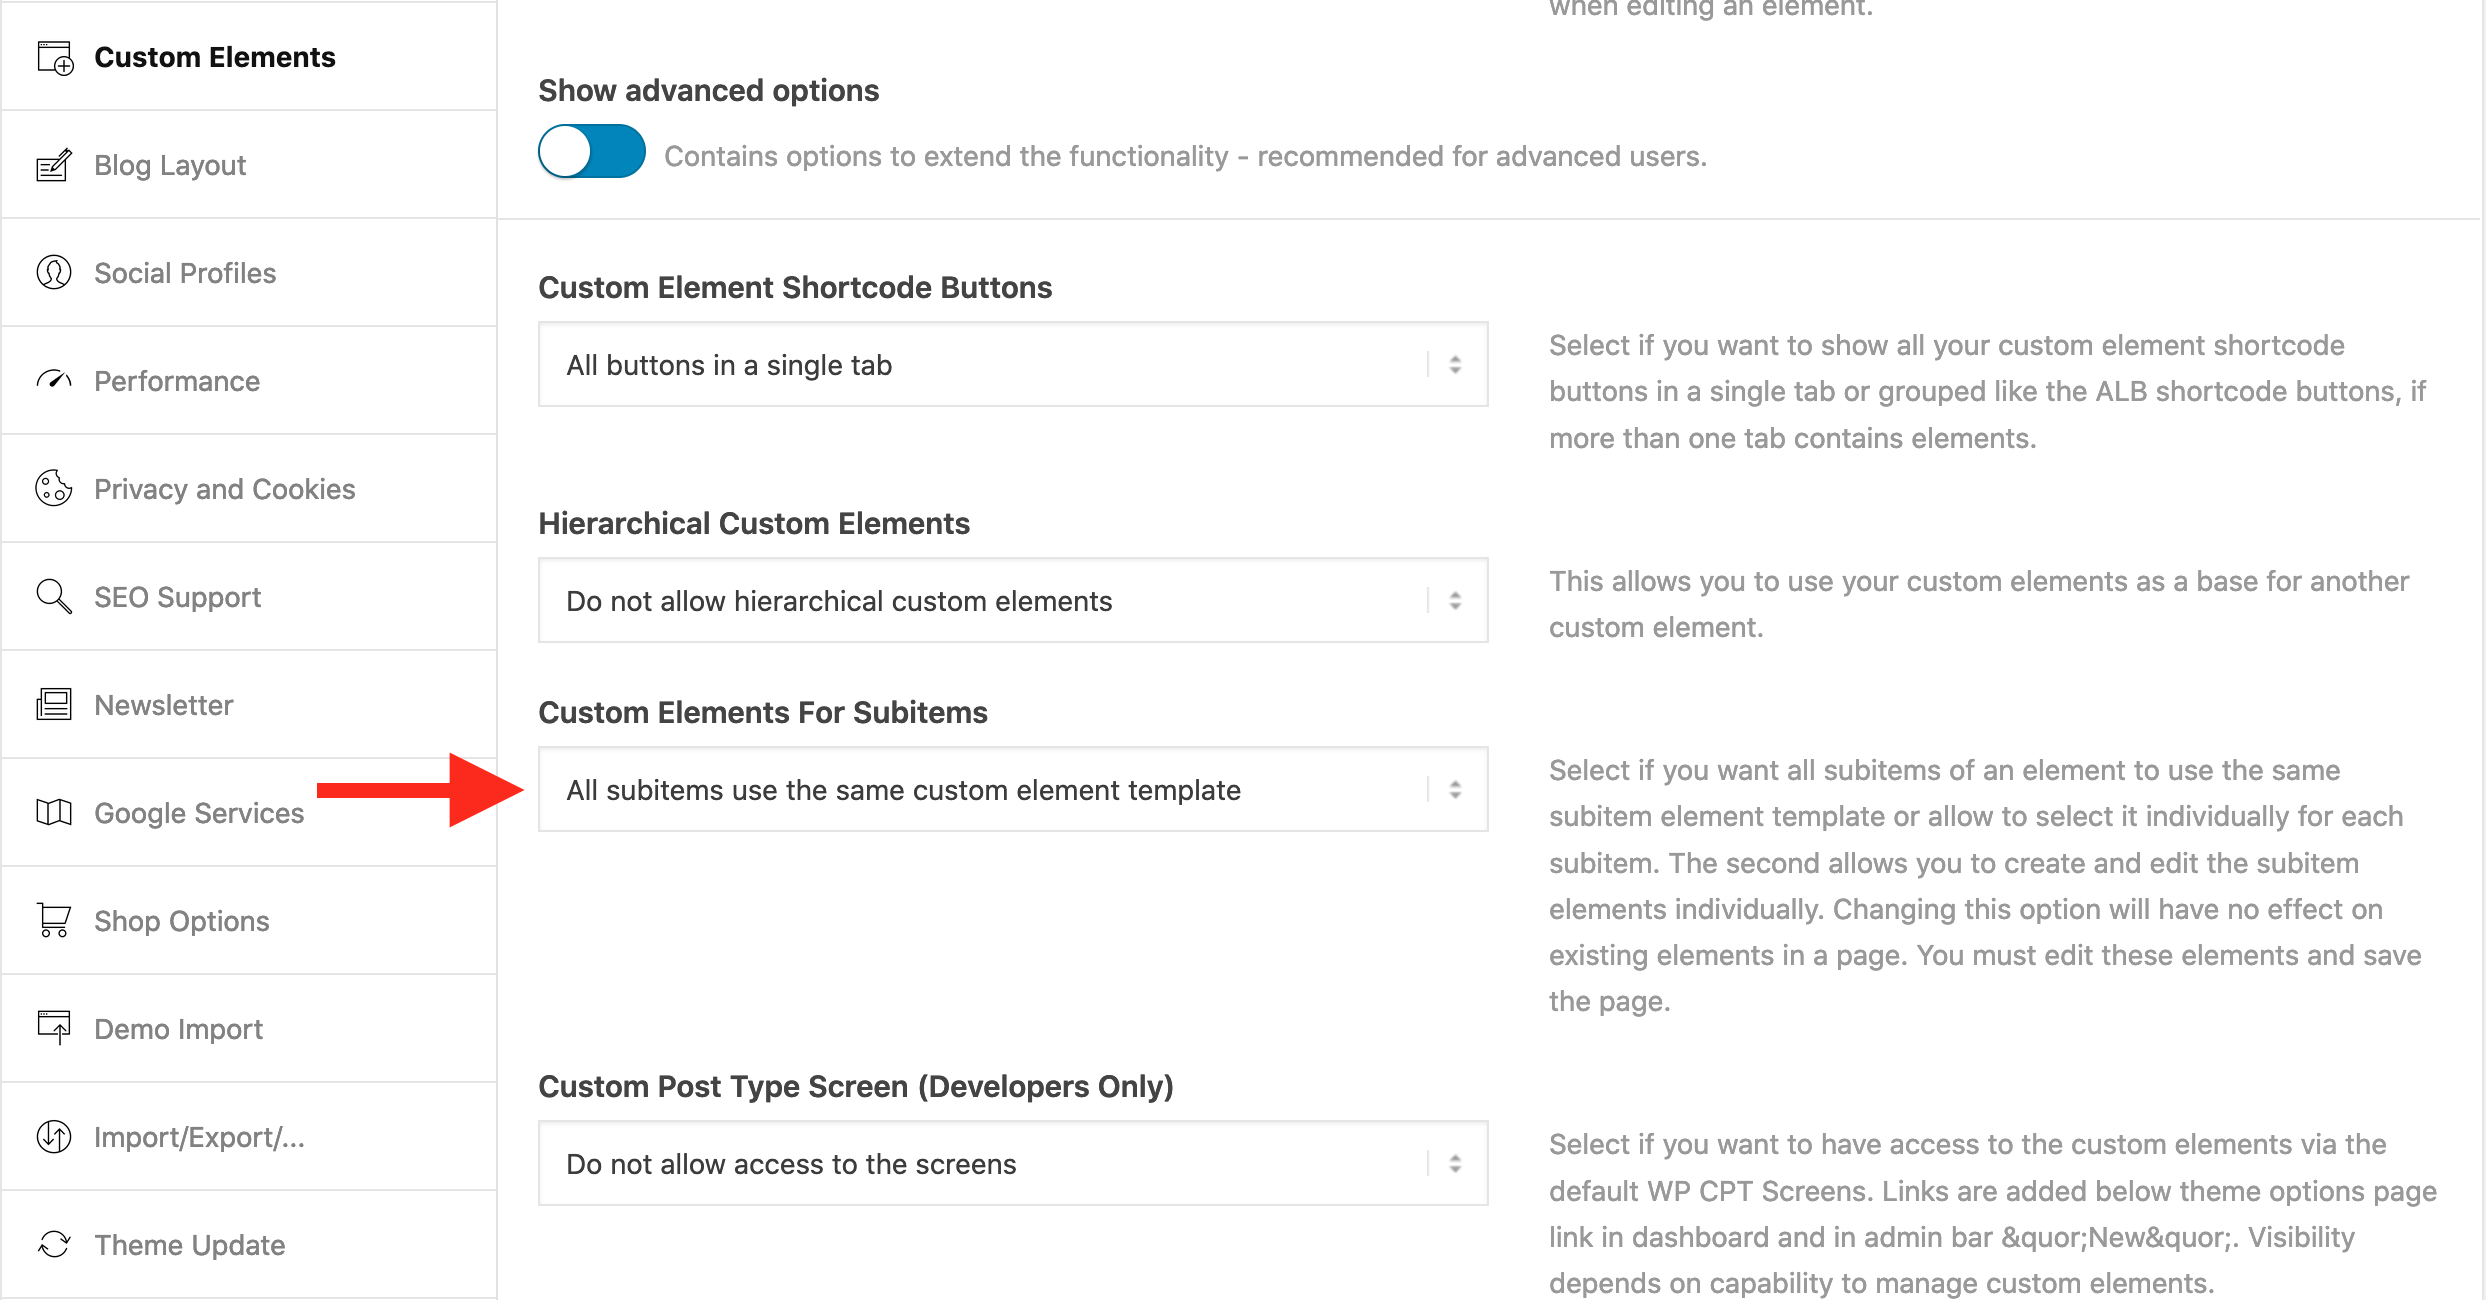
With this option selected you can use a seperate subitem CET, for each subitem used in the parent. We will explain this using an ALB Button Row element.
Create the CET for the Button Row itself
Steps are similar as described for a button:
- Click the Custom Elements Tab
- Click the “Add New Custom Element” button to create a new Custom Element
- A modal window opens:
- Select “Button Row”
- Give it a name, e.g. “Custom Button Row”
- Add an additional tooltip for this button row
- Click button “Create Element”
- The known button row modal popup opens with the default settings preselected and a few more settings:
- You will find the “Create an editable template” setting is set to “Base element template”.
- One button is already added with the default settings.
- An added Lock Symbol to lock the “Add/Edit Buttons” option.
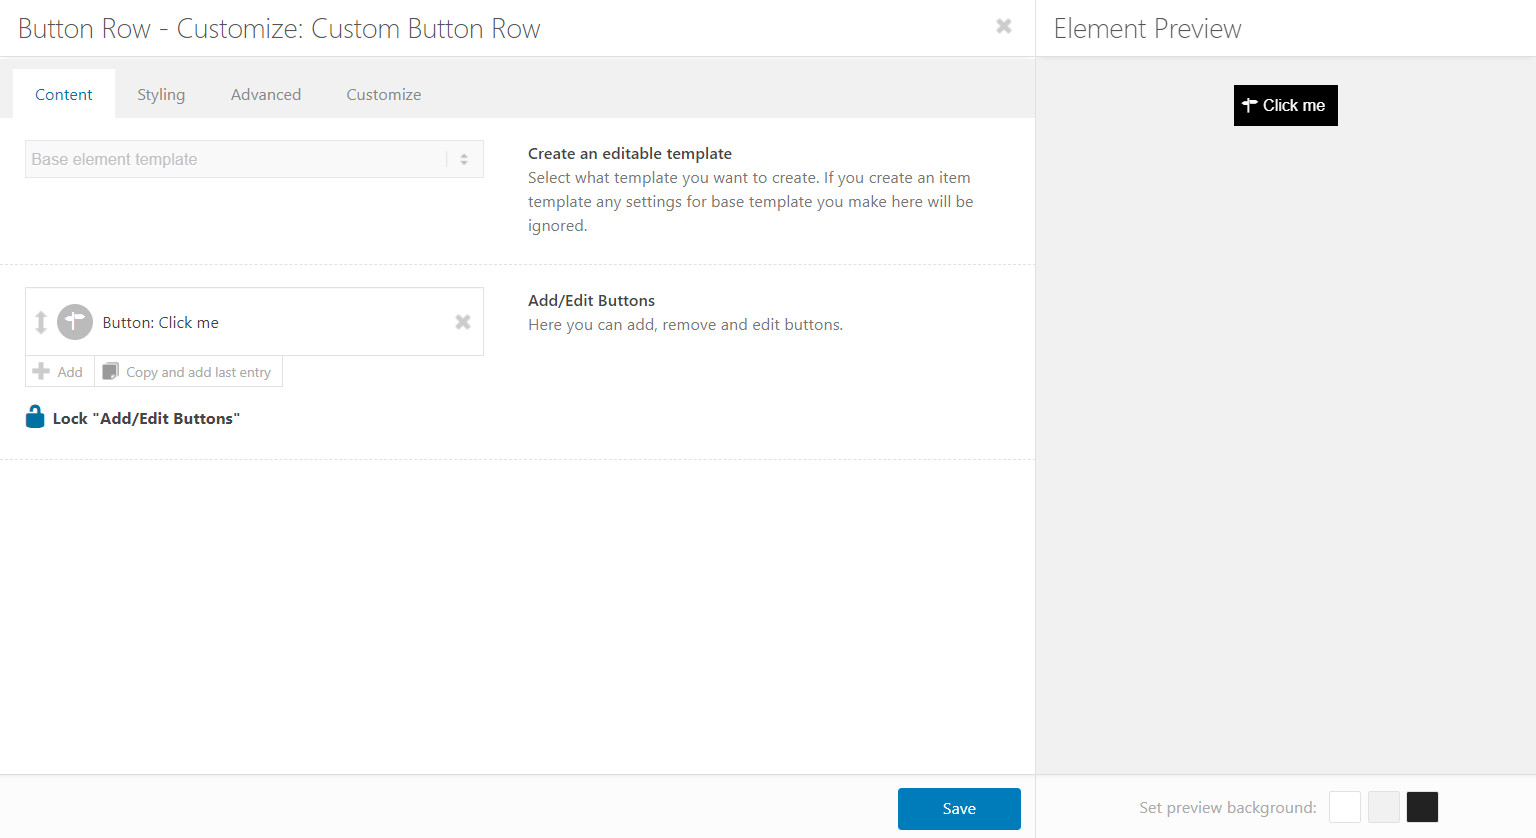
If you want a Button Row used several times with the same buttons
- Add your buttons as usual from this “Button Row – Customize: Custom Button Row”, as shown above, and make all the settings for the buttons you wish.
- Click the padlock Lock “Add/Edit Buttons”, to lock the option.
- Click the “Save” button.
- In the “Custom Elements” Tab you now see the button “Custom Button Row”
- Drag this button on the page and click to edit
- The buttons cannot be changed, added or removed – settings from CET for the buttons will be used
If you want to add CET buttons to the Button Row later
- You can ignore the Add/Edit Buttons option as any settings or buttons you make will be ignored.
- Make your settings for any other options and lock as you wish.
- Click the “Save” button
Now you must create a button for your Button Row, called a “Button Row Item”:
- Click the “Add New Custom Element” button to create a new Custom Element
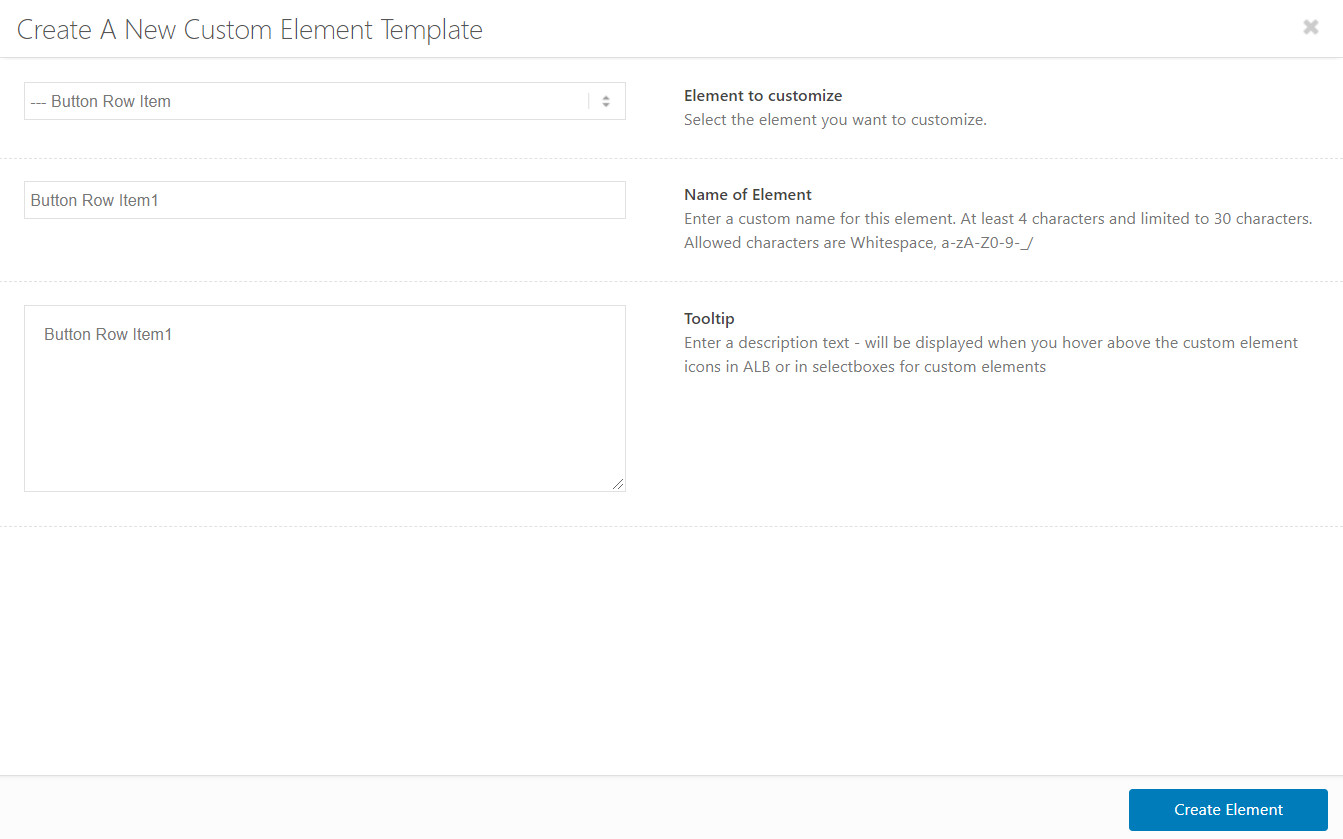
- A modal window opens:
- Select “— Button Row Item”
- Give it a name, e.g. “Button Row Item1”
- Add an additional tooltip for this button row item
- Click button “Create Element”
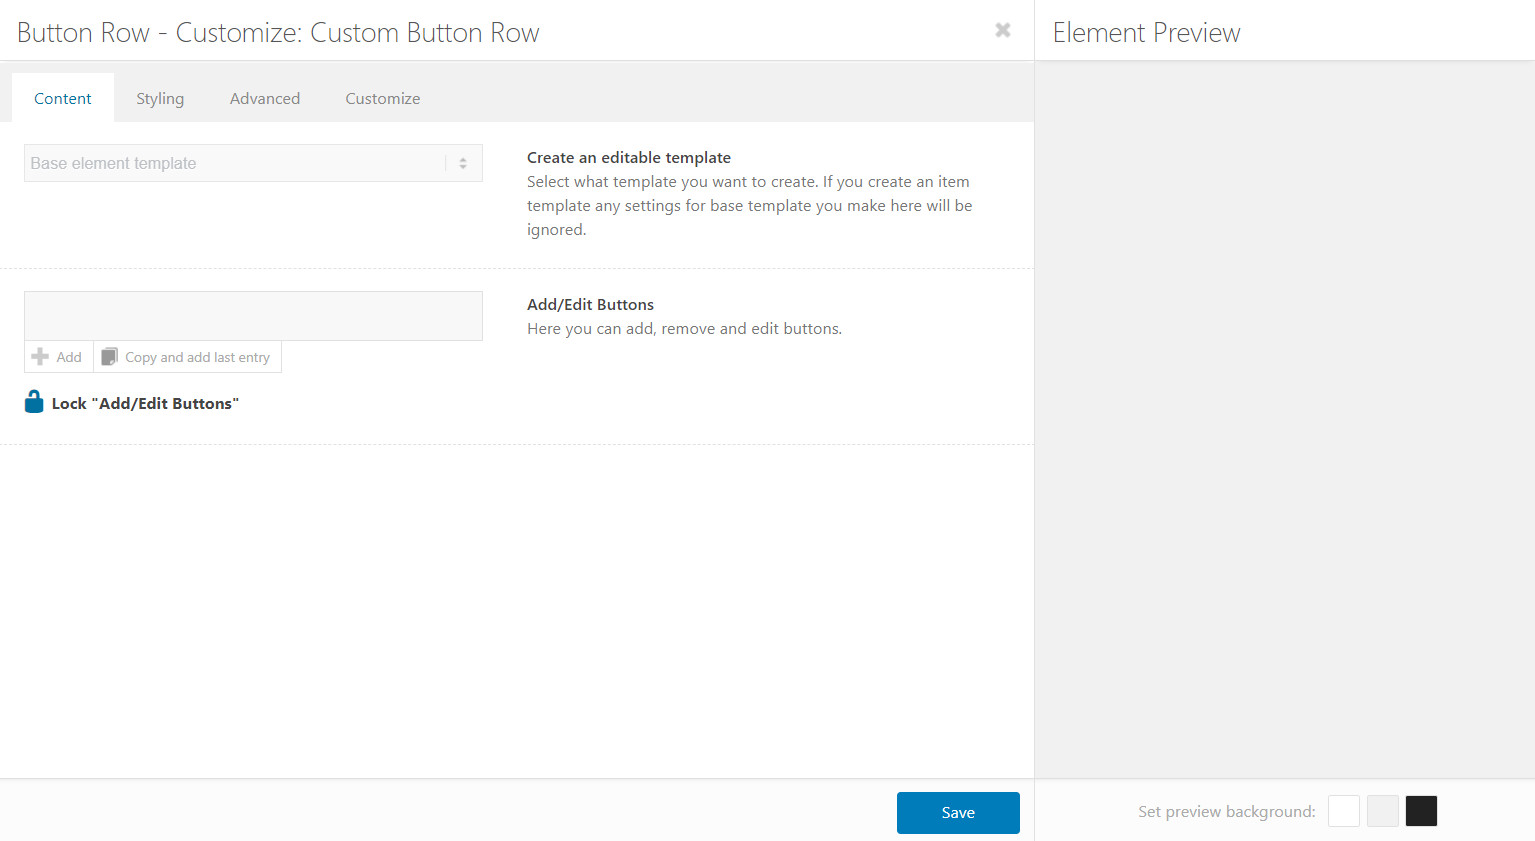
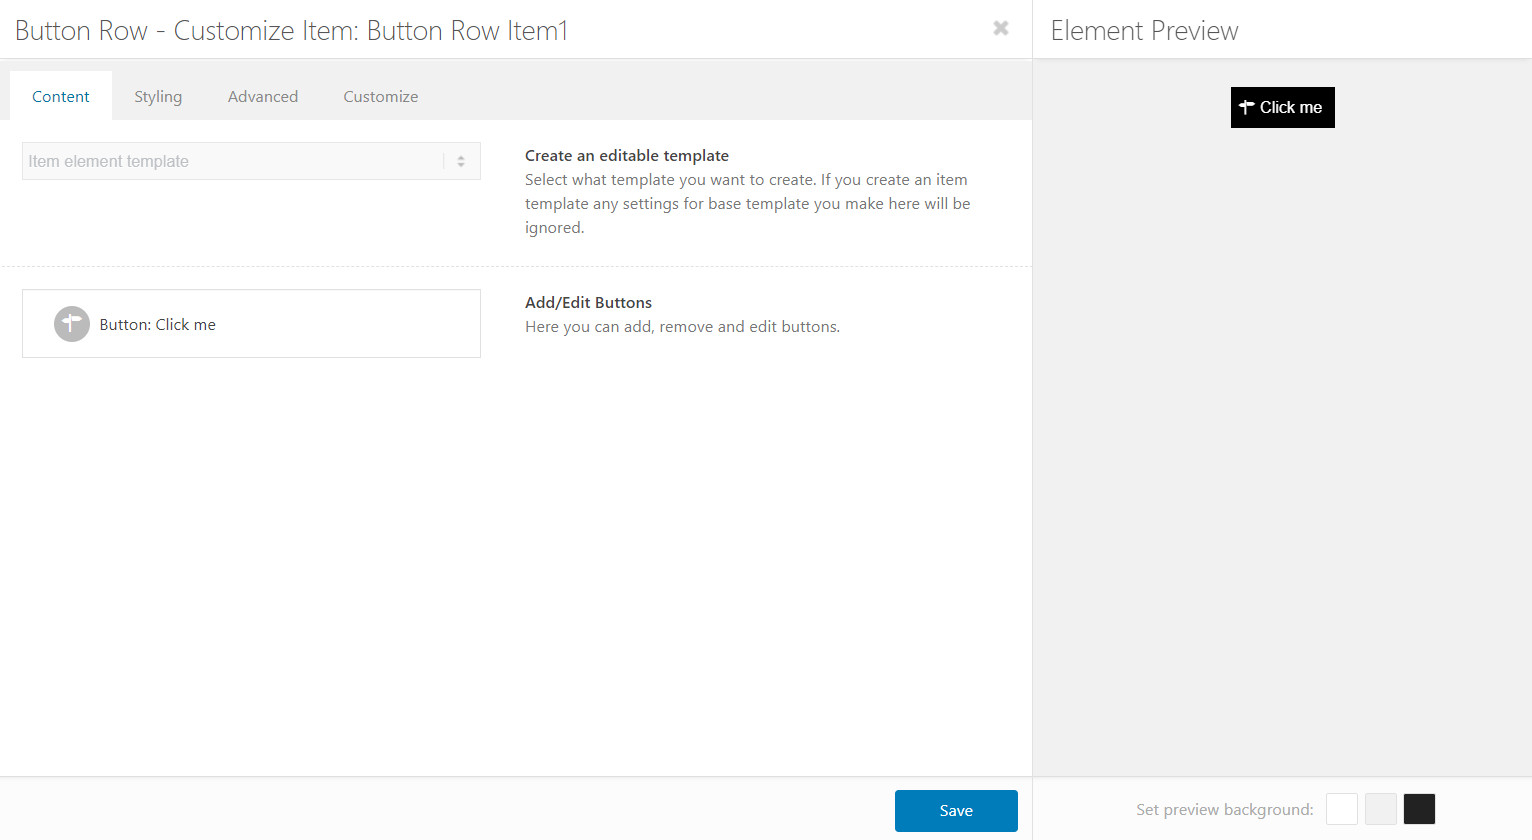
- The known Button Row modal popup opens, and only 2 options shown as we can only edit the button item:
-
- The “Create an editable template” is set with “Item element template”, and can not be changed.
- One button with default settings is already added and available.
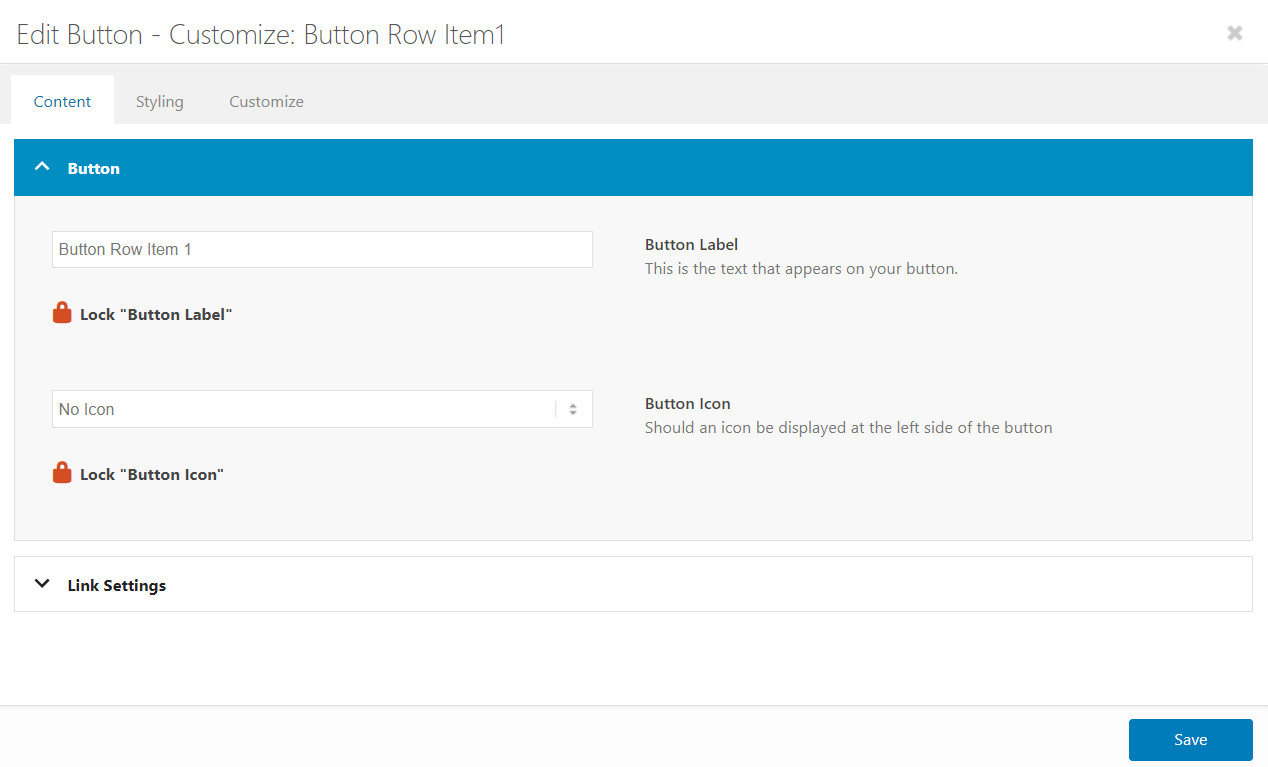
- Click the button
- Modal popup for the button opens with padlocks for each option, make change as you wish.
-
- Then click the “Save” buttons to close the popups.
- Add as many Button Row Items as you would like via “Add New Custom Element” button, following the same steps as above.
- Then drag the Button Row CET onto the page and click to edit.
- Now you can add as many Button Row Items you wish, in the modal popup of each Button Row Item select the CET from the dropdown in the Customize Tab.
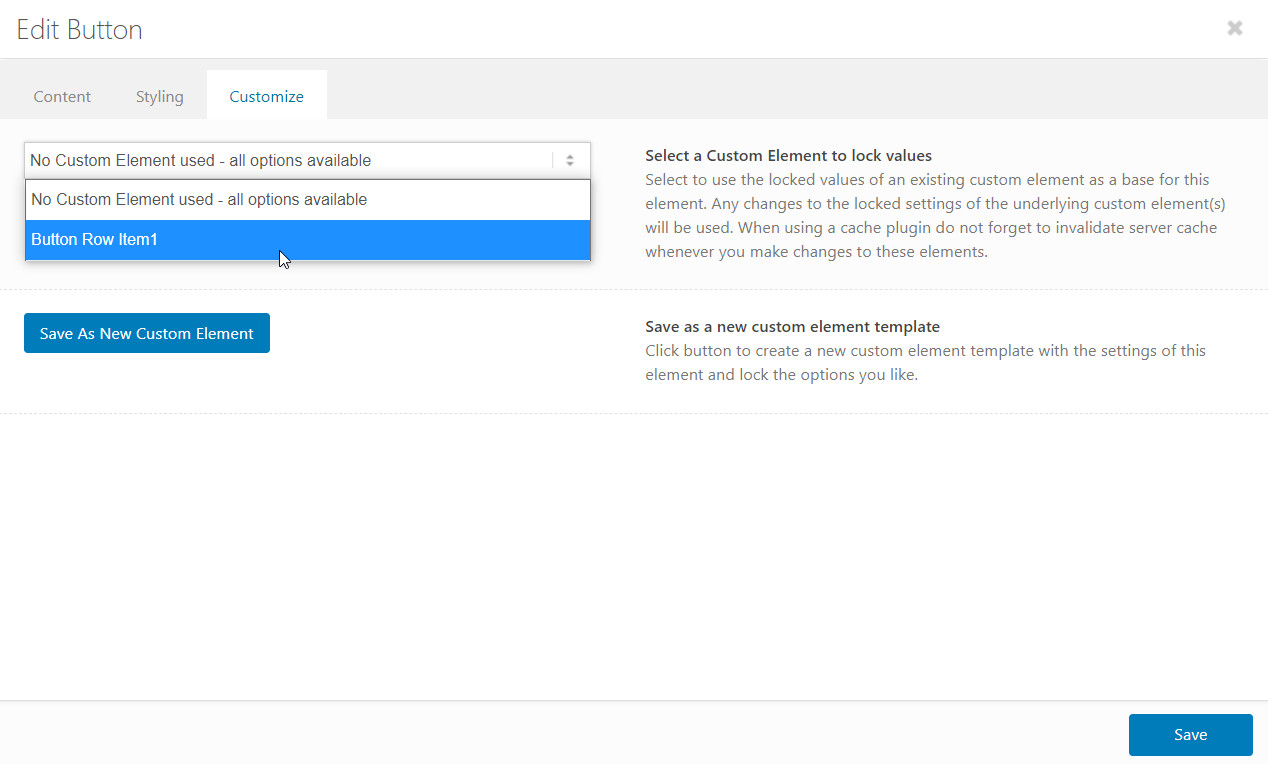
Here the Button Row CET shows the “Button Row Item” CET
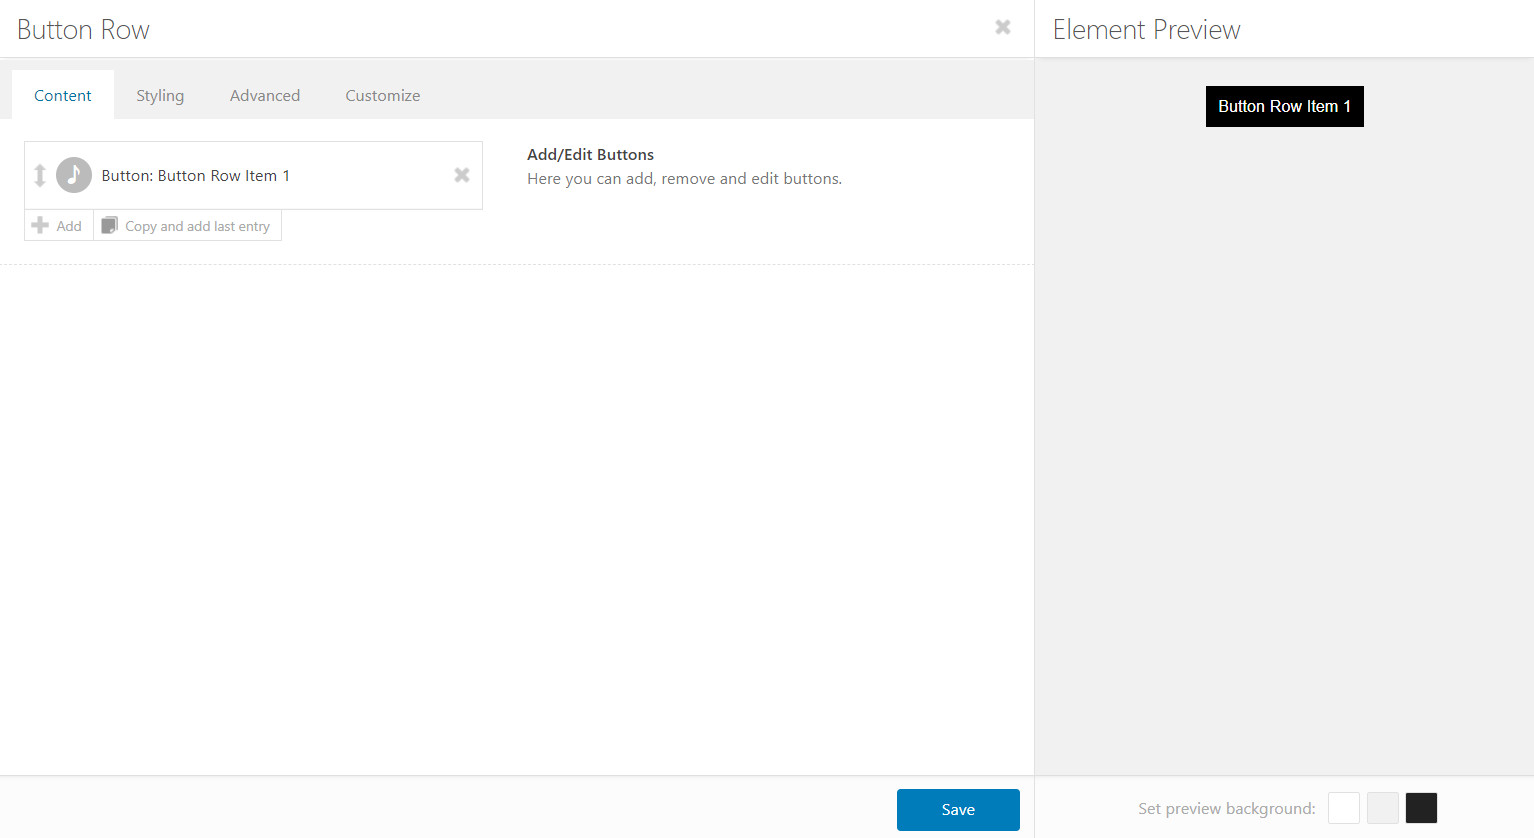
Please Note: A subitem CET, such as the “Button Row Item”, will not show in the ALB Custom Elements block area, but it will be available within the parent element CET.

For Developers
This is only a quick guide – for more details, please check already existing elements.
Mark an ALB element to support templates:
$this->config['base_element'] = 'yes';
$this->config['name_item'] = __( 'Button Row Item', 'avia_framework' );
$this->config['tooltip_item'] = __( 'A Button Row Button Element', 'avia_framework' );
Add the template selection tab:
				array(
						'type'			=> 'template',
						'template_id'	=> 'element_template_selection_tab',
						'args'			=> array( 'sc' => $this )
					),
Mark options to support locking (not all options support locking yet – check in config-templatebuilderavia-template-builderphphtml-helper.class.php)
'lockable' => true,Select multiple options to lock with:
'locked' => array( 'icon', 'font' ),For a type = modal_group element add:
'editable_item' => true,in editor_element():
$locked = array();
$attr = $params['args'];
$content =  $params['content'];
Avia_Element_Templates()->set_locked_attributes( $attr, $this, $this->config['shortcode'], $default, $locked, $content );
and use:
$this->class_by_arguments_lockable( 'icon_select, color, size, position', $attr, $locked )

$this->update_template_lockable
If template needs a reload to show locked options correctly add to (outer) container:
data-update_element_template='yes'in shortcode_handler()
Avia_Element_Templates()->set_locked_attributes( $atts, $this, $shortcodename, $default );If $content is locked:
$locked = array();
Avia_Element_Templates()->set_locked_attributes( $atts, $this, $shortcodename, $default, $locked, $content );
Custom Elements and WPML
Content moved into Translation page


