How to add custom CSS
Overview
In this section, we will learn how to overcome a situation in which you have a specific design requirement but the styles you require is not available in the theme. As you may have already guessed it, yes! we are going to add custom CSS code and style the theme elements to make it look the way you want.
Example: Add a mouseover effect to a button element so that it animates by shaking sideways a few times.
Before we start
How to inspect an element on the page?
To custom style the theme elements you need to know some basics of CSS and how to use the chrome developer tool to find the CSS class names of the page elements. To inspect the elements on your page just right click and select inspect. This opens up the inspect window and you can navigate the DOM to find the class name of any element.

If this is a new topic for you please feel free to watch the videos for a quick demonstration on how to use the chrome developer tools and some advanced tips.
Enable custom CSS class name support
First, go to Enfold options > Layout Builder and make sure “Hide template builder developer options” option is disabled so that we can assign a custom class name to any element in the theme. Now that we can assign a specific class name to the theme elements we can target them using custom CSS and style the elements the way you want it to look.
Going back to our example, to animate a button element, first add a button element on to your page and click on it to open the button element options. Go to Advanced > Developer Settings tab and find “Custom CSS Class” field and add a custom class name “button-hover-effect” (no need to add “.” in front of the class name as we normally do in CSS).
Example CSS code
Now that we have successfully added a custom class name to the button element. We need the custom CSS code to target this button element and animate it on hover. Below is the required custom CSS code which we will add to the theme.
Code snippet:
CSS
/*Hover Effect*/
.button-hover-effect .avia-button:hover {
    animation: shakeMe .180s cubic-bezier(.15, 0, 1, .03) infinite;
    -webkit-animation: shakeMe .180s cubic-bezier(.15, 0, 1, .03) infinite;
    -moz-animation: shakeMe .180s cubic-bezier(.15, 0, 1, .03) infinite;
    -o-animation: shakeMe .180s cubic-bezier(.15, 0, 1, .03) infinite;
    -ms-animation: shakeMe .180s cubic-bezier(.15, 0, 1, .03) infinite;
}

/*Keyframes*/
@keyframes shakeMe {
    25% {
        transform: translateX(2px);
        -webkit-transform: translateX(2px);
        -moz-transform: translateX(2px);
        -o-transform: translateX(2px);
        -ms-transform: translateX(2px);
    }
    50% {
        transform: translateX(-3px);
        -webkit-transform: translateX(-3px);
        -moz-transform: translateX(-3px);
        -o-transform: translateX(-3px);
        -ms-transform: translateX(-3px);
    }
    100% {
        transform: translateX(2px);
        -webkit-transform: translateX(2px);
        -moz-transform: translateX(2px);
        -o-transform: translateX(2px);
        -ms-transform: translateX(2px);
    }
}
Different ways to add custom CSS
OK! let’s dive in. There are a few different ways to add custom CSS to the Enfold theme as mentioned below.
- Add CSS to Quick CSS
- Child theme style sheet
- Use a Code block element
- Enqueue a custom CSS file
Quick CSS
The Quick CSS section is provided in the theme options to add your custom CSS code easily and quickly. You can access this section from the Enfold theme Options > General Styling > Quick CSS

Adding small snippets of CSS code works great in Quick CSS but if your list of custom code is growing we recommend using a child theme.
Use a Code block element
Yes, you can use the code block element to add custom code. However please note that the code in the code block will have an effect only on the specific page it is added to and not on the whole site.
To add CSS inside the code block you need to wrap it inside the style tag. So, your final CSS should look like the below example:
<style>


/* Add your custom styles here */


</style>
Child theme
A Child theme inherits all features from the main theme but any custom code or files added to the child theme will be given priority over the main theme files. This helps us in adding modifications without losing them when the main theme is updated. If you haven’t installed the child theme already please take a look at the step by step tutorial
After installing the child theme it is really easy to add your custom CSS and manage it.
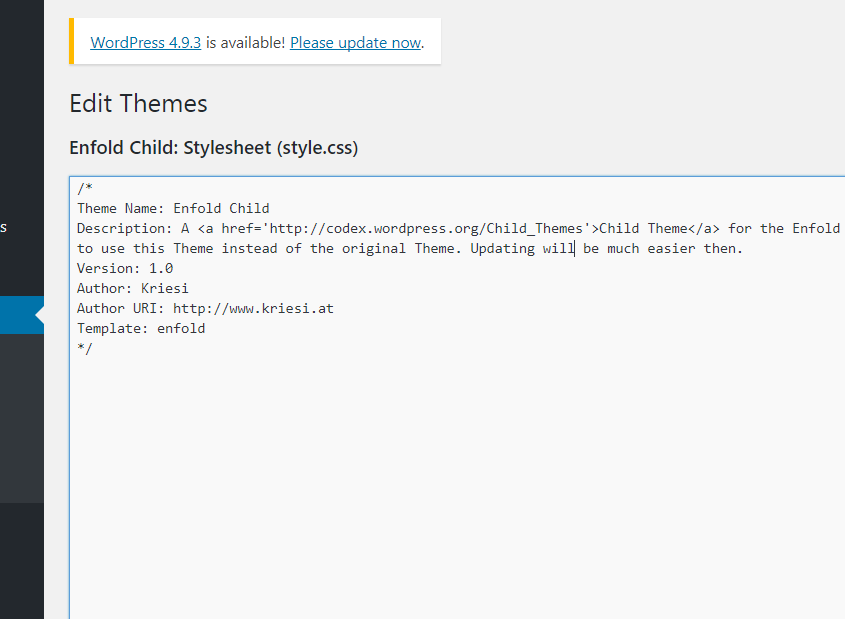
- Go to Appearance > Editor > Style.css ( Styles.css should open by default).
- Do not edit the theme info on the top unless you know what you are doing. But you can continue to add your own styles below. Go ahead copy the CSS for the button element and paste it here.

The style.css can also be accessed via FTP. Once you login to FTP go to wp-content/themes/enfold-child/style.css
Enqueue custom CSS
Assuming you have installed the child theme, which is always recommended for any custom modifications. We will enqueue a custom CSS file called my_custom.css
Steps to add a custom CSS file.
1. Create your custom.css file.
2.Create a new folder called “css” in child theme root directory and place your “my_custom.css” file in wp-content > themes > enfold-child > css > my_custom.css
3. Add the below code to your functions.php file.
add_action( 'wp_enqueue_scripts', 'theme_enqueue_styles' );
function theme_enqueue_styles() {
    wp_enqueue_style( 'parent-style', get_template_directory_uri() . '/style.css' );
    wp_enqueue_style( 'child-style',
        get_stylesheet_directory_uri() . '/css/my_custom.css',
        array('parent-style')
    );
}


