
WordPress Beginners: How to Start With Enfold From Scratch
New to Enfold and wondering where to start? Here is a small beginners guide
Our best-selling Enfold theme is a perfect theme for users of all levels of technical ability, but it’s particularly useful for those new to the world of WordPress.
Although it ships with a Demo Content Import feature to help users hit the ground running, we frequently receive requests for an overview of how to start with Enfold from scratch.
In this article we’ll walk you through everything you need to look at for building an Enfold site from the ground up without relying on imported content.
As this could be your first exposure to the theme, let’s briefly recap some of the reasons why Enfold is a particularly good option for beginners.
What Makes Enfold Great for Beginners
We shipped the original version of Enfold back in 2013 and have been continually upgrading its feature set ever since. The latest and greatest version is Enfold 3.1, which retails for $59.
Check out a working demo to see a full list of its features. Here are three key points to highlight:
- On the front end, the 100% responsive layout that comes as standard is designed to let you avoid the many potential pain points of trying to roll your own mobile-ready solution.
- Meanwhile, behind the scenes, an intuitive admin interface frees you from the need to wrestle with theming code.
- A lifetime guarantee of free updates means you’ve also effectively future-proofed your site on purchase.
Put those three things together and you’ve got a great theming option for beginners.
That said, let’s start looking at how to set up an Enfold site from scratch.
Getting Started with Enfold
If this is your first time using WordPress, we recommend having a quick read of the New to WordPress page before going any further.
It’s an excellent overview that, along with the Using Themes page of WordPress’ documentation, will give you some instant context for many of the areas we’re about to look at.
We also recommend bookmarking our dedicated Enfold support forum and the Kriesi documentation center so you’ve always got somewhere to turn for Enfold specific queries.
Let’s have a quick look at installation to kick things off.
Installing Enfold
For the purposes of this article, we’re assuming that you already have WordPress installed. If you’re looking for help in that department, begin with the official reference in the Codex and branch out from there.
There are two basic ways of installing Enfold:
- installing via the administration panel in WordPress, and
- manually uploading to the /wp-content/themes/ directory of your installation.
Depending on your local or remote setup, there are a number of potential complexities that could come into play with the latter method. For this article, we’ll be keeping things nice and simple and using the first option.
We have, however, put together a comprehensive guide to installing Enfold via FTP right here on the site if you want to go down that road.
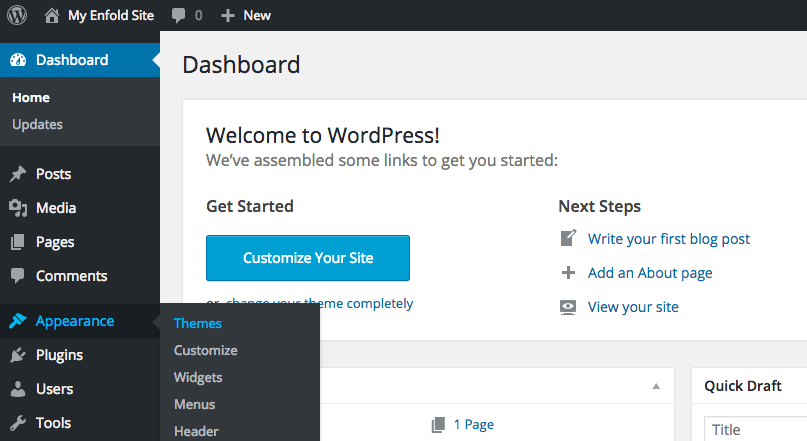
Let’s start by popping into the admin panel of our WordPress install and navigating to Appearance > Themes.
As you can see in the Themes page of my install, I currently have just three default themes available. Let’s kick things up a notch and bring Enfold into the mix by hitting Add New Theme.
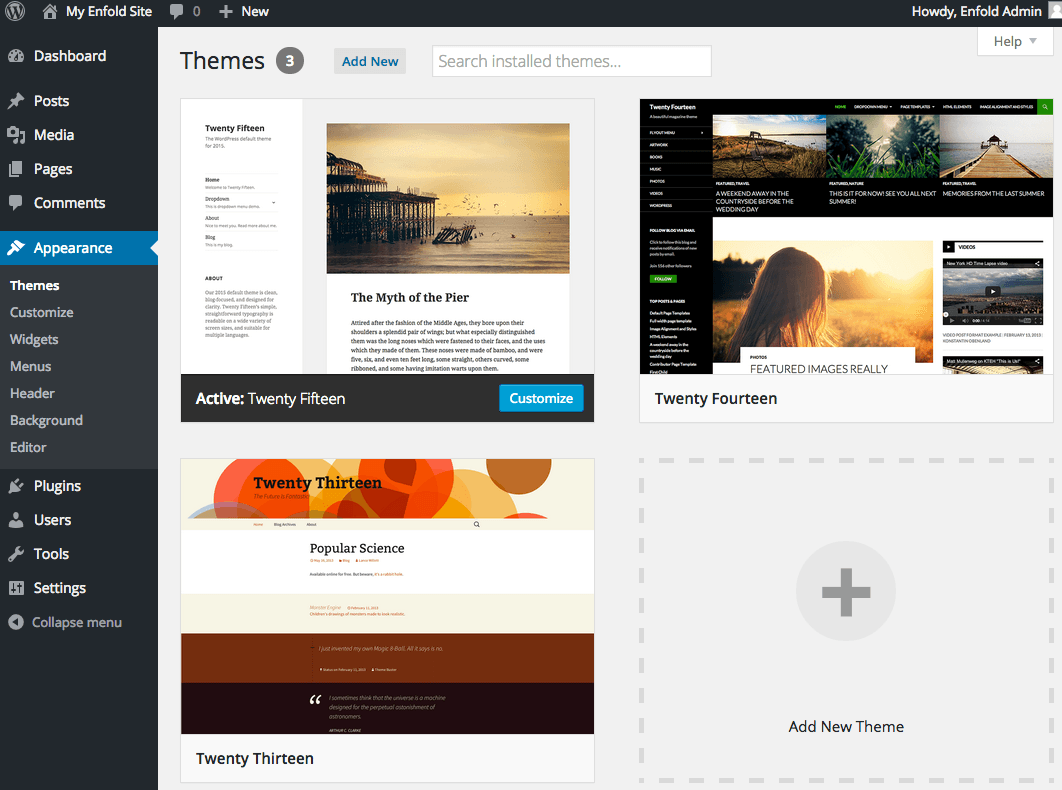
This brings us to the Add Themes screen where we are free to select a local copy of the Enfold theme in .zip format and upload.

At this stage, if you find yourself facing a slightly ominously worded message on the screen reading Are you sure you want to do this?, please don’t panic!
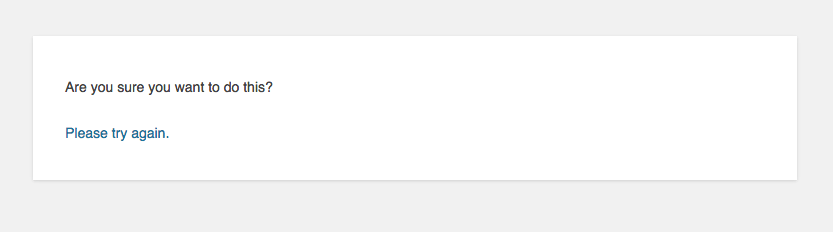
It’s a common installation gotcha that can occur if you’ve inadvertently tried to upload the overall package .zip file rather than the Enfold theme .zip contained within it. Locate the latter and give it another shot.
This is also as good a time as any to remind you that Enfold comes with free support. If you find yourself hitting real difficulties at this point or any other, just get in touch and we’ll be happy to help you resolve the matter.
All should now be well and hopefully you are now looking at something similar to the success confirmation below.
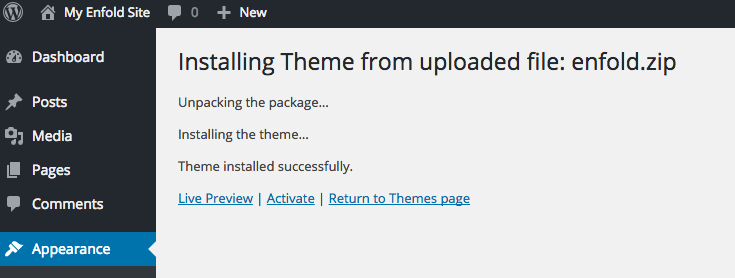
Hit Activate and there are then three things we want to bring to your attention in the screenshot that follows:
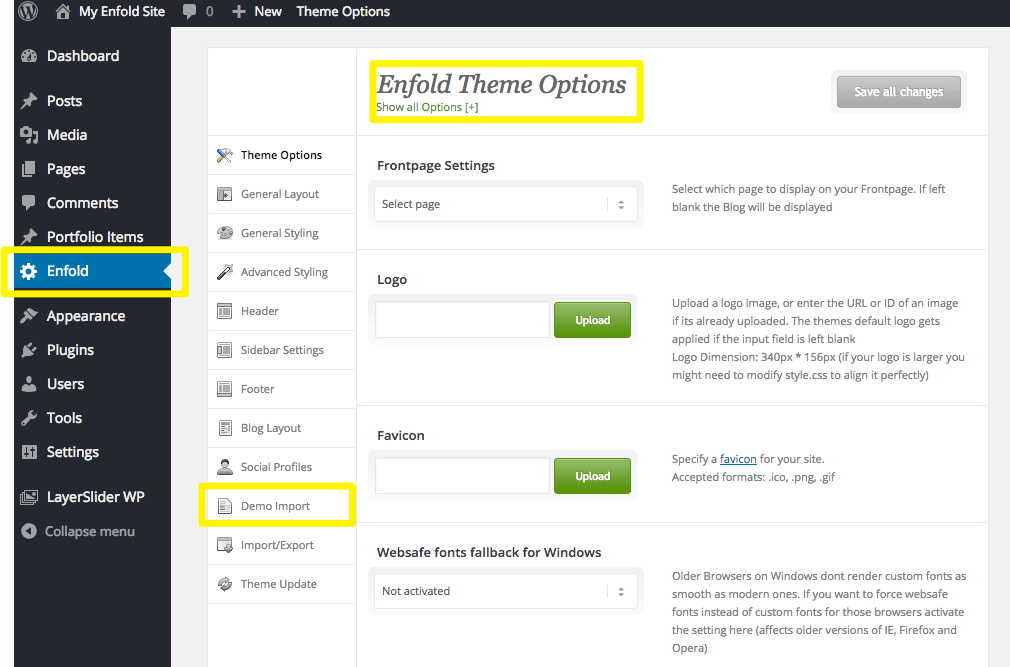
- A side menu item entitled Enfold is now visible. This is where you need to get back to in order to manage most Enfold specific options down the line.
- This menu item is currently active and you should be able to see the Enfold Theme Options heading in the right-hand panel.
- You have the option of setting up an entire default site instantaneously at this or any other point by using the Demo Import. It’s not a road we’ll be going down in this article but you might want to read up on it for future reference.
At this point Enfold is installed and we know where to look to access its functionality.
Let’s move on to setting your site up.
Laying the Foundations of Your Site
The first point to make here is actually nothing to do with Enfold – or any other theme for that matter. It’s about the importance of defining some sort of provisional site structure in advance before you try to build it.
The subject of how far to go with this is something of a potential rabbit hole so we’ll limit ourselves to some general pointers:
- Keep things simple. An outline on paper of the main pages and sections you think your site will require is enough to get the ball rolling.
- If you want an excellent, more detailed overview of the process of site planning in general, have a look at this Smashing magazine article on the subject. An oldie but a goodie.
- If you want to really bone up on all aspects of the planning process, get your hands on a copy of Steve Krug’s classic Don’t Make Me Think.
- If you’re looking for a user-friendly, breakdown of a specific use case – a small business brochure site – have a look at our recent blog post on that subject.
Ok, with that caveat out of the way, let’s look at the areas of Enfold to hit in sequence.
Setting up Your Header
Start with a visit to Enfold > Header to review the options that will define the top of your website’s pages.
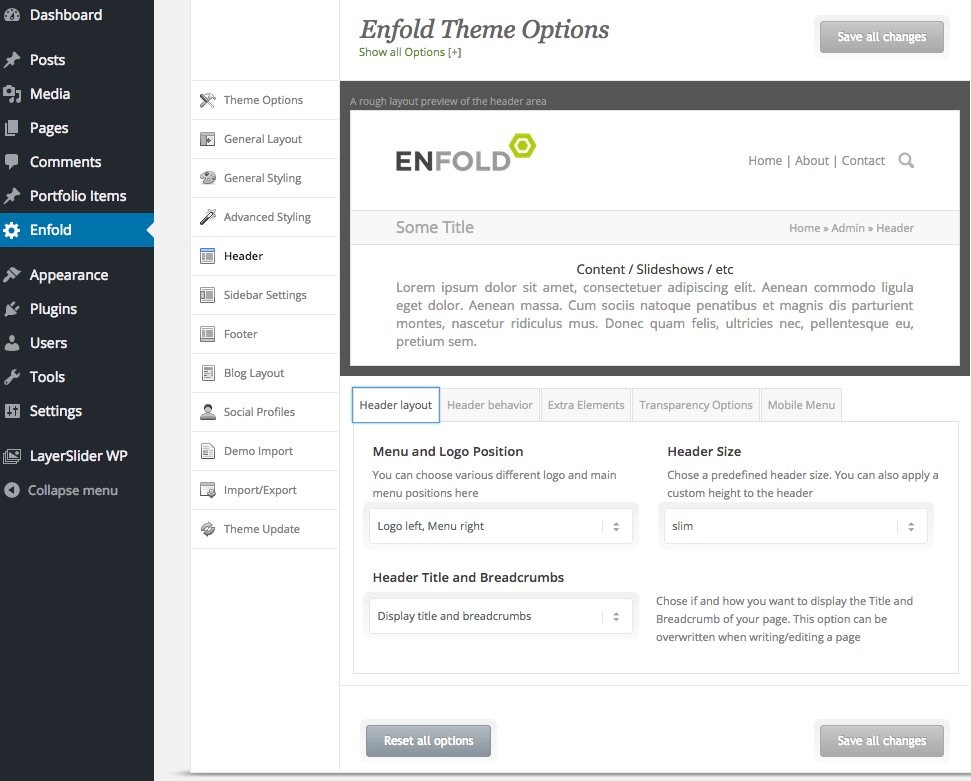
For a full walkthrough of the functionality on offer here, check out our Intro to the Header Configurator video.
Setting up Your Menus
Menus are a key component of both your header and other site elements such as the sidebar and footer.
You’ll see that some options for their positioning – and display on mobile – are available in the header configurator above.
In order to see what these options do, you’ll naturally need to actually create a menu. Do this by following the standard WordPress instructions.
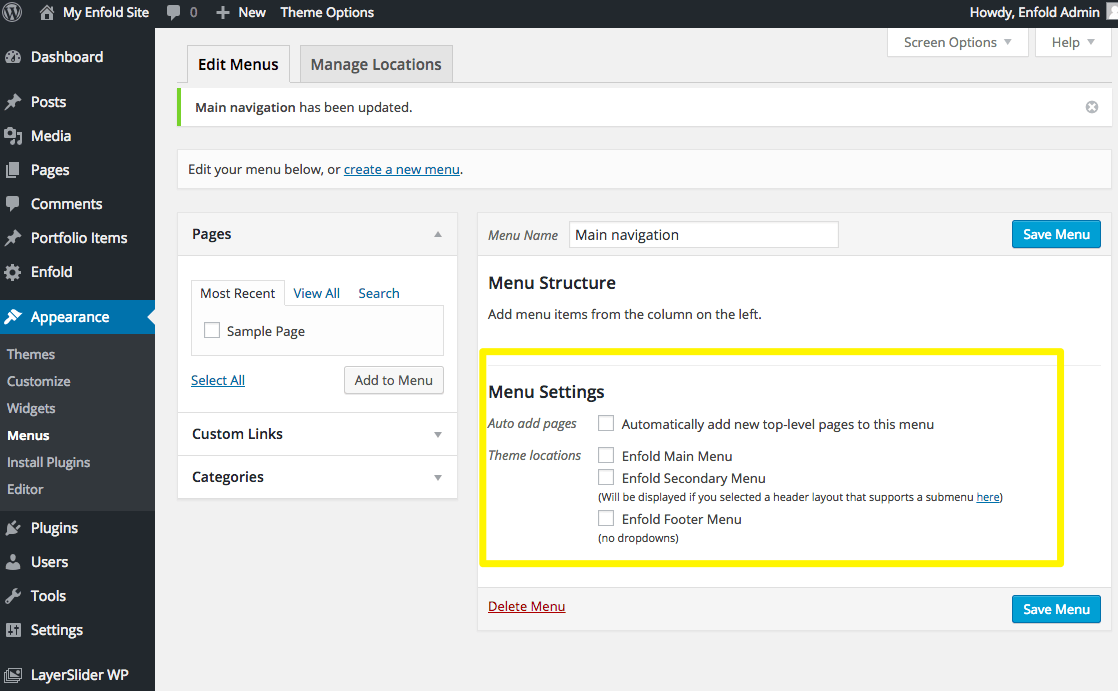
You’ll notice that you are able to add your menu to a number of Theme locations in the image above.
Further options for positioning are handled via a mixture of the General layout and Header screens.
If you want to tweak the menu’s actual look, begin with the general color settings in General styling and fine-tune via the menu elements themselves in Advanced styling.
You also have the option of creating a Mega Menu and we have an entire introductory video available explaining exactly how to configure that.
Setting up the Homepage and Blog
By now your site should be starting to look relatively ship-shape. The next step is setting up your homepage and blog.
These are controlled via the Theme Options and Blog Layout sections respectively.

We have a special page in the Enfold documentation to walk you through all the options available here.
Using the Template Builder
As you start adding your own content, it’s time to take advantage of one of Enfold’s most appealing features: its intuitive Layout Builder.
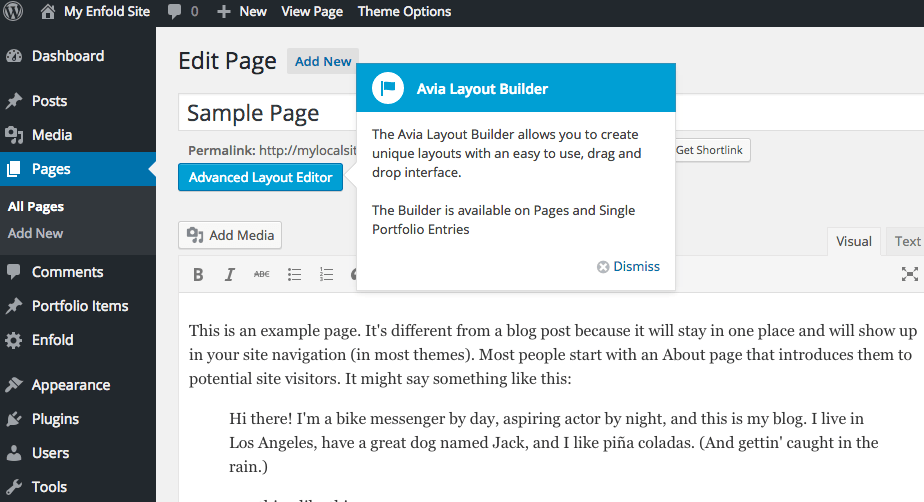
You’ll find it available on individual pages and portfolio entries. Check out our Intro to Portfolios and Intro to the Advanced Layout Editor videos for more details.
Using the Styling Options
With content in and organized, it’s time to pay some attention to matters of style. Use the General Styling tab to dial in the overall look and feel that you’re after.
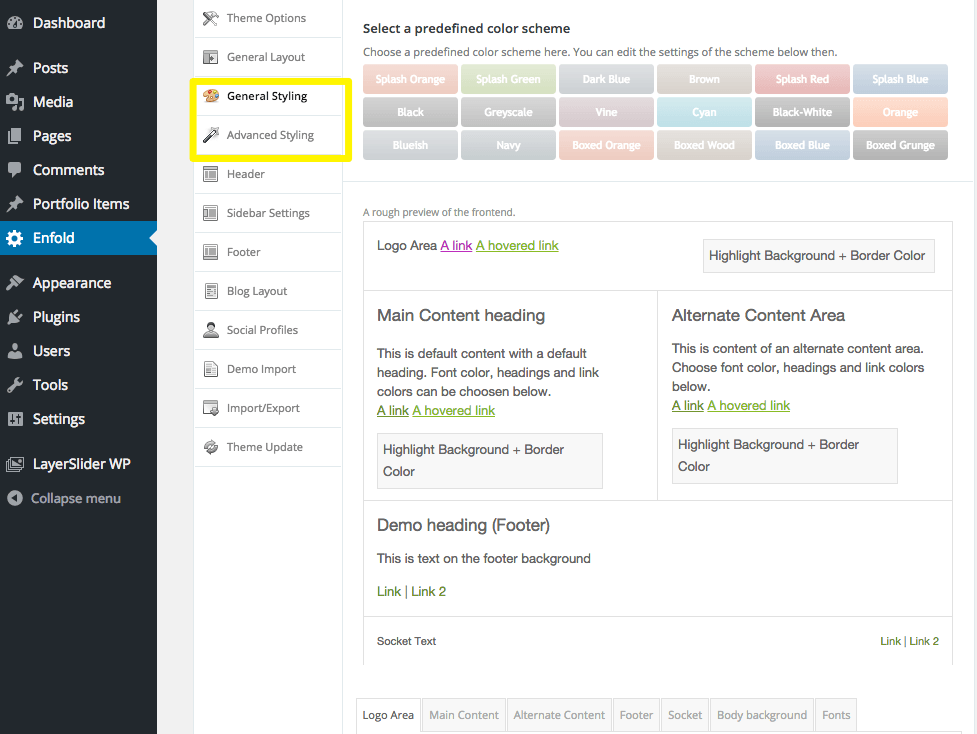
If you’re after more finely-grained control, take a look at the Advanced Styling tab. Our Intro to the Advanced Styling Options video will take you through the basics.
Add Images and Use Sliders
One of Enfold’s most attractive features is the range of sliders it supports. Upload images and use sliders to add some real pop to your site’s display on both desktop and mobile.
Check out our Intro to the Accordion Slider video for some ideas on how to get started or see sliders in action on our demo page.
Staying up to Speed
If you’ve made it this far, things should be starting to tick away nicely on your site. Now it’s a question of keeping things that way.
Here are some further resources to follow up in that department:
- Updating Enfold: Check out our video tutorial on how to keep up to date.
- Getting help online: Make our documentation center your first port of call.
- Taking your WordPress skills to the next level: Check WordPress’ own suggestions or go the extra mile and commit to a year long learning odyssey!
Conclusion
We hope the information above has given you a solid overview on setting up your Enfold-powered site from scratch.
Here’s a brief recap of the main items we covered in sequence:
- Getting Enfold installed
- Planning your site layout
- Setting up your header and menus
- Setting up the homepage and blog
- Styling and custom templates
- Adding sliders
- Staying up to speed with Enfold and WordPress generally
If you have an example of a site you’ve created with Enfold that you’re particularly proud of, feel free to bring it to our attention in the comments below. We’re always on the lookout for showcase sites!
And, if you’re experiencing any difficulties with getting started with Enfold, don’t forget to consult the documentation and take advantage of our ongoing support offer.
We’re always happy to lend a helping hand!


Thanks for the Post. Really a Good Guide for beginners
Kind Regards