Forum Replies Created
-
AuthorPosts
-
you can see here my trial. https://webers-testseite.de/slider-depending-on-screenwidth/
But i try to insert a debounce function now because the resize function is always firering during resize. Performance-friendly way to handle this is debouncing.See here a demo what is the difference – resize the window: https://www.paulirish.com/demo/resize
then you should remove the script: …
(function($){
        $('html.avia_mobile #fullscreen_slider_1').remove();
        $('html.avia_desktop #full_slider_1').remove();
})(jQuery);
we had to find a way now for your slider that it is only inserted before header on screenwidth dependency.From my point of view the other way would be easier to go. To make a full-screen slider look like a full-width slider.
Only the following problem is: Your pictures are not all in the same aspect ratio, that they do not have the same size (meant are the dimensions) is not relevant.If you were to use the 1500px x 630px aspect ratio, for example, you could specify the following with this aspect ratio:
630/1500 = 42% – if we now take the screenwidth as basis we had 42vw as heightSo make yourself a copy of your homepage which has only the fullscreen slider and shows it on all screen widths.
It would be nice if the images would have the same aspect ratio. So test the 1500px x 630px variant in the slider.
Then we convert the code only for this Page-id:
So e.g:@media only screen and (max-width:767px) { .page-id-xyz .avia-slideshow.av_fullscreen { width: 100vw !important; height: 42vw !important; } }on a 16:9 aspect ratio it is 54vw height
on 801:1200 = 67vw
etc.Doesn’t seem to have been in a hurry.
Übrigens
What do you mean by advanced css editor?
So from my experience I recommend you to keep the places where you save your code as uniform and simple as possible.
Inline Style – and nothing else is the Customizer – is only valid for the given page.
So if you come to the next content slider on another page, you have to set it again.
Enfold has the Quick CSS input field for this.
Furthermore I recommend the use of a child theme.
Has many advantages and only with very simple WordPress installations disadvantages.
It then allows you to customize the theme regarding functionality via the child theme functions.php.
Most of the small “snippets” you find on the board come in there.My question about your layout is intended because I suspect that you are not taking advantage of the Enfold ALB.
Your placed elements look different than the standard setup of a content slider, for example.
For example, did you select Theme Settings / Select Your Editor : Use WP Classic Editor in the Enfold settings?
The new Block Editor ( Gutenberg ) doesn’t work so well with the Advanced Layout Editor.Finally we want to use the drag&drop functionality of the Enfold Editor.
See here how it should work on smaller screens: https://webers-testseite.de/content-slider/
Sorry – tell me how you create the layout please?
Where did you insert the css code? ( i see a lot of inline styles etc.)before you changed the code – my solution above works to 100%.
I can validate this with developer tools on your website. Now everything is confused.i guess you had to start – reading a little from the beginning to work with enfold.
October 5, 2019 at 9:57 pm in reply to: Code for Adding Content Slider Arrows found in Enfold Documentation doesn't work #1145385you are running the 4.5.7.1 beta –
go and update to the 4.6.3.1i’m not shure but on that newest Enfold there is under Enfold Options Dialog on : Layoutbuilder 3 Options to set. ID, Classes and Heading styling. Mark them.
The you have on nearly all ALB Elements a Developer Tab – there you can insert the class :
now to a quick and dirty solution. You have the debug mode down your layout field?your first line of that element – there you can add the custom class:
[ av_content_slider heading='' columns='1' animation='slide' navigation='arrows' autoplay='false' interval='5' font_color='' color='' av_uid='av-3sky8y' custom_class='av-contentslider-style-2']may i ask you how you set up those Styling elements? You are in the Advanced Layout Builder Editing Moder – aren’t you?
because on the content-slider your approach was unusual there, too.It’s no big deal, but you’re making life unnecessarily difficult for yourself.
I once developed a responsive solution using a Flex-Box model for the thab section:Try this and see whats happening on small screens:
@media screen and (max-width:989px) {
  .js_active .av-tab-section-tab-title-container {
    display:flex !important;
    flex-flow: row wrap;
    justify-content: space-between !important;
    align-items: baseline;
    width: 100vw !important;
    min-width: 0 !important;
    padding: 0;
    margin: 0;
    left: 0 !important;
  }

  #top .av-section-tab-title {
    padding: 0 !important ;
    flex: 0 1 auto;
    min-width: 130px
  }

  .av-outer-tab-title {
    display: inline-block !important;
  }

  .av-tab-section-image,
  .av-tab-arrow-container {
    background-position: center center;
    position: relative;
    top: 0;
    left: 50%;
    transform: translateX(-50%);
  }

  .av-tab-section-icon {
    display: block;
    text-align: center;
    position: relative;
    top: 20px;
    left: 50%;
    transform: translateX(-50%);
    padding-bottom: 40px;
  }

  .av-active-tab-title {
    background:  transparent !important;
  }

  #top .av-tab-arrow-container span {
    background-color: #fccd36;
  }
}
some settings have to be adjusted when using icons instead of titles etc. pp
October 5, 2019 at 7:04 pm in reply to: Code for Adding Content Slider Arrows found in Enfold Documentation doesn't work #1145340on your css ( by the way – why don’t you use the quick css input field ( i found the code in: wp-custom-css) )
– i can see the usage of custom-class in your css : av-contentslider-style-2 – but
in the DOM i can not find it.That custom-class had to be on that alb element : content-slider
By the way, the arrows are incorrectly defined in the documentation:
/* Arrow icon */
#top .av-contentslider-style-2 .avia-slideshow-arrows.avia-slideshow-controls a.next-slide:before{
content:'\e875';
}

/* Arrow icon */
#top .av-contentslider-style-2 .avia-slideshow-arrows.avia-slideshow-controls a.prev-slide:before{
content:'\e874';
}
that little backslash is missing – but you did it right in your code!
that depends on your logo. If it was possible to have it as svg – this would be very nice and the best solution for it.
See for example the pssibilities of a svg as logo on: https://webers-testseite.de/cynthia/so maybe a link to your site would be the best.
is there a link we can follow to see whats going on there.
On both links following your nick link i can see the fullscreen sliders ( awakenthecity and enterthestorylab) on different browsers!
But on both sites you got very old Enfold Versions: 3.3.2. and 3.8.4from these very old Enfold Versions my recommendation is to update not via the wordpress update routine.
Best would be the ftp way: https://kriesi.at/support/topic/some-hints-and-advice-to-update-enfold/#post-1056107
with this method you also always have the rollback option – and you can be sure that older components do not play into the update as well.-
This reply was modified 6 years, 6 months ago by
Guenni007.
October 5, 2019 at 9:26 am in reply to: #6 showing Above Footer and/or socket (4.6.3.1 ISSUE) #1145230So tell us if it was a bug. Maybe others have the problem too – or if there was a user bug? ;)
Are you familiar with using the debug mode?
You have to activate it via functions.php of your child theme// Debug Modus Enfold add_action('avia_builder_mode', "builder_set_debug"); function builder_set_debug(){ return "debug"; }after doing that – you can see under each alb generated page/post an extra field with the shortcodes Enfold uses:

– you see on top window the Elements in your layout – at the bottom you see the shortcodes.
after the closing of the slideshow there is the shortcode f.e. for a button row – maybe this is for you the right choose.
Now you can copy the whole code – f.e.[ av_buttonrow alignment='center' button_spacing='5' button_spacing_unit='px' av-desktop-hide='' av-medium-hide='' av-small-hide='' av-mini-hide='' av_uid=''] [ av_buttonrow_item label='Click me' icon='4'] [ av_buttonrow_item label='Call to Action' icon='5'] [ av_buttonrow_item label='Click me' icon='6'] [ /av_buttonrow]now open the slider and open that slide you like to have the buttons. goto Caption Tab.
insert into the Caption Text Field that copied shortcode:

if you don’t like the styling – go and change the auxiliary ( helping ) element.
After all – delete that additonal helping element.put this to your quick css:
.breadcrumb-title {
    font-weight: bold;
}
October 5, 2019 at 8:17 am in reply to: Portfolio Raster – Einzelansicht auf neuer Seite öffnen und Navigation #1145224please try the first code instead – i posted here – and on Enfold Child – Blog Layout – Single Post Navigation : an try Loop Post Navigation.
I tested it on a customer site – even if i inserted that code above the side navigation only stays in same “category” and the Sorting in Masonry the Portfolios works well.
https://webers-testseite.de/lepper/portfolio-alle/-
This reply was modified 6 years, 6 months ago by
October 5, 2019 at 8:03 am in reply to: Google Maps wird unter MacOS Safari nicht angezeigt #1145222ich glaube man kann dort einen Haken setzen – refresh page after cookie consent. Dann wird die Karte neu geladen
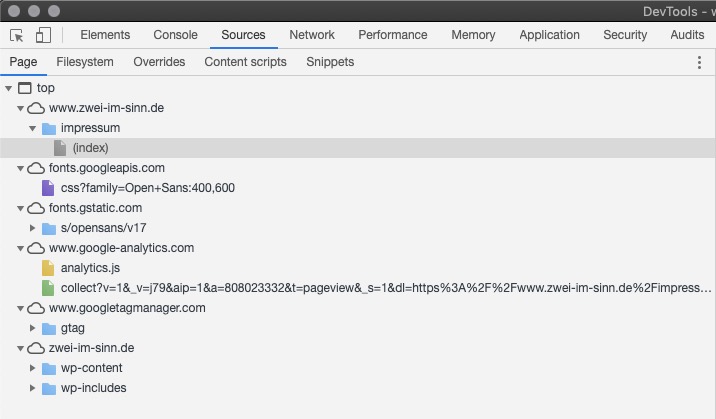
you can see the logo in the screenshot and that subheading. that’s obvious enough.
maybe for this page you take the fullscreen slider – have transparency header and show no footer nor socket.
And then take the slideshow to have no autorotation. the dots you have to choose the slides you can force to be elsewhere on your page. Maybe to have them on the right side. Like in your example above.
This here is only an experimental navigation for the slider but you see what i mean with your page.First of all – you have to choose on Main Menu – Burger/Mobile Menu – the “Fullpage Overlay” – to have the same style as that page.
The Landing Page you had to choose the transparency option on that page editing ( right side) – maybe a fullscreen Slider would be nice.
Let that Option Victoria shows in her image as Display as text / to have on all other pages the normal menu.
To have the burger directly showing only on homepage – This to your quick css:.responsive #top.home .av-main-nav .menu-item { display: none; } .responsive #top.home .av-main-nav .menu-item-avia-special { display: block; }that effect is nice – but not withour big changings to reach with Enfold
Guess your images are wrong numbered above:
issue#2:
put the rule with the header right border into media query:@media only screen and (min-width:768px) { #header { border-right: 20px solid white; } }issue’1 : … find:
#top .av_inherit_color a {
 text-decoration:underline
}
delete it – the hover rule is active on that without the rule
October 4, 2019 at 12:21 pm in reply to: Google Maps wird unter MacOS Safari nicht angezeigt #1144949ich habe das alles über ein sehr schönes Plugin gelöst. Borlabs Cookie.
Ist meiner Meinung nach wirklich DSGVO konform, weil es die Seite komplett blockiert, bis eine Entscheidung getroffen wurde.Ausserdem musste ich noch ein paar scripte schreiben, damit auch ein double Opt-In wirklich gewährleistet is.
Für mich hätte es genügt, mit den Enfold Optionen, aber es wäre für mich peinlich wenn ein Kunde einen Abmahnung erhält, nur weil ich nachlässig wurde:
Schau mal hier: https://webers-testseite.de/guenni/kontakt/Im Falle von Youtube kann man sogar die Vorschaubilder local speichern lassen. Ist auch nochmals ein sehr schönes Beispiel wie ernst die die Sache nehmen.
Es sollten schon inline svgs sein, da man so leicht an Füllfarben kommt – ja sogar Verläufe im SVG per css noch ändern kann.
Das muss wohl schon jemand angedacht haben: https://kriesi.at/documentation/enfold/svg-dividers/nein – das reine komplette <svg> </svg>
du kannst es hier im Einsatz sehen – allerdings noch wie unten beschrieben: https://webers-testseite.de/guenni/#runde
Unten der Trenner über dem FooterOctober 4, 2019 at 9:32 am in reply to: Google Maps wird unter MacOS Safari nicht angezeigt #1144921ja – in Safari sehe ich deine Karte auch nicht.
Firefox und Chrome zeigen Sie an.PS : du hast ja zwei der Erzfeinde einer DSGVO installiert – Das hier wird alles geladen ohne dass ich zustimme oder ablehne. :
Obwohl ich glaube, dass es nicht so heiß gegessen wird wie es gekocht wird, solltest du versuchen da mehr DSGVO Konformität einzubringen.PPS: schöne Grüße aus Bonn
no debug – just download – and replace ;)
Aha – something has been forgotten:
open textblock.php – in : function popup_elements()
before the tab_container closes there is a close_div missing
so find of that function this:
array(
		"type" 	=> "close_tab_container", //close tab container
		'nodescription' => true
	),
there has to be just before a closing div:
array(
		"type" 	=> "close_div",
		'nodescription' => true
	),
all tabs had to be closed propper.
here is a corrected textblock.php to download: pastebinthis must have something to do with the new toggle of screenoptions. Previously (4.6.2) it wasn’t like that, but like all elements without toggle containers.
Till it was fixed i copied the 4.6.2 textblock.php to my child-themeOctober 3, 2019 at 10:30 pm in reply to: Google Maps wird unter MacOS Safari nicht angezeigt #1144643Muss an deiner Konfiguration liegen. MacOS Mojave : Version 13.0.1 (14608.2.11.1.11) –
bei mir werden die Karten angezeigt ( neuestes WP – Enfold 4.6.3.1)was heißt wird nicht angezeigt – garnichts?
eventuell mal einen Link?
Danke -
This reply was modified 6 years, 6 months ago by
-
AuthorPosts