Forum Replies Created
-
AuthorPosts
-
https://www.w3schools.com/css/css_rwd_mediaqueries.asp
max-width: 1280px means<= 1280px( the 1280px is in the rule)
min-width: 1280px means> 1280px(1280px is out of that rule)so this should be ok !!! but if you want to be sure leave a 1px distance between.
@media only screen and (max-width: 1400px) { .page-id-1602 #av_section_1 { display: none !important; } } .page-id-1602 #av_section_2 { display: none; } @media screen and (min-width: 1281px) and (max-width: 1400px) { .page-id-1602 #av_section_2 { display: block !important; } } .page-id-1602 #av_section_3 { display: none; } @media screen and (min-width: 900px) and (max-width: 1280px) { .page-id-1602 #av_section_3 { display: block !important; } }you know how to?
Because this script is also responsible for the amount of shrinkage, I wrote a tutorial here.https://kriesi.at/support/topic/shrinking-of-header-amount-an-info/#post-1044887
so again my question : does your devices show my website as it should?
Does the header shrink on my website with your devices?
My test with the same Chrome Version as you ( and btw: now it is Version 72.0.3626.81) and with newest Safari and with my ipad shows my page as it should.
It shows the normal Navigation Menu and is shrinking on that case and with all browsers and devices.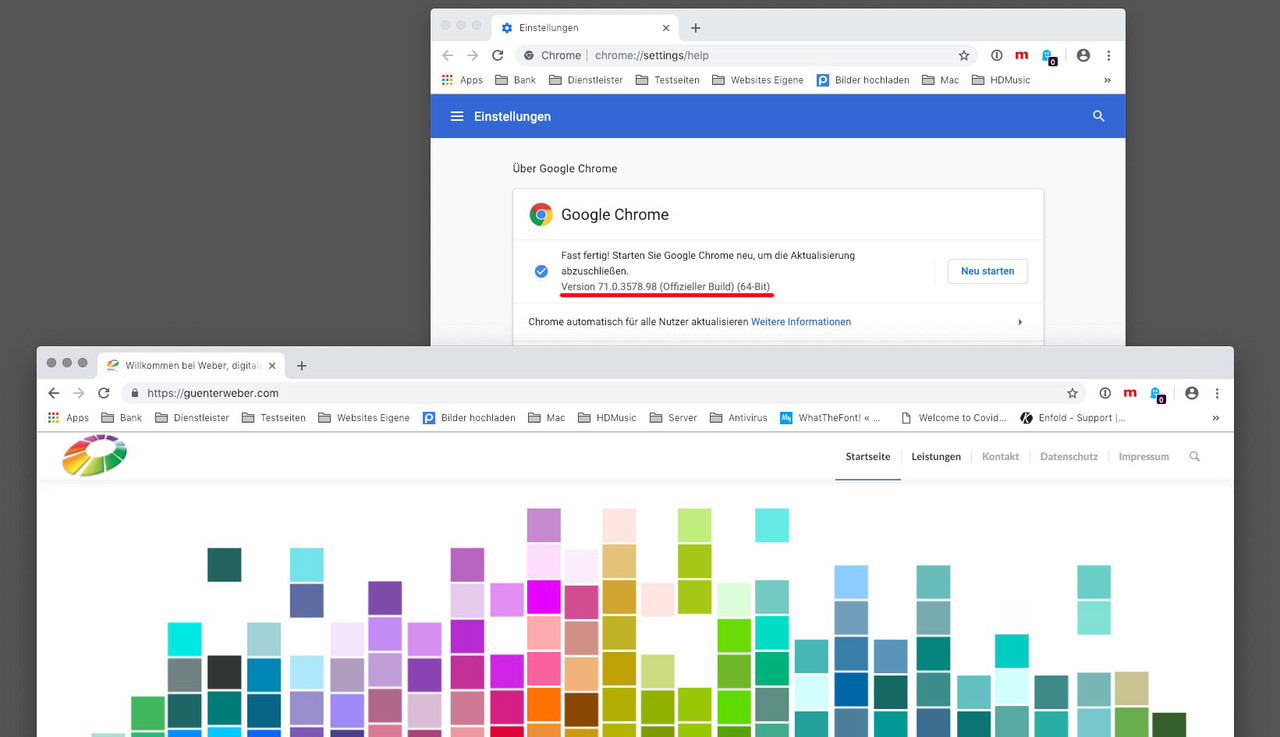
The code is in :
enfold/js/avia-snippet-sticky-header.js
on line 62 there is: if(shrinking && !isMobile) change it to: if(shrinking)The original code states that the shrinking is only performed if the shrinking has been selected in the options and it is not a mobile device.
In that function : function avia_header_size() from line 39 on there will be your classes header-scrolled and header-scrolled-full. It only happens to mobile devices if you get rid of that !isMobile condition.if this will solve your problem – we can go the next step to make it update independent with a child-theme file and a code to load the alternative file.
Do not forget to refresh merged files in Enfold and to clean all cachings on Safari and ChromeJanuary 30, 2019 at 9:23 am in reply to: codeblock javascript issue > missing header, messed up anchor links #1060388ok – maybe you set the height of the iframe to 560px – then on most of the screen width you won’t have the need to scroll inside the iframe if a new window in the iframe is opend ( klick on one link inside – kickboksen meit rens f.e.)
so post a link to your site , if it had to be not public just post the link in private content. Then you have to wait for a mod.
Without a link it is hard to reproduce the things you described and to understand the problem as well.but the thing you described above it the behavior on a shrinking header. On ipad the screen width is 1024px or more on landscape view.
So the normal navigation is shown.
And you like to have that shrinking behavior as well on ipad. What about my page here: does it shrink the header: https://guenterweber.com/ on your ipad?if you like to have the hamburger on screens that have less 1024px and not 990px:
try this to quick css:
@media only screen and (max-width: 1024px) { nav.main_menu { display: block !important; } #avia-menu .menu-item { display: none; } .av-burger-menu-main.menu-item-avia-special { display: block; } }Na – anhand des Screenshots kann ich ja wohl auch deutsch schreiben.
Ich versuche halt mit einem livelink mittels developer tools und dem Screenverhalten zu sehen was man da machen kann. Das geht mit einem Screenshot leider nicht.
Gemeint ist da unten, bei weitere Produkte. Die Titles brechen doch aber um bei kleineren Screenweiten oder?January 30, 2019 at 6:43 am in reply to: codeblock javascript issue > missing header, messed up anchor links #1060342yes now I see what you mean, after pressing the navigation points several times one scrolls here and there or no scrolling is triggered anymore.
but i do not see the need for a code in that page. Try to put your link in a text block with an iframe (paste it to text mode better)
<iframe src="https://app.paynplan.nl/agenda-embedded.html?embedded=1&idc=2754&mode=listView" width="100%" height="500px" frameborder="0" allowfullscreen="allowfullscreen"></iframe>i did that here on a test page – and it works without code on that page: https://webers-testseite.de/code-in-iframe/
it is just blocked through my Cookie Consent Plugin.But a subscription is not nedded for the theme. This is a lifetime license. Only the support is limited to a certain time. Personally I haven’t experienced that yet, however, that after the expiration of the time one is deleted here from the board – or no more write permissions would have.
There has only been some confusion since the introduction of the Gutenberg editor in WordPress 5.x, which I personally completely block for Enfold. Meanwhile Enfold also offers this option to use the Classic Editor as default.
The Advanced Layout Builder (called ALB for short) is exactly the ingenious thing about this theme – and in principle a unique selling point. I don’t know of any WP theme that is as intuitive to use as this enfold. I have also been very busy with Divi, but find it by far not as pleasant to use as Enfold.
Maybe you should give it a chance, because the learning curve is very steep.January 29, 2019 at 4:32 pm in reply to: codeblock javascript issue > missing header, messed up anchor links #1060074aha – and what should the code do for you – what do you expect the code would do?
The code was this:var iFrameID = 'BM_Frame_' + new Date().valueOf(); var output = ''; output += '<style>'; output += 'html,body {padding:0; margin:0; height:100%;}'; output += '.BM_AppContainer iframe {'; output += 'width:100%; height:100%;'; output += 'position:relative;'; output += 'height:600px;'; output+= ' border:0;}'; output+= '</style>'; var frame = '<div class="BM_AppContainer"><iframe id="' + iFrameID + '" src="https://app.paynplan.nl/agenda-embedded.html?embedded=1&idc=2754&mode=listView"></iframe></div>'; document.write(output); document.write(frame);but i don’t think that this will work with codeblock element
Sorry – but i’m Participant as you – so if the link has to be kept private, you can only wait for a moderator.
A lifelink would be the best for any advice to give.
You got a shrinking header and wants that the header shrinks on ipad too?
that is in enfold/js/avia-snippet-sticky-header.js
on line 62 there is:
if(shrinking && !isMobile)
change it to:if(shrinking)if you have a child-theme it would be best derigester it on parent theme and load that script via child-theme
January 29, 2019 at 12:41 pm in reply to: How can change yellow into blue on the Construction Demo theme? #1059969By the way: the use of a child theme is highly recommended, and the Realistation is not a witchcraft.
this is a nice method to have “nested Columns” ;)
make a 2/3 and a 1/3 grid ( via set cell size)
pull in the 2/3 grid a 1/1 container and in the 1/3 grid 2 1/1 containers:
click on it to enlarge the image:

if you have to have that grid not fullsize – give the grid-row a custom class: on my test page it is: grid-notfull
put this into functions.php of your child-theme:function grid_layout_notfull(){ ?> <script> (function($){ $('.av-layout-grid-container.grid-notfull' ).wrap( '<div class="main_color notfullsize"></div>'); $('.notfullsize').css({"clear": "both", "width": "100%" , "float": "left" , "position": "static" , "min-height": "100px" }); $('.grid-notfull').css({"max-width": "1310px", "margin": "0 auto" , "padding": "0 50px"}); })(jQuery); </script> <?php } add_action('wp_footer', 'grid_layout_notfull');you have to adjust it then to your needs ( above are the default settings with 1310px width and 50px left/right padding )
see : https://webers-testseite.de/33916-2/January 29, 2019 at 11:27 am in reply to: How can change yellow into blue on the Construction Demo theme? #1059942so if it is based on blue-yellow and change it to your needs:
add_filter('avf_skin_options', 'my_custom_added_style_function');
function my_custom_added_style_function($styles = "") {

  $styles["Peeters Style"] = array(
            'style'=>'background-color:#2c353d;',
            'default_font' => 'Helvetica-Neue,Helvetica-websave',
            'google_webfont' => 'Metrophobic',
            'color_scheme'  =>'Peeters Style',

            // header
            'colorset-header_color-bg'        =>'#ffffff',
            'colorset-header_color-bg2'       =>'#f8f8f8',
            'colorset-header_color-primary'     =>'#efbb20',
            'colorset-header_color-secondary'   =>'#444444',
            'colorset-header_color-color'     =>'#333333',
            'colorset-header_color-border'      =>'#e1e1e1',
            'colorset-header_color-img'       =>'',
            'colorset-header_color-customimage'   =>'',
            'colorset-header_color-pos'       => 'center center',
            'colorset-header_color-repeat'      => 'repeat',
            'colorset-header_color-attach'      => 'scroll',
            'colorset-header_color-heading'     => '#000000',
            'colorset-header_color-meta'      => '#808080',

            // main
            'colorset-main_color-bg'        =>'#ffffff',
            'colorset-main_color-bg2'       =>'#f8f8f8',
            'colorset-main_color-primary'     =>'#efbb20',
            'colorset-main_color-secondary'     =>'#db9d00',
            'colorset-main_color-color'       =>'#9c9c9c',
            'colorset-main_color-border'      =>'#e1e1e1',
            'colorset-main_color-img'       =>'',
            'colorset-main_color-customimage'   =>'',
            'colorset-main_color-pos'         => 'center center',
            'colorset-main_color-repeat'      => 'repeat',
            'colorset-main_color-attach'      => 'scroll',
            'colorset-main_color-heading'       => '#2c353d',
            'colorset-main_color-meta'        => '#919191',

            // alternate
            'colorset-alternate_color-bg'     =>'#2c353d',
            'colorset-alternate_color-bg2'      =>'#454e57',
            'colorset-alternate_color-primary'    =>'#ffffff',
            'colorset-alternate_color-secondary'  =>'#efbb20',
            'colorset-alternate_color-color'    =>'#ffffff',
            'colorset-alternate_color-border'   =>'#5b646b',
            'colorset-alternate_color-img'      => "",
            'colorset-alternate_color-customimage'  =>'',
            'colorset-alternate_color-pos'      => 'top center',
            'colorset-alternate_color-repeat'     => 'repeat',
            'colorset-alternate_color-attach'     => 'scroll',
            'colorset-alternate_color-heading'    => '#ffffff',
            'colorset-alternate_color-meta'     => '#e1e1e1',

            // Footer
            'colorset-footer_color-bg'      =>'#2c353d',
            'colorset-footer_color-bg2'     =>'#454e57',
            'colorset-footer_color-primary'   =>'#ffffff',
            'colorset-footer_color-secondary' =>'#efbb20',
            'colorset-footer_color-color'   =>'#ffffff',
            'colorset-footer_color-border'    =>'#5b646b',
            'colorset-footer_color-img'     => "",
            'colorset-footer_color-customimage' =>'',
            'colorset-footer_color-pos'     => 'top center',
            'colorset-footer_color-repeat'    => 'repeat',
            'colorset-footer_color-attach'    => 'scroll',
            'colorset-footer_color-heading'   => '#ffffff',
            'colorset-footer_color-meta'    => '#e1e1e1',

            // Socket
            'colorset-socket_color-bg'      =>'#5b646b',
            'colorset-socket_color-bg2'     =>'#454e57',
            'colorset-socket_color-primary'   =>'#ffffff',
            'colorset-socket_color-secondary' =>'#efbb20',
            'colorset-socket_color-color'   =>'#ffffff',
            'colorset-socket_color-border'    =>'#5b646b',
            'colorset-socket_color-img'     => "",
            'colorset-socket_color-customimage' =>'',
            'colorset-socket_color-pos'     => 'top center',
            'colorset-socket_color-repeat'    => 'repeat',
            'colorset-socket_color-attach'    => 'scroll',
            'colorset-socket_color-heading'   => '#ffffff',
            'colorset-socket_color-meta'    => '#e1e1e1',

            //body bg
            'color-body_style'            =>'stretched',
            'color-body_color'            =>'#ffffff',
            'color-body_attach'           =>'scroll',
            'color-body_repeat'           =>'repeat',
            'color-body_pos'              =>'top left',
            'color-body_img'              =>'',
            'color-body_customimage'        =>'',
  );

  return $styles;
}
January 29, 2019 at 11:06 am in reply to: How can change yellow into blue on the Construction Demo theme? #1059937by the way – you can have your own style. You find those definitions of the buttons above on : register-backend-styles.php
to have your own style there put this ( as an example ) in your child-theme functions.php:next post please

there you can replace all : #efbb20 to the hex code you need ( but think of enough contrast to the background)
and by the way – from your link above – till now avia.js was splitted in different files.
The setting now can be find in : avia-snippet-lightbox.js line 20
so a different method could be to have a child-theme avia-snippet-lightbox.js file and load this
but this will be a bit harder to make – because the script was conditionally loaded on functions.php of enfold.don’t know how to deregister that conditionally and register conditionally via a child theme
but i think what you mean is not the scrollbar in the lightbox but that background of lightbox is scrollable:
(sometimes the content of the lightbox isnt an image but maybe a website or a lot of text – this should stay scrollable)try this in functions.php of your child-theme:
add_action('wp_footer', 'custom_lightbox_script');
function custom_lightbox_script(){
?>
<script type="text/javascript">
(function($) {
    function a() {
      $('body').on('click', '.lightbox-added', function() {
        if($('.mfp-bg').length >= 1) {
          $('html').css("overflow-y", "hidden");
        }
      });

      $('body').on('click', function() {
        setTimeout( function() {
          if($('.mfp-bg').length == 0) {
            $('html').css("overflow-y", "scroll");
          }
        },500);
      });
    }
  a();
})(jQuery);
</script>
<?php
}
January 29, 2019 at 8:26 am in reply to: Add a line break in Element Label on the Contact Form #1059907you can use tags inside a input filed of that form alb:
(if you use span it will have a different font-size)<i>First Line</i><i>Second Line</i>#top label i { display: block; }so try the code in quick css and put in your field:
<i>Message (You can list the number of rooms / areas or rough sizes)</i><i>ex) 3 Bedrooms, 1 Living room(12‘x16’), 12 Stairs, 1 Hallway, 1 Rug</i>January 28, 2019 at 5:44 pm in reply to: How can change yellow into blue on the Construction Demo theme? #1059698What kind of predefined color scheme is used on that demo?
have a look to Dashboard – Enfold (Child) – General Styling
There are most of the color settings. Sometimes the demo stylinges have some “Advanced Styling”Dear Bubu – it would be very nice if approaches to solutions that lead to the goal would also be positively decided.
https://kriesi.at/support/topic/header-logo-gets-cropped-when-shrinking-on-sticky/but afaik has Enfold included the waypoints script – there is an existing sticky script to it. But i never worked with it.
maybe a mod knows how to use the waypoints script to have sticky elementsthe biggest problem is that position sticky is not well supported on ever browser:
https://caniuse.com/#search=stickyYou can reach it with Javascript. And on a quick and dirty function i got this. But it does not respect the resize function.
see result here: https://webers-testseite.de/scrolling/if this is no problem for you – i will tell you how to.
January 27, 2019 at 9:39 am in reply to: codeblock javascript issue > missing header, messed up anchor links #1059322And what code do you insert on that page?
(please use code tag here on the answer)And if you are interested to have the choice on each page/post – you can have a meta-box on every page/post where you can set it like template or breadcrumb etc.
by the way you can decide this via functions.php for only some pages with if-clauses:
if you choose header top on the enfold options – you can have sidebar navigation for frontpage only by:add_filter('avf_header_setting_filter','av_change_header_style'); function av_change_header_style($header){ if( is_front_page() ){ $header['header_position'] = "header_right header_sidebar"; } return $header; }Dashboard – Enfold (Child) – General Layout – Logo and Main Menu : choose now if left or right sidebar.
You can see here the demo overview: https://kriesi.at/themes/enfold-overview/
Scroll down to: Consulting DemoFirst you can decide to insert in the heading input field the word with a softhyphen !
<span style="color: #eaa11d;"><span style="color: #ffffff;">#FairShare­</span>Everywhere</span>
that­helps you to have a non visible breakpoint for your heading
And then you got the opportunity to go to that tab “screen options” there are some options for screenwidth for both the heading and the subheadline font size.
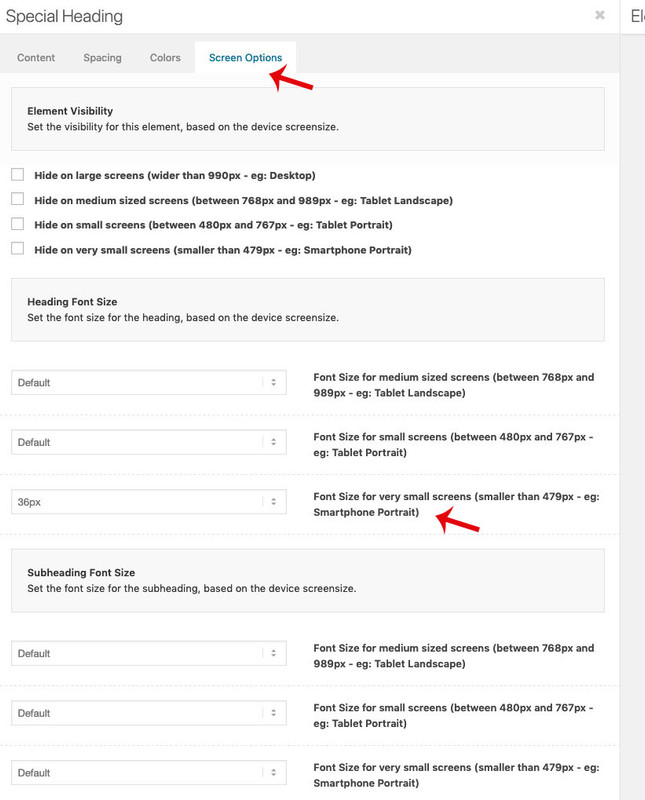
Result is here: https://webers-testseite.de/accordion/
-
This reply was modified 7 years, 3 months ago by
Guenni007.
-
This reply was modified 7 years, 3 months ago by
-
AuthorPosts