Forum Replies Created
-
AuthorPosts
-
June 8, 2018 at 7:08 am in reply to: Change of fonts changes designfor some elements in Enfold 4.4 #969970
Hi @Ismael,
yes, that can be a solution for the Meta but for me it isn’t one. I liked the old design and the design changed a lot after the last update.
Also, your solution doesn’t help with problem of the post element on the front page having another font size then before and the headline still being displayed above the image.Best Regards,
OlafMay 29, 2018 at 12:50 pm in reply to: Change of fonts changes designfor some elements in Enfold 4.4 #963634Hi Ismael,
thank you for this info. This solves at least the problem of the headline being aligned to the left.
The other problems like- The post element has still the wrong font size and the meta information is there
- The headline in a single post is still above the featured image and the meta information are not complete as the date and the author are displayed on the bottom, the categories are on the top
still persist.
In the end it would be great to have the option to decide where the meta elements are being displayed, which seperator should be used and font-size/color. Same goes for the front page element of displaying blog posts in a row as this is still messed up.
Best Regards,
OlafMay 25, 2018 at 8:27 pm in reply to: Change of fonts changes designfor some elements in Enfold 4.4 #962365Hi Vinay,
the problem persists, even after disabling all plugins.
I restored the old, working version to a staging site and reconfigured the FTP server so you have access to both sites, production and staging.
All credentials are the same as before, no change here.Best Regards,
OlafHi,
please try this:- Download the font you wan to use from google fonts
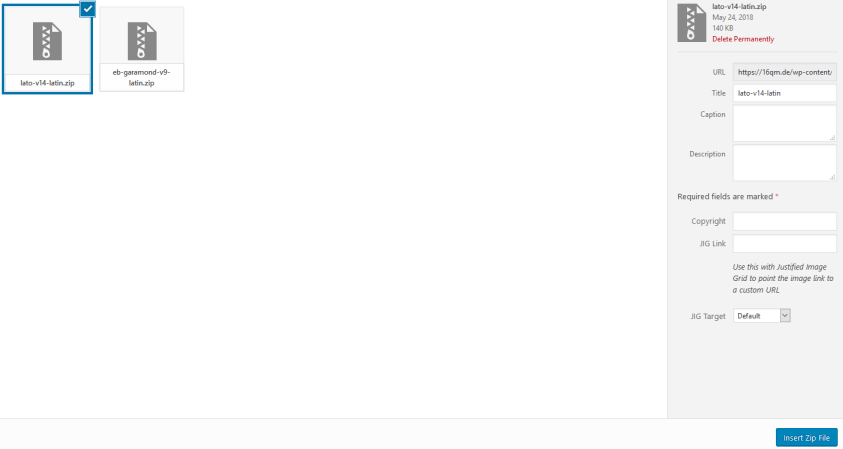
- Choose Upload/Select Font Zip File
- Upload the zip file
- After the upload you should be able to mark the file and click “Insert Zip file”

- If you don’t see the zip file after the upload to mark it, please close the upload/select window an open it again by clicking “Choose Upload/Select Font Zip File” again. It should be listed there.
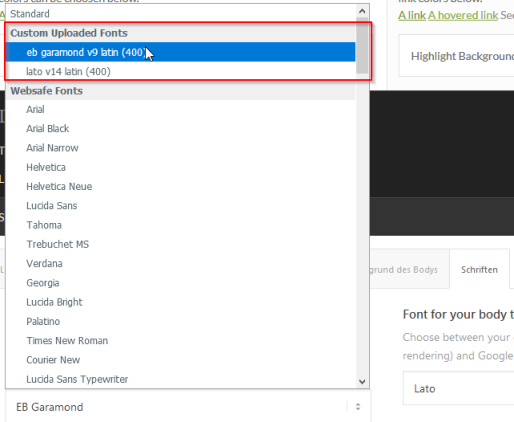
- Then you can choose the uploaded font like you would normaly within the General Styling -> Fonts

I hope this help.
Best Regards,
OlafMay 24, 2018 at 5:56 pm in reply to: Change of fonts changes designfor some elements in Enfold 4.4 #961749Hi Vinay,
problem is, that the appearance stays that way, even i choose to change the font back to the old value, i can’t get back to the design before the change.
I changed the font within the “General Styling” menu, provided by the theme.
The pages in questions are the front page of my site (1) and the every post (example at 2).
If you want to see how it looked before you can restore the site with the Backup (Updraft) from 24.5. named Before Them(e) Update. If you are not able to restore it because of company policies as it can potentially go wrong, i undestand this and do it for you :)Best Regards,
OlafMay 24, 2018 at 3:05 pm in reply to: GDPR + ENFOLD 4.4: how to disable Google Fonts at all? How to use own fonts? #961562Hi,
1. The font weight is the thickness of the font, 400 to 700, where 400 is normal and 700 is bold.
Here are two follow up links:
W3School – CSS font-weight Property
and
How To Set Weights And Styles With The @font-face Declaration (scroll a little bit down, to find the start if the article)2. I don’t really know what you mean with the second question, you set the font for the headlines and the content in the general styling menu, If you choose there your uploaded fonts then no connection to the google server is made. If you are using the google maps feature of enfold, you can use this Disable loading of roboto font of google maps
Best Regards,
OlafMay 24, 2018 at 10:49 am in reply to: GDPR + ENFOLD 4.4: how to disable Google Fonts at all? How to use own fonts? #961417Hi @Gitte,
- Download the font you wan to use from google fonts
- Choose Upload/Select Font Zip File
- Upload the zip file
- After the upload you should be able to mark the file and click “Insert Zip file”

- Then you can choose the uploaded font like you would normaly within the General Styling -> Fonts

I hope this help.
Best Regards,
Olaf-
This reply was modified 7 years, 9 months ago by
Shashahan.
Hi,
please have a look at the Import/Export feature. There you will find the “Custom font manager”
Best Regards,
OlafHi,
thank you @stephan_h for your answer but i am no good with css at all. I don’t even know where to begin :/
I decided to use the route with @font-face entries in custom.css and the function below as i am not planning to change the fonts often .It seems that a lot of the general styling is ignored when i use the function `add_action( ‘init’, ‘enfold_customization_switch_fonts’ );
function enfold_customization_switch_fonts() {
global $avia;
$avia->style->print_extra_output = false;
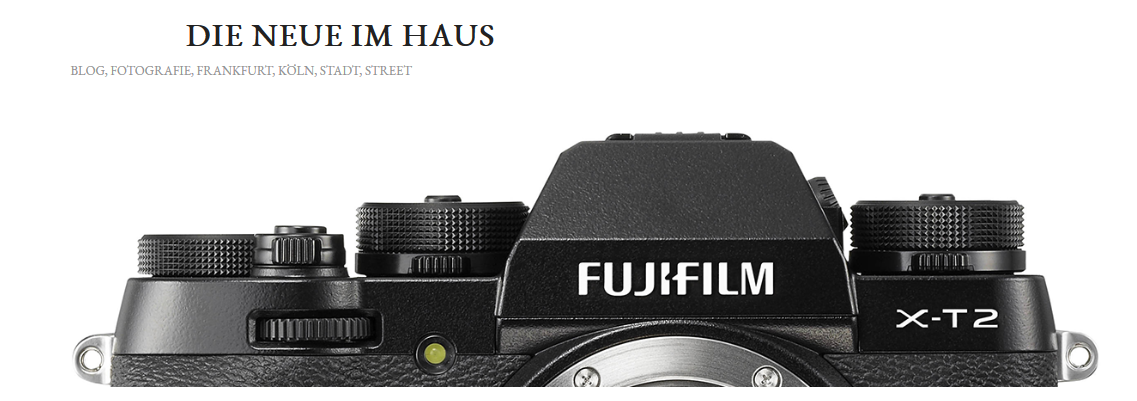
}`Before the change it looked like that:
Home:
Post:
After the change:
Home:
Post:
Is it planned to have an option to load fonts from local storage without disabling the design (font size and position) of the theme to be compliant with the GDPR (DSGVO)?
Best Regards,
OlafHi,
I followed the instructions here for the plugin and it worked so far really good. But there are two problems now:- The size of the font is not correct anymore for the header, it seems that the size setting is not used anymore
- The header of a is not centered anymore
Is this happening to other also?
Best Regards,
Olaf-
This reply was modified 7 years, 9 months ago by
Shashahan.
May 16, 2014 at 6:45 am in reply to: 2 Questions about "Single Blog Post with Preview Image" #265721Thank you very much, works like a charm.
Best Regards,
ShashahanMay 15, 2014 at 9:37 am in reply to: 2 Questions about "Single Blog Post with Preview Image" #265193This reply has been marked as private.*FACE->DESK* Sometimes … i could punch myself for my own stupidity.
You’re totally right, this works as intended. I tried it, changed avia.js back to the original state and deleted the entry in the quick.css section.
Thank you for your *WORKING* answer in the first post. ;)Thank you and have a nive day =)
OlafHi,
i found a way to make it work =)
It contains the editing of avia.js at line 61 where you have to change//activates the prettyphoto lightbox $(container).avia_activate_lightbox({callback:'avia_lightbox_callback'});to
//activates the prettyphoto lightbox
//$(container).avia_activate_lightbox({callback:'avia_lightbox_callback'});
and in the Quick CSS section of the theme i have the following CSS:
.image-overlay{ background-color: transparent; display: none !important; }Now it works. Maybe this help future customers of this great theme.
Thank you. =)Hi Devin,
thank you for your answer.
I’m sorry, it didn’t.Below, you will find the html source code. Justified Image Grid picked up the class “noLightbox” and put it in a-tag. And yet it has the overlay and will open in the standard lightbox behind foobox.
Short code used in WordPress:
[jig title_field=off caption_field=off caption=off mobile_caption=off outer link_title_field=off img_alt_field=off link_class=noLighbox ng_gallery=13]HTML:
<div class="jig-imageContainer">
	<div class="jig-overflow" style="width: 146px; height: 200px; opacity: 1;">
		<a class="jig-link noLighbox fbx-link jig-loaded" rel="gallery[1]" href="http://16qm.de/wp-content/gallery/portfolio/0001-10.jpg" style="position: relative; overflow: hidden; display: block;">
			<img src="http://16qm.de/wp-content/plugins/justified-image-grid/timthumb.php?src=http://16qm.de/wp-content/gallery/portfolio/0001-10.jpg&h=240&w=180&q=90&f=.jpg" width="150" height="200" style="width: 150px; height: 200px; margin-left: -2px; margin-top: 0px;" class="">
			<canvas width="150" height="200" title="" class="jig-pixastic" tabindex="-1" id="" style="width: 150px; height: 200px; margin-left: -2px; margin-top: 0px; display: block; opacity: 1;"></canvas>
			<div class="jig-overlay-wrapper" style="display: none;">
				<div class="jig-overlay"></div>
			</div>
			<div class="jig-border"></div>
			<span class="image-overlay overlay-type-image" style="left: -7px; top: 0px; overflow: hidden; display: block; height: 200px; width: 160px;">
				<span class="image-overlay-inside"></span>
			</span>
		</a>
	</div>
</div>
Best Regards,
Olaf-
This reply was modified 11 years, 9 months ago by
Shashahan.
-
AuthorPosts
