Viewing 30 results - 481 through 510 (of 106,437 total)
  • Author
    Search Results
  • #1492272

    Hey Tanja,

    Thank you for the inquiry.

    The font displays normally on our end when tested on mobile devices.

    Would you mind providing a screenshot of the issue? You can use platforms like Savvyify, ImgBB, PostImages or Dropbox to upload and share the screenshot.

    Best regards,
    Ismael

    #1492270

    I think the easiest way is to remove the fullwidth slider and do a color section with image and a second column with contact form etc.

    Would that be correct? If so, what’s the appropriate way to input the image, set as background?

    #1492236

    Hey condonp,

    Thank you for the inquiry.

    This is possible but it will require some custom html and some css modifications. You can start with the following code:

    <div class="av-custom-testimonial">
      <div class="av-testimonial-card">
        
        <div class="av-testimonial-left">
          <h3 class="av-testimonial-heading">What our clients say</h3>
          <div class="av-testimonial-stars"></div>
          <p class="av-testimonial-text">“Your testimonial text goes here.”</p>
          <div class="av-testimonial-client">Client Name</div>
          <div class="av-testimonial-client-meta">Client Title</div>
        </div>
    
        <div class="av-testimonial-right">
          <div class="av-image-wrap">
            <img src="image.jpg" alt="">
          </div>
        </div>
      </div>
    </div>


    Then add this code in the Quick CSS field:

    .av-custom-testimonial .av-testimonial-card {
      display: grid;
      grid-template-columns: 1fr 220px;
      gap: 24px;
      background: #fff;
      padding: 20px;
      border-radius: 16px;
      box-shadow: 0 6px 20px rgba(16, 24, 40, 0.08);
      max-width: 880px;
      align-items: stretch;
    }
    
    .av-custom-testimonial .av-testimonial-left {
      display: flex;
      flex-direction: column;
      justify-content: center;
      padding: 6px 0;
    }
    
    .av-custom-testimonial .av-testimonial-heading {
      font-size: 1.25rem;
      line-height: 1.1;
      font-weight: 700;
      color: #0f172a;
      margin: 0 0 10px 0;
      display: inline-block;
      width: 50%;
    }
    
    .av-custom-testimonial .av-testimonial-stars {
      display: inline-flex;
      gap: 6px;
      align-items: center;
      margin-bottom: 12px;
    }
    
    .av-custom-testimonial .av-testimonial-text {
      font-size: 0.98rem;
      color: #6b7280;
      margin-bottom: 14px;
    }
    
    .av-custom-testimonial .av-testimonial-client {
      font-weight: 600;
      font-size: 0.95rem;
      color: #08121a;
    }
    
    .av-custom-testimonial .av-testimonial-client-meta {
      font-size: 0.85rem;
      color: #6b7280;
      margin-top: 4px;
    }
    
    .av-custom-testimonial .av-testimonial-right {
      position: relative;
      min-height: 220px;
      overflow: visible;
    }
    
    .av-custom-testimonial .av-image-wrap {
      position: absolute;
      bottom: 0;
      right: 0;
      width: 160px;
      height: 280px;
      overflow: hidden;
      border-top-left-radius: 140px 72px;
      border-bottom-left-radius: 24px;
      border-bottom-right-radius: 12px;
      border-top-right-radius: 12px;
      background: #f3f4f6;
    }
    
    .av-custom-testimonial .av-image-wrap img {
      width: 100%;
      height: 100%;
      object-fit: cover;
      display: block;
    }
    
    @media (max-width: 760px) {
      .av-custom-testimonial .av-testimonial-card {
        grid-template-columns: 1fr;
      }
    
      .av-custom-testimonial .av-image-wrap {
        position: relative;
        width: 100%;
        height: 220px;
        border-top-left-radius: 48px 26px;
      }
    
      .av-custom-testimonial .av-testimonial-right {
        min-height: auto;
      }
    
      .av-custom-testimonial .av-testimonial-heading {
        width: 70%;
      }
    }
    

    Best regards,
    Ismael

    #1492233

    Hey viannay,

    Thank you for the inquiry.

    Would you mind providing a screenshot of the issue? You can use platforms like Savvyify, ImgBB, PostImages or Dropbox to upload and share the screenshot. Here are the steps to follow:

    1.) Visit the website of your chosen platform, such as Savvyify, ImgBB, PostImages or Dropbox.
    2.) Locate the option to upload a file or an image.
    3.) Select the screenshot file from your computer or device and upload it to the platform.
    4.) After the upload is complete, you will be provided with a shareable link or an embed code.
    5.) Copy the link or code and include it in your message or response to provide us with the screenshot.

    Thank you for taking the time to share the screenshot. It will help us better understand the issue you’re facing and provide appropriate assistance.

    Best regards,
    Ismael

    mistermagoo8691
    Participant

    My website is using the Roboto font. I have selected it in Theme Options\General Styling\Fonts:
    font settings.

    I want to use another font, “Josefin Sans” on the main special heading only of my homepage.
    Please note: they are both Google Webkit fonts.

    This below is the CSS I used. I followed the instructions I found in the documentation.. You can find this CSS section at the end of my style.css file.

    #top .titolo_homepage h1.av-special-heading-tag {
        font-family: 'Josefin Sans', sans-serif !important;
        letter-spacing: -2px;
    }
    
    #top .titolo_homepage .av-subheading p {
        font-family: 'Josefin Sans', sans-serif !important;
        letter-spacing: -2px;
        margin-top: -10px !important;
    }

    Please note: in “Performance,” I disabled CCS compression. I always clear the cache every time I test it, I am always using Incognito mode for my tests.

    ON DESKTOP:
    1) on desktop, when I open the page for the first time and haven’t yet accepted cookies, I see a normal sans serif font.
    on desktop before cookies

    After accepting cookies, if I refresh the page, I will finally see the font I chose, Josefin Sans (it is especially recognizable by its very large N).
    on desktop after cookies

    I should see it also before the cookies. In fact, if I select Josefin Sans in General Styling/Fonts/Headings, I see Josefin Sans also before cookies…

    ON MOBILE:
    1) Whatever browser I use (Chrome, Safari, Brave, Edge), I still see the default sans serif font, not Josefin sans. Both before and after cookies, both in normal mode and incognito mode.
    on mobile

    2) please note: on PC, If I activate the Chrome developer’s mode and switch to “mobile,” I do see Josefin Sans!
    on PC in Developers mode

    So weird…

    #1492210
    condonp
    Participant

    Dear Sirs,

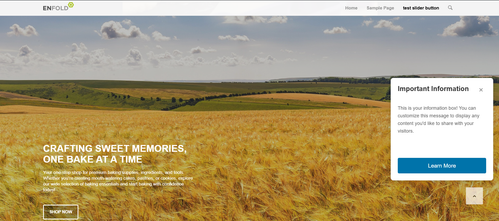
    I have created a content sllder with client reviews for this website see https://www.alwaystakecare.co.uk/content/ what my client want is to add the background image to give the following effect https://freeimage.host/i/fTpj0Zu I am unsure how to do this and also alter the width of text to fit the image. Can you help please.

    • This topic was modified 3 months, 3 weeks ago by condonp.
    • This topic was modified 3 months, 3 weeks ago by condonp.
    #1492163

    on your ngg page the content is limited to 1140px – enfold uses on that container a padding: 0 50px

    so try:

    .page-id-1562 #section-width .container {
      max-width: 1240px;
    }

    btw. enfold version looks better – because images are not cropped.

    #1492155

    Hi,

    Thank you for the update.

    The images in the masonry seem to be displaying in their original sizes now. Have you tried adjusting the width of the container so the images display the same as on the previous site?

    .page-id-1562 #section-width .container {
        max-width: 1350px;
    }
    

    Adjust the max-width value as necessary.

    Screenshot:

    Screenshot-2025-12-05-at-2-13-48-PM

    Best regards,
    Ismael

    #1492154

    Hi,

    Thank you for the update.

    We just tested the code again and it seems to be working as it should.

    Screenshot-2025-12-05-at-2-08-44-PM

    Have you tried removing this css code?

    #top #header.header-scrolled a {
        color: #ffffff !important;
    }
    

    Please provide a screenshot of the element that you’d like to change. You can use platforms like Savvyify, ImgBB, PostImages or Dropbox.

    Best regards,
    Ismael

    #1492144

    In reply to: Icon Title on Hover

    Are you using this solution?
    https://kriesi.at/support/topic/image-title-on-hover/#post-1490549

    because there the selector is for all elements with title attribute ( *[title] ) – so this will include icons

    #1492143

    Topic: Icon Title on Hover

    in forum Enfold
    sjahan
    Participant

    Hi, you helped me remove the image title on hover, but I also need to remove it from the icons. Can you help with that?

    Sample: https://imgur.com/a/PyEH0Ph
    Original ticket: https://kriesi.at/support/topic/image-title-on-hover/

    Hey ti2media,
    Try adding this snippet to your child theme functions.php:

    function add_sticky_info_box() {
        ?>
        <style>
            .sticky-info-box {
                position: fixed;
                bottom: 120px;
                right: 20px;
                width: 300px;
                height: 300px;
                background: #ffffff;
                border: 1px solid #ddd;
                border-radius: 8px;
                box-shadow: 0 4px 12px rgba(0,0,0,0.15);
                z-index: 9999;
                display: flex;
                flex-direction: column;
                padding: 20px;
                box-sizing: border-box;
                transition: opacity 0.3s ease;
            }
            
            .sticky-info-box.hidden {
                display: none;
            }
            
            .sticky-info-box-header {
                display: flex;
                justify-content: space-between;
                align-items: flex-start;
                margin-bottom: 15px;
            }
            
            .sticky-info-box-title {
                font-size: 20px;
                font-weight: bold;
                color: #333;
                margin: 0;
                flex: 1;
            }
            
            .sticky-info-box-close {
                background: none;
                border: none;
                font-size: 24px;
                color: #999;
                cursor: pointer;
                padding: 0;
                width: 30px;
                height: 30px;
                display: flex;
                align-items: center;
                justify-content: center;
                transition: color 0.2s ease;
            }
            
            .sticky-info-box-close:hover {
                color: #333;
            }
            
            .sticky-info-box-message {
                flex: 1;
                color: #666;
                font-size: 14px;
                line-height: 1.6;
                margin-bottom: 20px;
                overflow-y: auto;
            }
            
            .sticky-info-box-button {
                background: #0073aa;
                color: white;
                border: none;
                padding: 12px 24px;
                border-radius: 4px;
                font-size: 16px;
                cursor: pointer;
                text-decoration: none;
                display: inline-block;
                text-align: center;
                transition: background 0.2s ease;
            }
            
            .sticky-info-box-button:hover {
                background: #005a87;
            }
            
            .sticky-info-toggle {
                position: fixed;
                bottom: 120px;
                right: 50px;
                width: 50px;
                height: 50px;
                background: #0073aa;
                color: white;
                border: none;
                border-radius: 50%;
                font-size: 24px;
                cursor: pointer;
                box-shadow: 0 4px 12px rgba(0,0,0,0.15);
                z-index: 9998;
                display: none;
                align-items: center;
                justify-content: center;
                transition: background 0.2s ease;
            }
            
            .sticky-info-toggle:hover {
                background: #005a87;
            }
            
            .sticky-info-toggle.visible {
                display: flex;
            }
        </style>
        
        <div class="sticky-info-box" id="stickyInfoBox">
            <div class="sticky-info-box-header">
                <h3 class="sticky-info-box-title">Important Information</h3>
                <button class="sticky-info-box-close" id="closeInfoBox" aria-label="Close">×</button>
            </div>
            <div class="sticky-info-box-message">
                <p>This is your information box! You can customize this message to display any content you'd like to share with your visitors.</p>
            </div>
            <a href="/your-page-url" class="sticky-info-box-button">Learn More</a>
        </div>
        
        <button class="sticky-info-toggle" id="infoToggle" aria-label="Show information">ℹ</button>
        
        <script>
            (function() {
                var infoBox = document.getElementById('stickyInfoBox');
                var closeBtn = document.getElementById('closeInfoBox');
                var toggleBtn = document.getElementById('infoToggle');
                
                // Close the info box
                closeBtn.addEventListener('click', function() {
                    infoBox.classList.add('hidden');
                    toggleBtn.classList.add('visible');
                });
                
                // Show the info box again
                toggleBtn.addEventListener('click', function() {
                    infoBox.classList.remove('hidden');
                    toggleBtn.classList.remove('visible');
                });
            })();
        </script>
        <?php
    }
    add_action('wp_footer', 'add_sticky_info_box');
    

    Then adjust the title, message, buttone text & link to suit. You can also adjust the CSS to change colors, etc.
    It places the box & info button 120px from the bottom so they are above the scroll-top button, ratio than have them move if the scroll-top shows, which would not be so good.
    fIPHs99.md.png
    fIPJ6iv.md.png

    Best regards,
    Mike

    #1492116

    you have to pay attention – there is a
    masonry for posts on : Content Elements Tab
    masonry and gallery for images on : Media Elements

    on your example page there is the use of portfolios.

    #1492110

    Guenni007,

    Firstly many thanks for your patience and help this is much appreciated. The CSS in the gallery was a mistake I have now hopefully rectified this. I wanted to isolated the CSS to the page id (1397).

    Secondly the page https://peter-test1.co.uk/avertising-design/ this links from the gallery and uses masonry what I am trying to achieve is to have the gallery images as the same size as https://wayneandersonart.com/gallery/nggallery/advertising-design/advertising-design. As we are tring to copy this.

    Hope this is clear. Thanks once again and also a merry xmas to you

    Pete

    #1492108

    on your ngg gallery you are showing images !
    on your test page : https://peter-test1.co.uk/portfolio-item/test/
    you are trying to show portfolios? – why not showing images masonry or gallery instead? https://peter-test1.co.uk/gallery/
    And btw. why do you removed the css for the gallery ? You like to show now the full-width?

    #1492104
    #1492103

    Hi,

    Thank you for the update.

    In the Masonry edit panel, go to Styling > Masonry Settings, then locate the Image Size settings. Set this to the first option No Scaling to display the image at its original size. Please let us know the result.

    Best regards,
    Ismael

    #1492098

    Hey condonp,

    Thank you for the inquiry.

    You can use this css code to apply borders to the masonry images:

    .av-fixed-size .av-masonry-image-container, .av-fixed-size .av-masonry-outerimage-container {
        border: 1px solid #000000;
    }
    
    .av-fixed-size .av-masonry-image-container .av-masonry-image-container, .av-fixed-size .av-masonry-outerimage-container .av-masonry-image-container {
        border: 10px solid #ffffff;
    }

    Result:

    Screenshot-2025-12-04-at-2-30-15-PM

    Best regards,
    Ismael

    #1492090
    condonp
    Participant

    I am trying to alter the images dimension and size of the Masonry Gallery and add a small border as in https://wayneandersonart.com/gallery/nggallery/advertising-design/advertising-design. I have created a page at https://peter-test1.co.uk/test/ but don’t seem to be able to alter the image dimensions to copy this can you help please.

    Many thanks

    Pete

    #1492085

    I believe Enfold is stripping out background before publishing. I can not locate the background image when inspecting the live page.

    #1492082
    dnewkirk
    Participant

    I have adjusted the Background Attachment options, several different photos, both small and large. I have noticed sometimes when I turn off the arrow it works, but not often. I have cleared the cache several times.

    Please help.

    Thanks,
    Drake

    #1492081
    dnewkirk
    Participant

    I have adjusted the Background Attachment options, several different photos, both small and large. I have noticed sometimes when I turn off the arrow it works, but not often. I have cleared the cache several times.

    Please help.

    Thanks,
    Drake

    #1492074

    In reply to: Responsive Issue

    if the auto group setting on : avia-snippet-lightbox.js should not be hampered globally – you can give a custom-Class to a parent element or the element itself ( f.e. a img gallery or masonry or the color-section with your images) e.g: noGroup

    Then change the behaviour by child-theme functions.php snippet:

    function conditional_disable_lightbox_gallery() {
    ?>
    <script type="text/javascript">
    (function($) {
        $(function() {
            setTimeout(function() {
                $('.noGroup a.lightbox-added').each(function() {
                    var $link = $(this);
                    
                    $link.magnificPopup('destroy');
                    
                    $link.magnificPopup($.extend({}, $.avia_utilities.av_popup, {
                        gallery: { 
                            enabled: false,
                            navigateByImgClick: false
                        }
                    }));
                });
            }, 100);
        });
    })(jQuery);
    </script>
    <?php
    }
    add_action('wp_footer', 'conditional_disable_lightbox_gallery', 999);

    see: https://webers-testseite.de/image-masonry/

    • This reply was modified 4 months ago by Guenni007.
    #1492072
    condonp
    Participant

    Dear Sirs,
    I have disabled the arrows on the navigation of the lightbox using the suggested css but I notice when I click on the image it still scrolls across. Is there any way we can stop this so we disable the scroll when someone clicks on the image please.

    Many thanks

    Peter

    #1492069

    In reply to: Responsive Issue

    Ok many thanks, Just one other issue I want to disable the navigation on the lightbox, so have disabled the arrows using css but see that if you click onto image it still slides to next image. Can this be disabled as client only wants one image at a time to show .

    Thanks

    Pete

    #1492057
    ti2media
    Participant

    Dear Support Team,

    I created a website using Enfold and LayerSlider. The LayerSlider works quite ok on all browsers except Safari. Since the menu is designed to work on the background color of the Video the Video needs to start or show right away.

    Please check the site and tell me what to change in the settings / how to make it work in Safari. Also maybe there is a workaround using a backup image that is only show on safari before the video starts.

    The Video is already set as background in the slider and muted as described in some threads as workaround.

    Thanks for your help.

    #1492056

    In reply to: Responsive Issue

    the better way would be over flexbox layout then …

    you got before more than 12 columns inside that section with your images – that should be inside a section –
    then the next color-section contains your heading – a separator (f.e. in one 1/1 column) and your videos – maybe inside 1/3 columns
    see what happens if you place this to your quick css:

    #av_section_1 .container {
      max-width: 800px;
      margin: 0 auto !important;
    }
    
    #av_section_1 .entry-content-wrapper {
      display: flex;
      flex-flow: row wrap;
      justify-content: center;
      gap: 20px
    }
    
    #av_section_1 .entry-content-wrapper:before,
    #av_section_1 .entry-content-wrapper:after {
      display: none;
    }
    
    #av_section_1 .entry-content-wrapper .flex_column {
      flex: 0 1 30%;
      width: unset !important;
      margin: 0;
      padding-bottom: 20px;
    }
    
    @media only screen and (max-width: 599px) {
      #av_section_1 .entry-content-wrapper .flex_column {
        flex: 0 1 45%;
      }
    }
    
    @media only screen and (max-width: 359px) {
      #av_section_1 .entry-content-wrapper .flex_column {
        flex: 1 1 100%;
      }
    }
    

    you can now pull all your columns from your color-section: #section-width with your images to that first color section.

    #1492051

    In reply to: Responsive Issue

    Do you really want it to be that narrow on small screens?
    I would set the content differently to narrow. Therefore, remove:

    #section-width {
      max-width: 50%;
      left: 50%;
      position: relative;
      transform: translateX(-50%);
    }

    and set instead:

    #section-width .container {
      max-width: 750px;
    }

    And here’s the next layout tip.
    I would place different design elements in different color sections.
    So all gallery images in one section (#section-width) – including the single one that comes last – without empty columns – then the films below in a separate section.

    If you have done that – i will give you a flex-box code to style your gallery.

    #1492046

    Hey tristen1,

    Thank you for the inquiry.

    We didn’t find any script issues on the frontend when we checked the Query Monitor overview. Would you mind providing a screenshot of the issue? You can upload it using platforms like Savvyify, ImgBB, PostImages or Dropbox.

    This is what we get from Query Monitor:

    Screenshot-2025-12-03-at-2-48-28-PM

    Best regards,
    Ismael

    #1492042

    Hi,

    Thank you for the update.

    Try to add this css code to show the full image:

    #top .fullsize .template-blog .big-preview img {
        min-width: 300px;
        background-size: contain;
    }

    Screenshot-2025-12-03-at-2-21-01-PM

    Best regards,
    Ismael

Viewing 30 results - 481 through 510 (of 106,437 total)